How to include a personalized image in an email marketing campaign

GMass has many great options for mail merge personalization options, from simple mail-merge personalization to fallback values and even automatic first name detection. But did you know you can also include a personalized image for each recipient of your email marketing campaign?
The best practice for including a personalized image is to include an “img” tag in a column in your Google Docs spreadsheet. Let’s walk through an example of how to do that.
Example: Different Zodiac Signs
After using GMass to connect to your spreadsheet, the Compose window launches. In our fictional example, the Star Sign promotional email looks like this:
Note the presence of the text “{ImageLink}” in the center of the email. That is how GMass will know to replace that with the image indicated in the spreadsheet.
When your email is sent, each recipient will get the same text, but a unique image. For example, the recipient Brandon, who is an Aries, will receive the following email:

Ron, who is a Leo, will get the same text, but an entirely different personalized image:
Finally, Jack, who is a Capricorn, will receive yet a different image:
Other Use Cases
You can personalize emails using any images you want, of course, but just to give a sense for how this GMass feature could be used, here are some example cases:
- Put a player’s name on the sports jersey or hat you are selling them.
- Include a photo of the person taken as part of his or her interaction with your business. For example, at a tourist site in which souvenir photos are taken.
- Include a different theme image depending on whether the recipient is male or a female, older or younger, from a particular country, or of some other demographic grouping that you could respectfully represent with an image.
- Provide a photo of the branch of your business that is local to the recipient.
- Show photos of specific products or services that each particular client is likely to be interested in based on customer data you already have.
Using Google Drive images
Google Drive is a great place to store images for your GMass campaigns. But… it takes a few steps. One, giving GMass permission to access Google Drive. Two, making sure your images have proper sharing permissions. And three, getting the actual image URLs (not the URLs to the images’ Google Drive page).
Click this link to give GMass permission to access your Google Drive images. We don’t ask for this permission by default; only in situations like this when we need it.
Now upload your images to Google Drive. Then select your images and give everyone with the link permission to view.
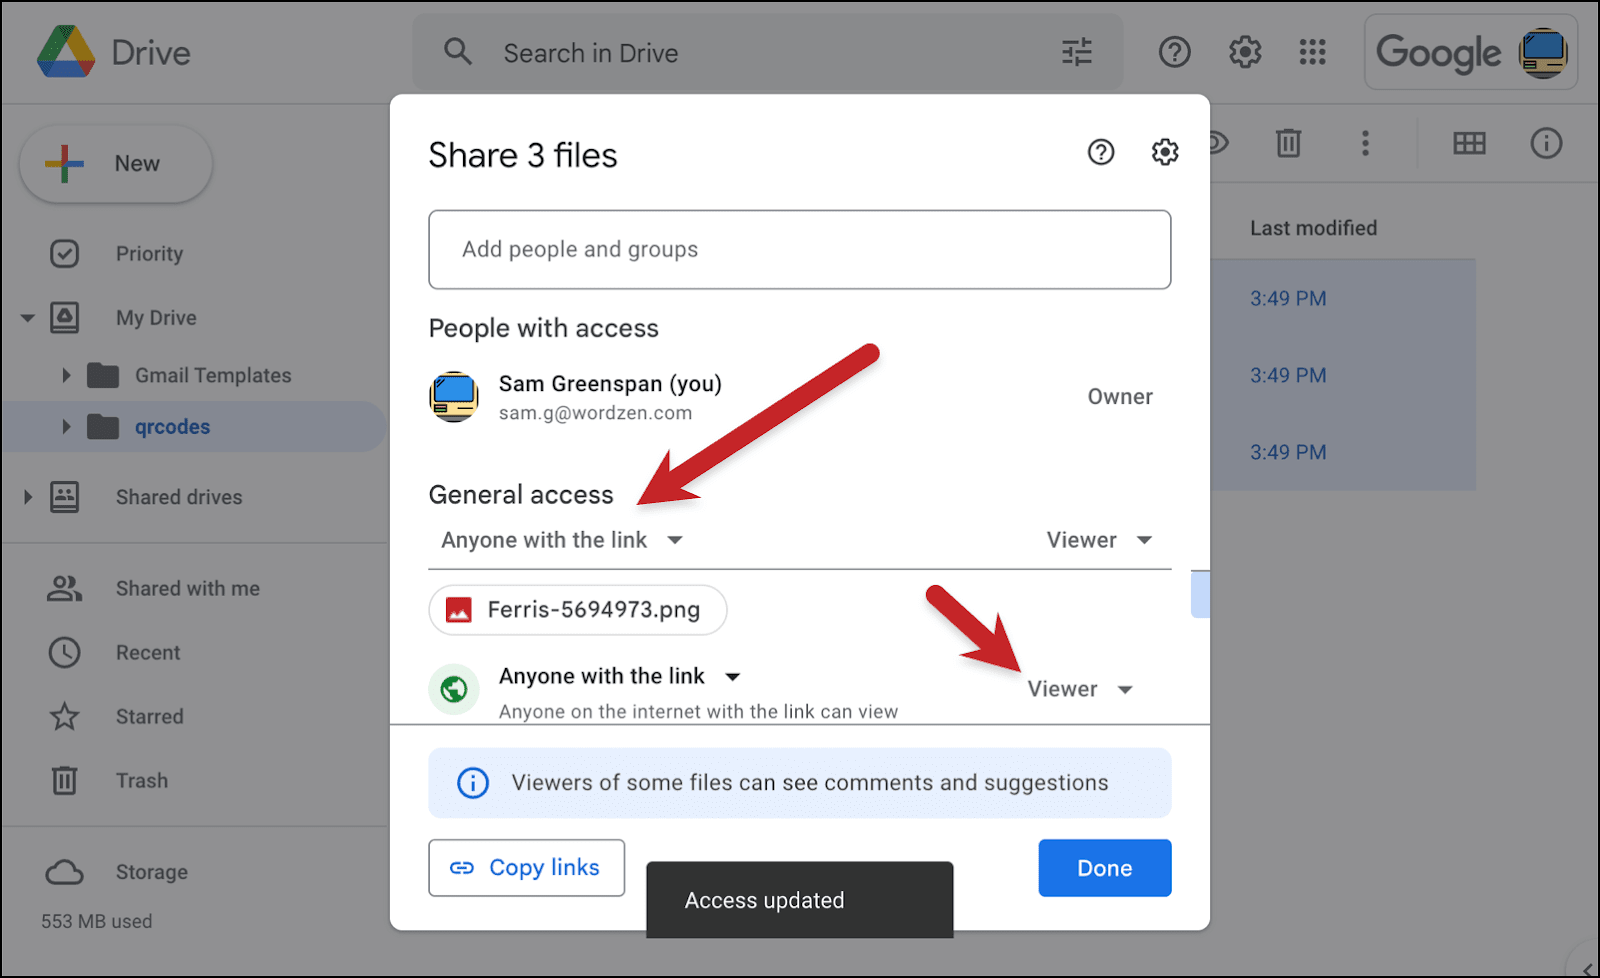
Now hit that Copy links button at the bottom of the popup.
Follow these steps to turn Google Drive’s string of URLs into actual images you can use.
- Open a new Google Sheet
- Click into cell A1 and hit paste.
- In cell A2, enter this formula:
=SPLIT(A1,", "). Don’t forget the space after the comma that’s inside the quotes. - Select everything in the second row. Click Copy.
- In cell A3, click Edit > Paste special > Values only.
- Select everything in the third row. Click Copy.
- In cell A4, click Edit > Paste special > Transposed.
![]()
Now we have every Google Drive image URL on its own line.
Delete rows 1, 2, and 3. That will leave you with just the URLs as they’re supposed to be for mail merge. That’s because Google didn’t give you direct links to the images — the links are to Google Drive pages featuring those images. And to mail merge the images, we need to grab the image links themselves.
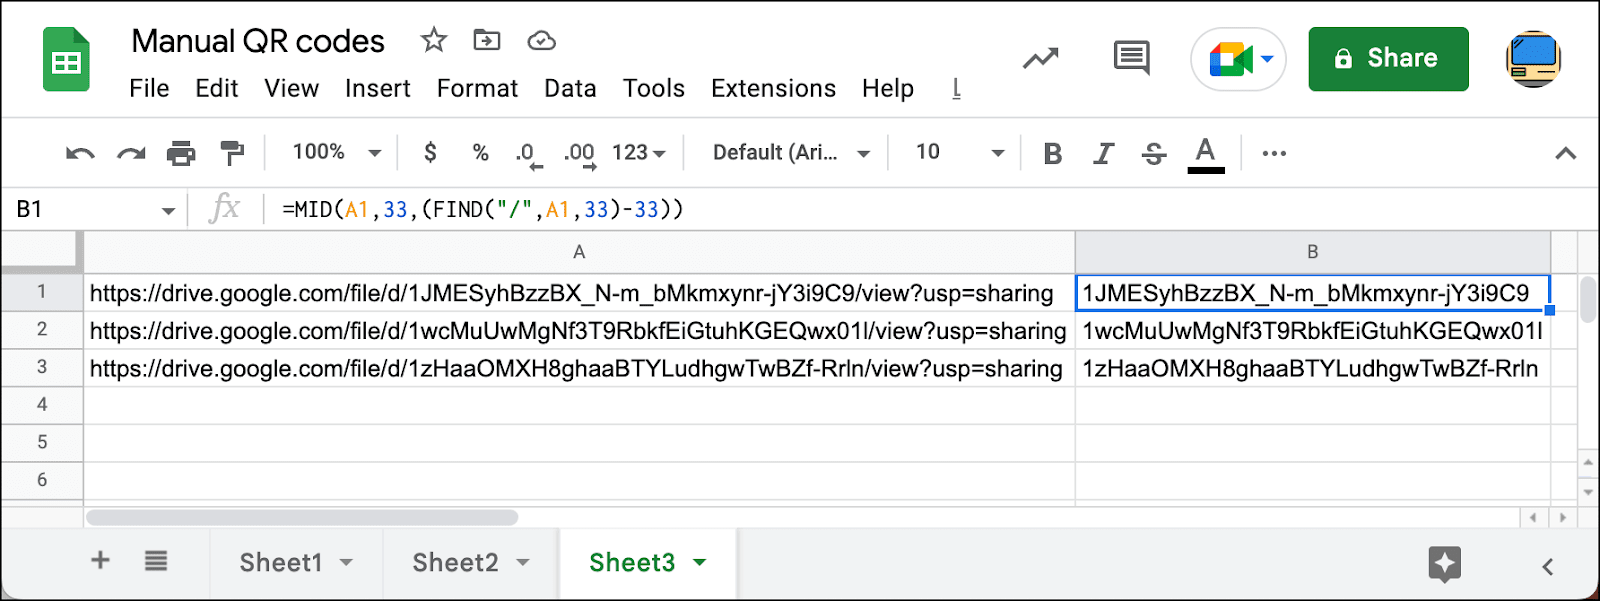
In B1, type in the following formula: =MID(A1,33,(FIND("/",A1,33)-33)). We’re extracting the file ID from the string. We know it starts at the 33rd character and we’re accounting for the possibility it could be any length. Then drag that formula down to the rest of the rows.
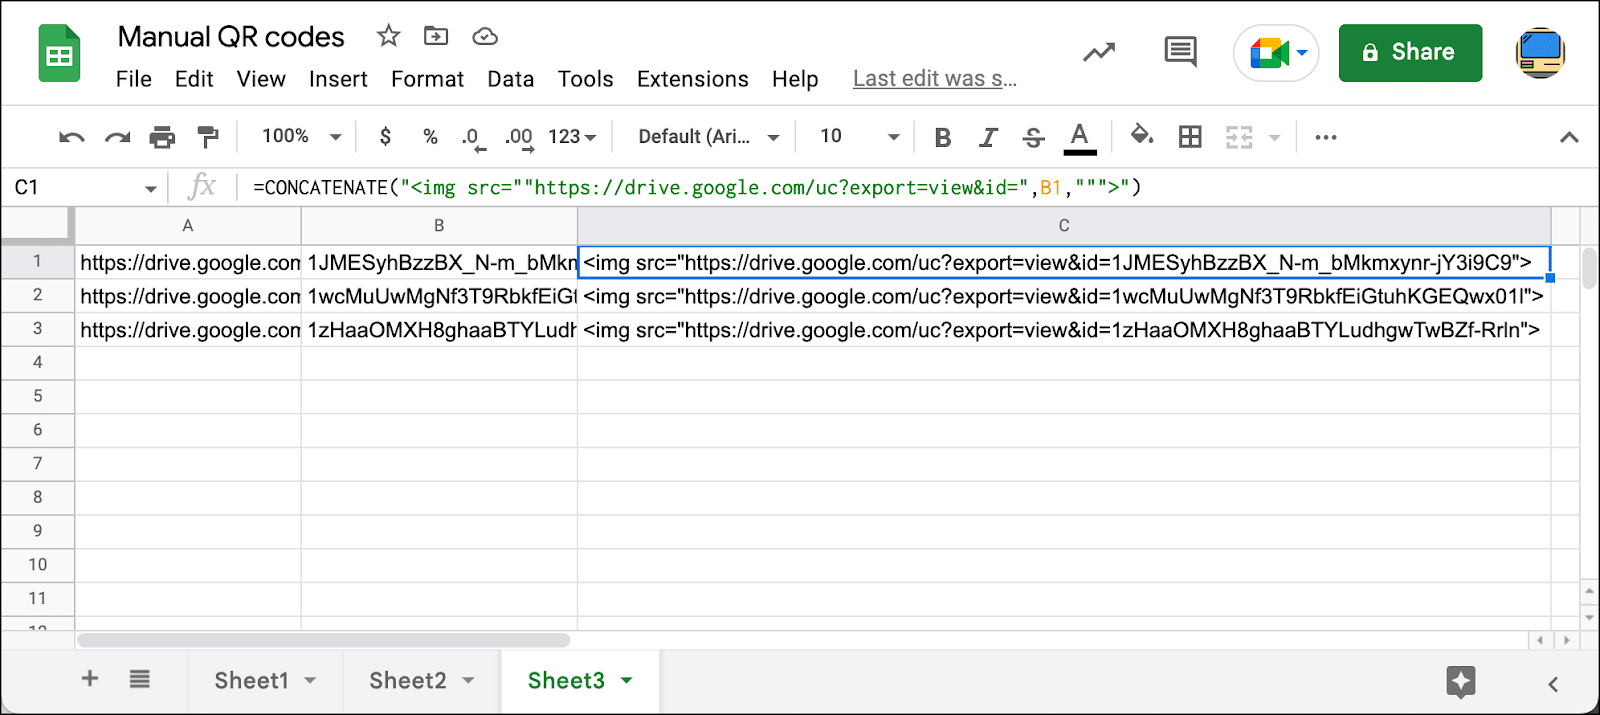
It’s finally time to build mail merge links.
In C1, type the following =CONCATENATE("<img src=""https://drive.google.com/uc?export=view&id=",B1,""">") . You need all those double quotes in there because that’s how you escape quotation marks in this particular Google Sheets scenario. Now drag that formula down to the rest of the cells in the column.
Now copy everything in column C. Go to your main spreadsheet and paste those links in the right rows. Make sure to use Edit > Paste special > Values only.
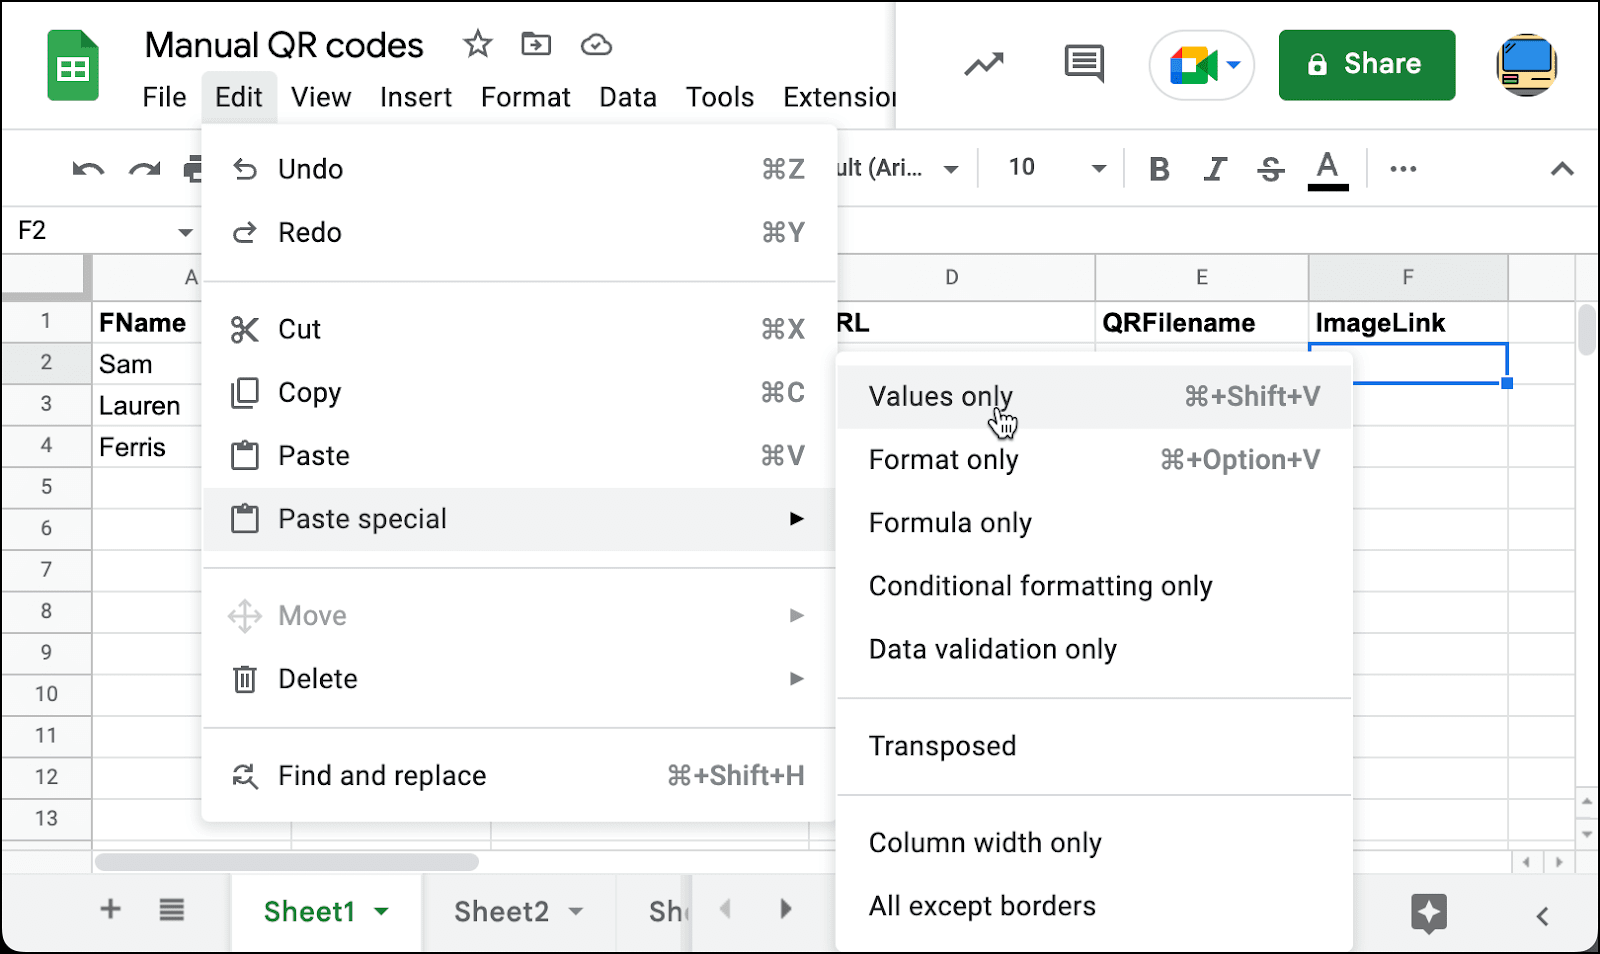
The images will now be properly embedded in your emails.
Using Dropbox images
Much like Google Drive, Dropbox doesn’t like giving you the direct URLs to your images — they give you links to Dropbox pages featuring your images. So again, we need to extract the URLs.
And with Dropbox, you have to do this one at a time. Plus the URLs are really long. So it’s not the ideal solution.
Upload your images to Dropbox.
Right click on one of your images and chose Share then Share with Dropbox.

Make sure the permission is Anyone with this link can view. Then click Copy Link.

Now open an incognito browser window. (It needs to be an incognito window so you get the public URL.) Paste in the link. Then right-click and choose Copy Image Address.

Now paste that URL into your spreadsheet. And add <img src=" before the image URL and "> after.

Now repeat for the rest of your images.
Things to Keep in Mind
Although that is the basic idea, here are a few other points to keep in mind about personalizing images:
- To keep things simple, I’ve just used a regular typed-in email for the example above. However, in many cases you will want to use the personalized image technique in the context of a custom HTML email. It works exactly the same way: just paste in your HTML into the Gmail compose window and then type in your {ImageLink} tag where you want the personalized image to appear. You can read more about How to use custom HTML in a Gmail compose window.
- You can also make the image a link itself, of course. That would require using the personalized link technique I’ve blogged about before, but, in your spreadsheet, including the <img> tag within the <a> tag, like this:
<a href="https://www.starsignessentialoils.com">
<img alt="Aries Essential Oil" src="https://i.imgur.com/n3LQgc1.png">
</a>
Summary
If you need to send personalized images as part of a Gmail-based email marketing campaign, just host the individual images somewhere online and then include the full personalized image links, one for each recipient, in your Google Docs spreadsheet. Finally, include the personalization tag (such as {ImageLink} or whatever you’d like to call it, as long as it matches to the spreadsheet column) in the body of your email. It’s that easy!
Want more?
- Now that you know how to personalize images, learn how to personalize links as well.
- See the complete guide to personalization for a deep dive into personalizing mail merge campaigns.
Send incredible emails & automations and avoid the spam folder — all in one powerful but easy-to-learn tool
TRY GMASS FOR FREE
Download Chrome extension - 30 second install!
No credit card required

Ajay is the founder of GMass and has been developing email sending software for 20 years.