Integrate HubSpot with Your Gmail Mail Merge Campaigns

HubSpot is a leading inbound marketing and sales platform. GMass is a leading cold email and email marketing platform which excels at Gmail mail merges. And… fortunately, the two play quite nice together.
Let’s take a look at how you can use GMass’s BCC feature to automatically log all your outgoing emails into HubSpot CRM.
How to Log Outgoing GMass Emails in Hubspot
The goal here is having emails you send via GMass “logged” in HubSpot’s CRM. This means that HubSpot will:
- Be aware you sent an email to that person.
- Extract the email address from the sent email.
- Then either add the person as a brand new HubSpot CRM contact and log the email to that contact — or, if you already have them in your HubSpot account as a contact, simply log that this email was sent to that contact.
Set up your Hubspot CRM account
First off, you’ll need a HubSpot account. For this tutorial, I’ll assume you have signed up for HubSpot CRM Free account.
(Note, although it asks for a website URL and company name, they indicate in their own help document that they do not validate either of these , so it’s OK to enter a fake company name and fake URL if you’re merely trying out HubSpot).
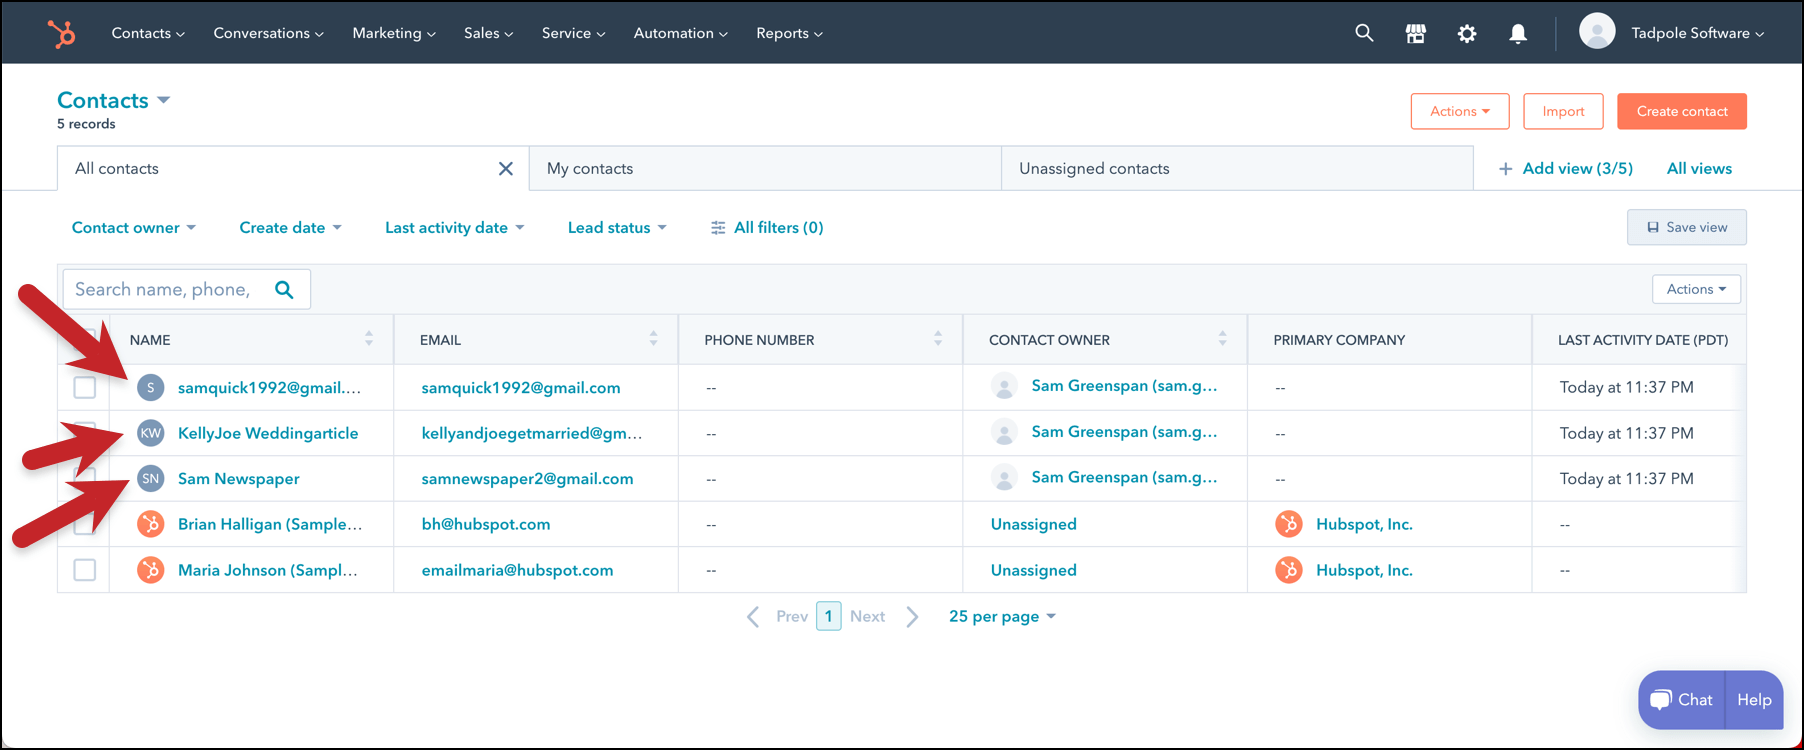
Before we do anything, let’s verify that your HubSpot CRM Contacts does not yet contain the people you are about to email. To see that, click on Contacts on the top menu bar in HubSpot, and it will bring up this page:
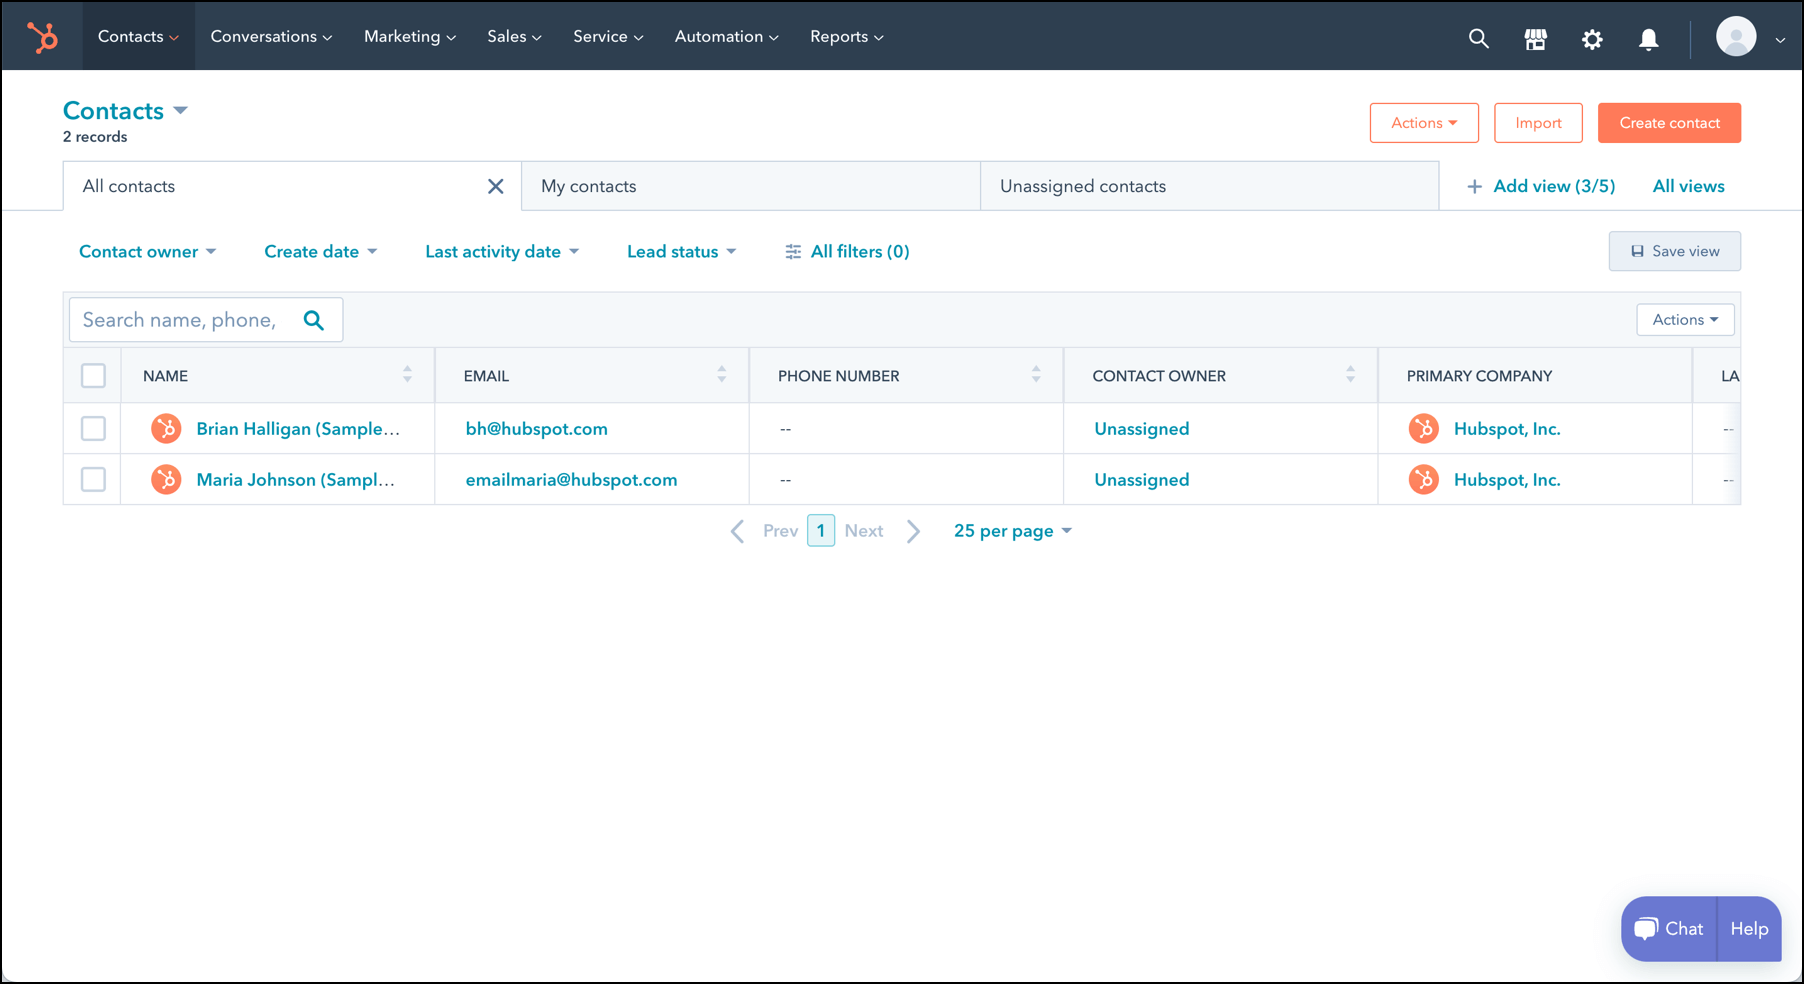
Notice there are only two sample contacts shown. These were provided by HubSpot at signup.
Here you can see that there are only two contacts, and these are just fake sample contacts provided by HubSpot when you first sign up. (This situation will soon change after we use GMass and BCC.)
Get your Hubspot BCC address
To log your sent emails in Hubspot you’ll need a special email address known in HubSpot terminology as your BCC address.
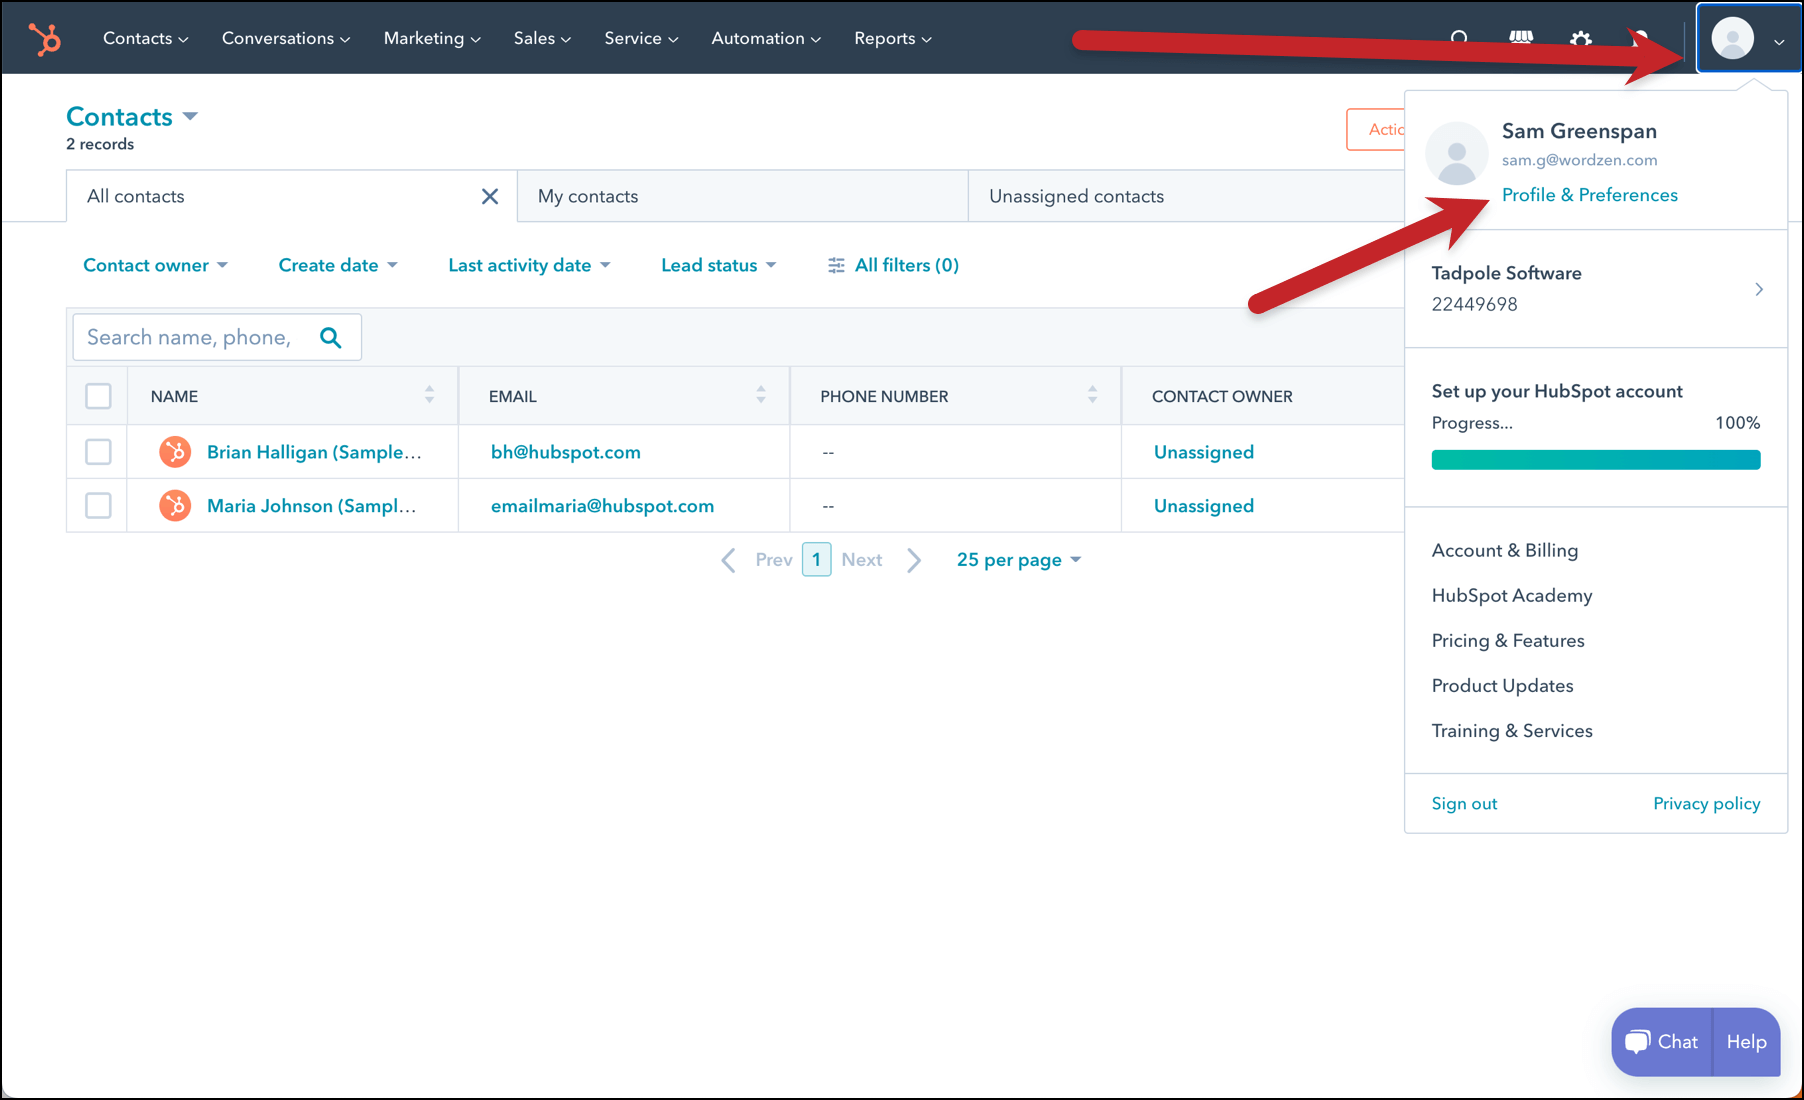
To get that address, make sure you’re logged into your HubSpot CRM account.
Click on the user icon in the upper right hand side of the HubSpot screen. This will open a dropdown menu. From that menu, select Profile & Preferences.
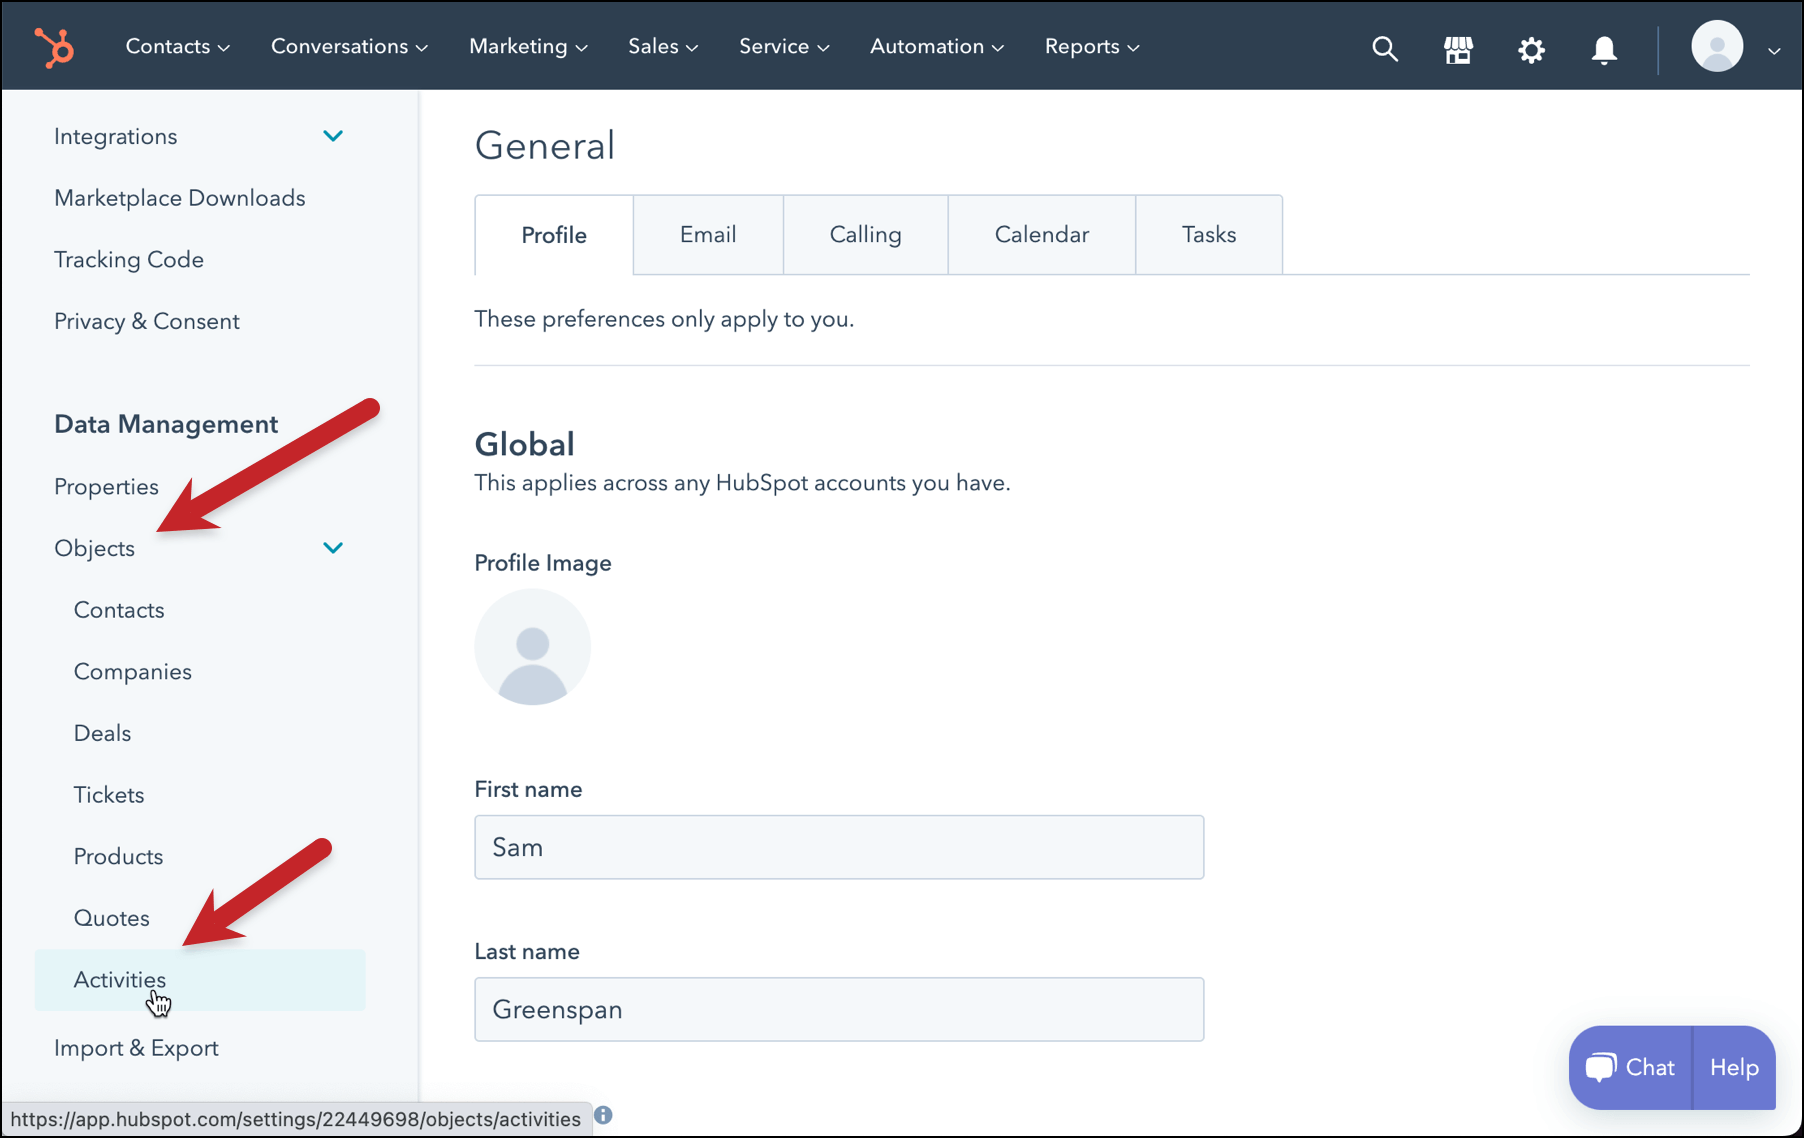
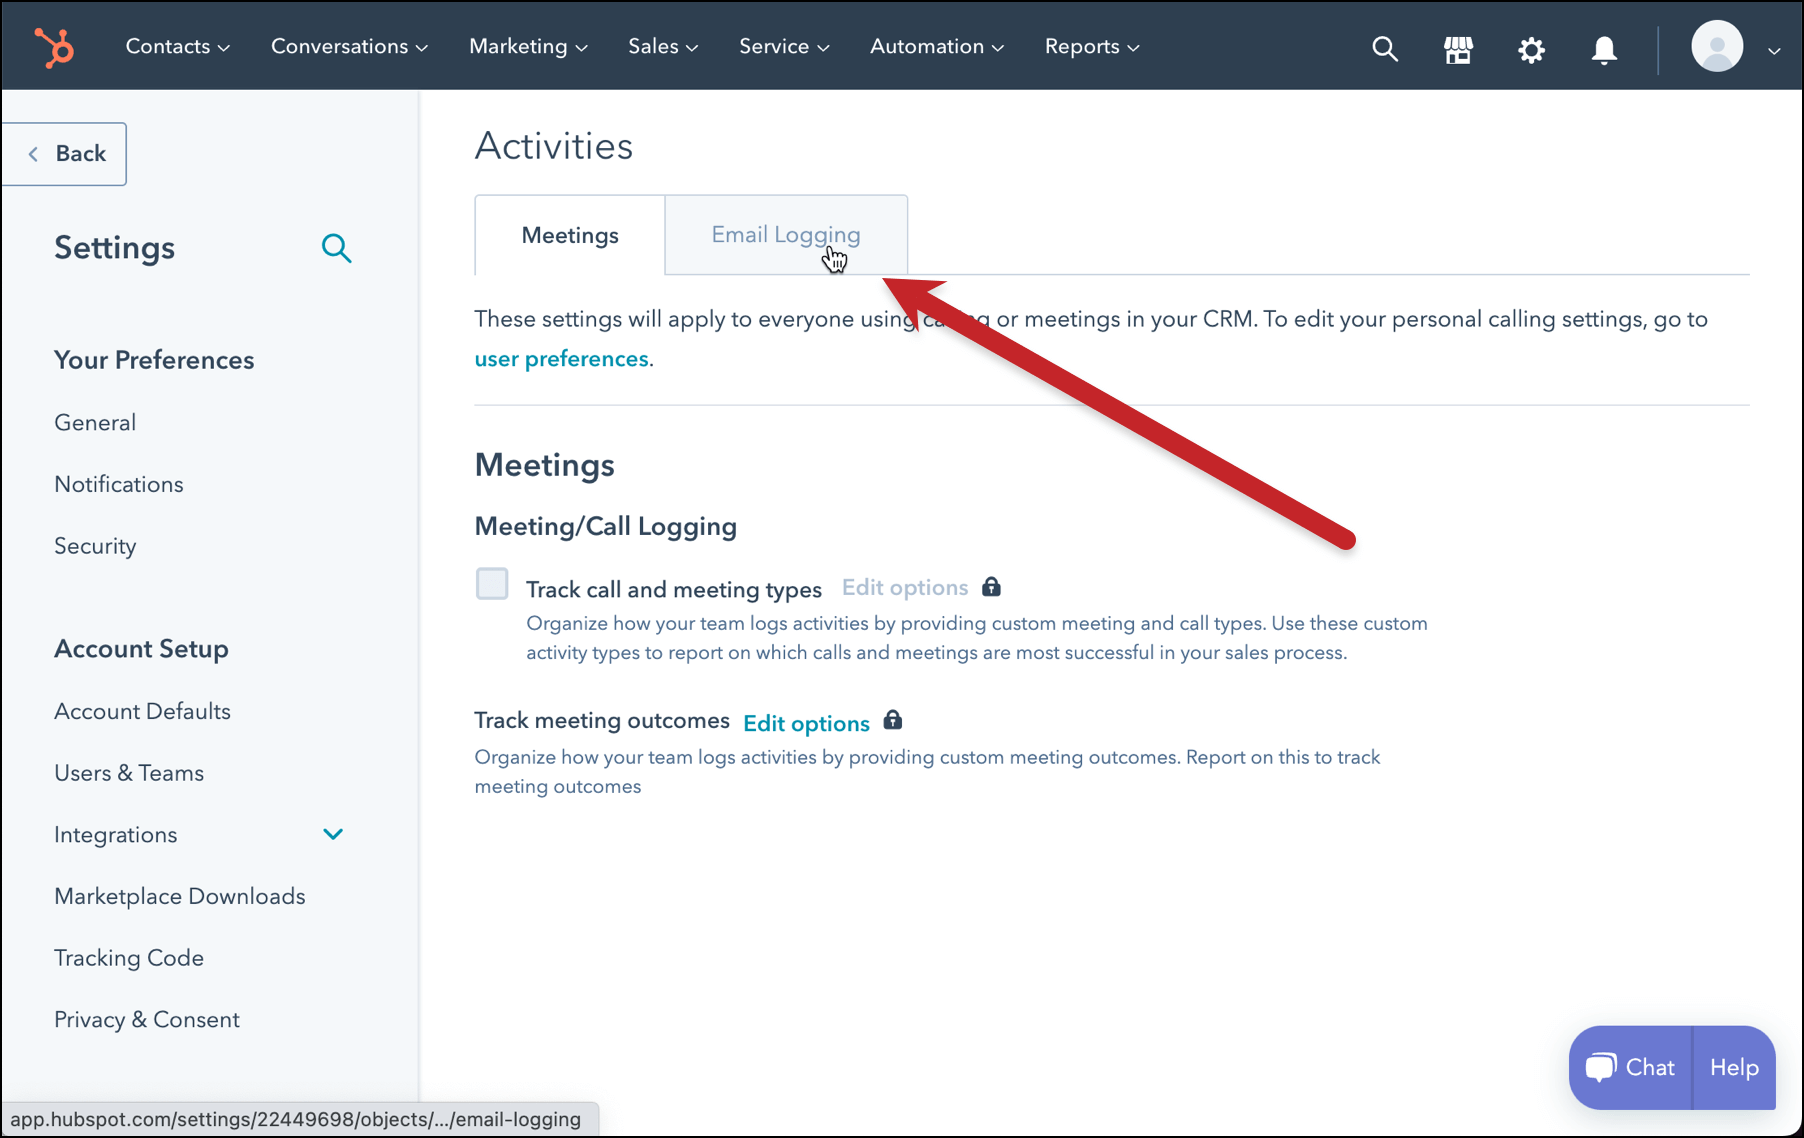
Clicking Profile & Preferences will take you to the Settings page in HubSpot CRM. The BCC address is pretty buried in here. On the left hand side menu, under Data Management click on Objects and then click on Activities.
On the activities page, click the tab to switch to the Email Logging options.
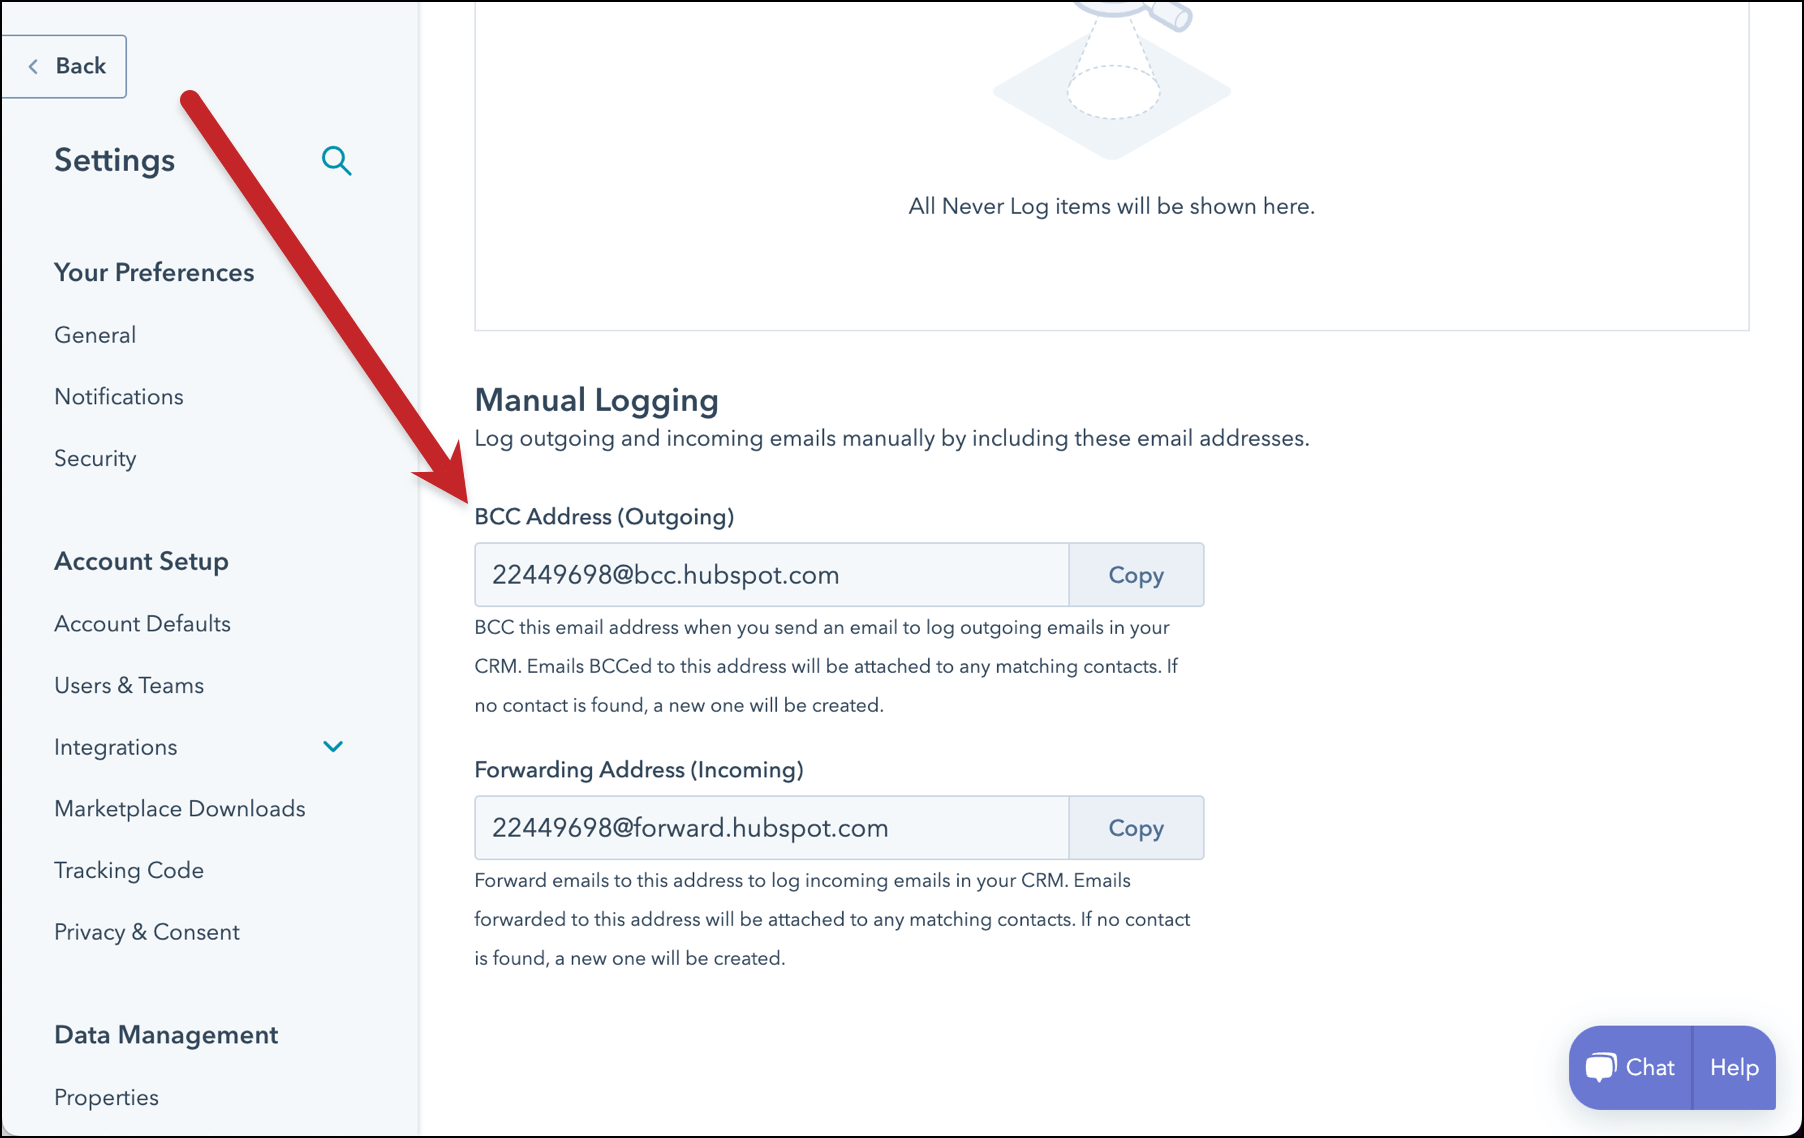
Scroll down and you’ll find a section called Manual Logging. There you’ll see a section titled “BCC Address (Outgoing)” with your address. It will be of the form “1234567@bcc.hubspot.com”. Click Copy to copy this email address to the clipboard.
Compose your email in Gmail
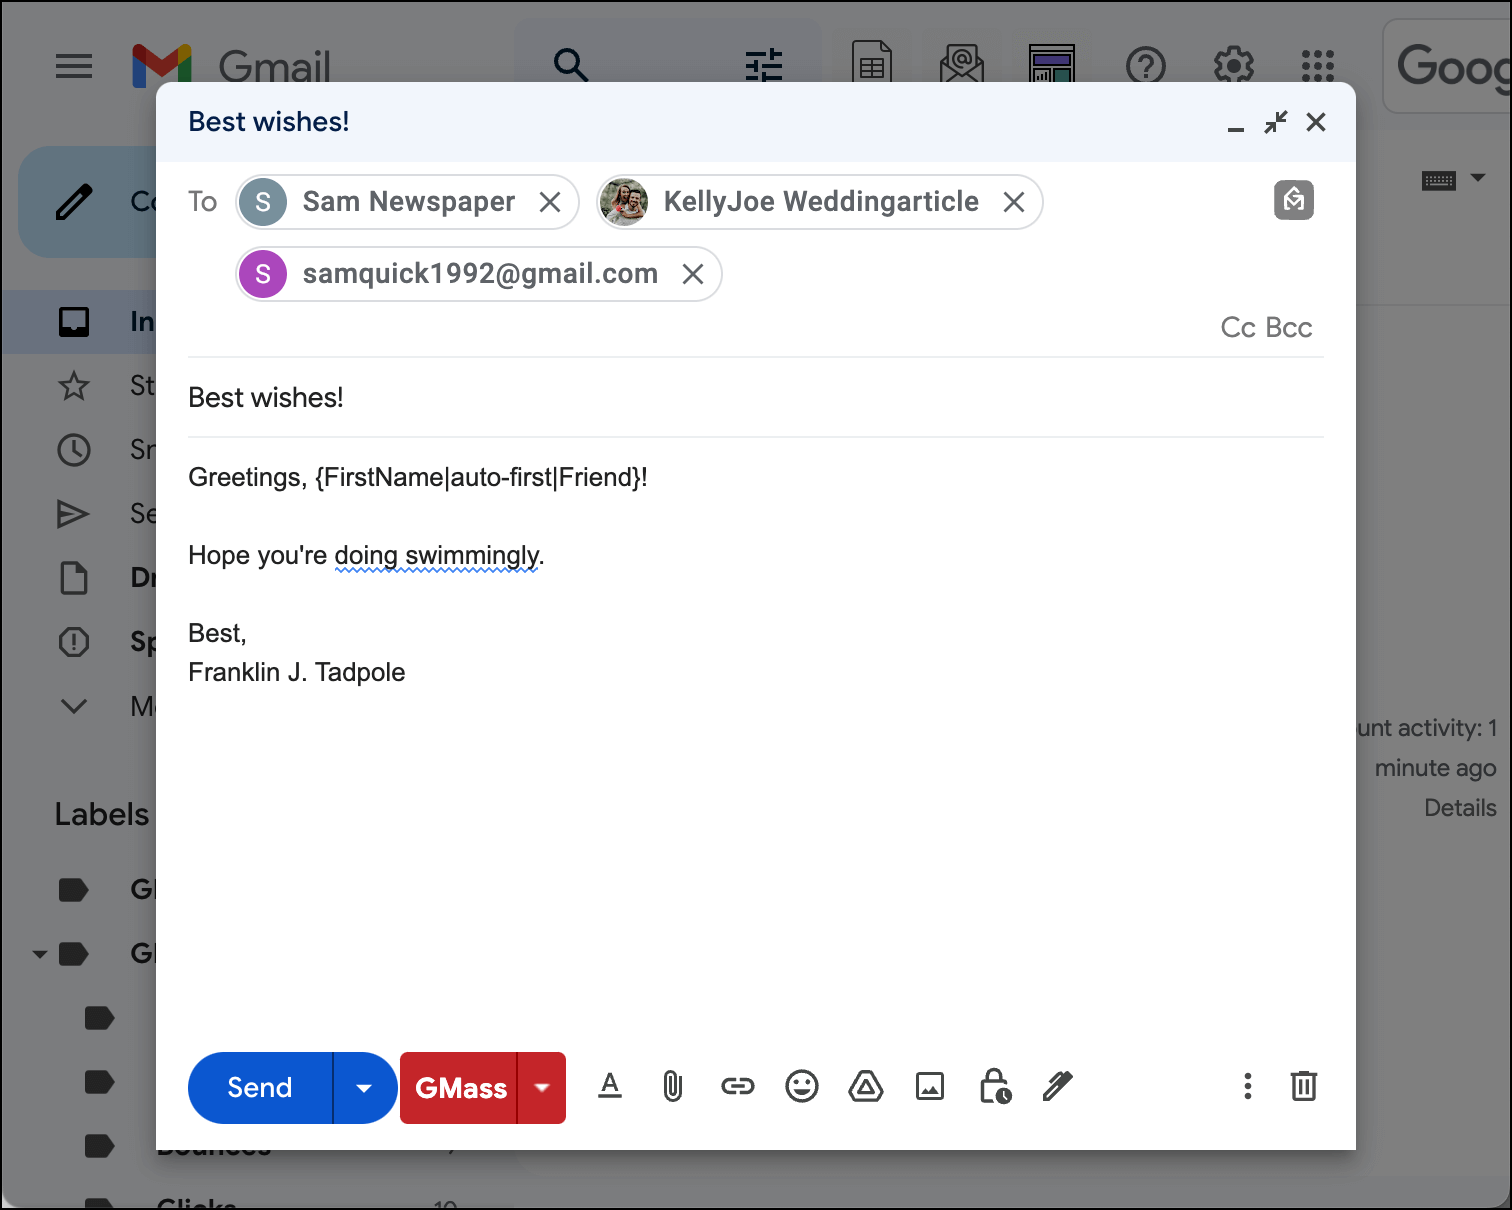
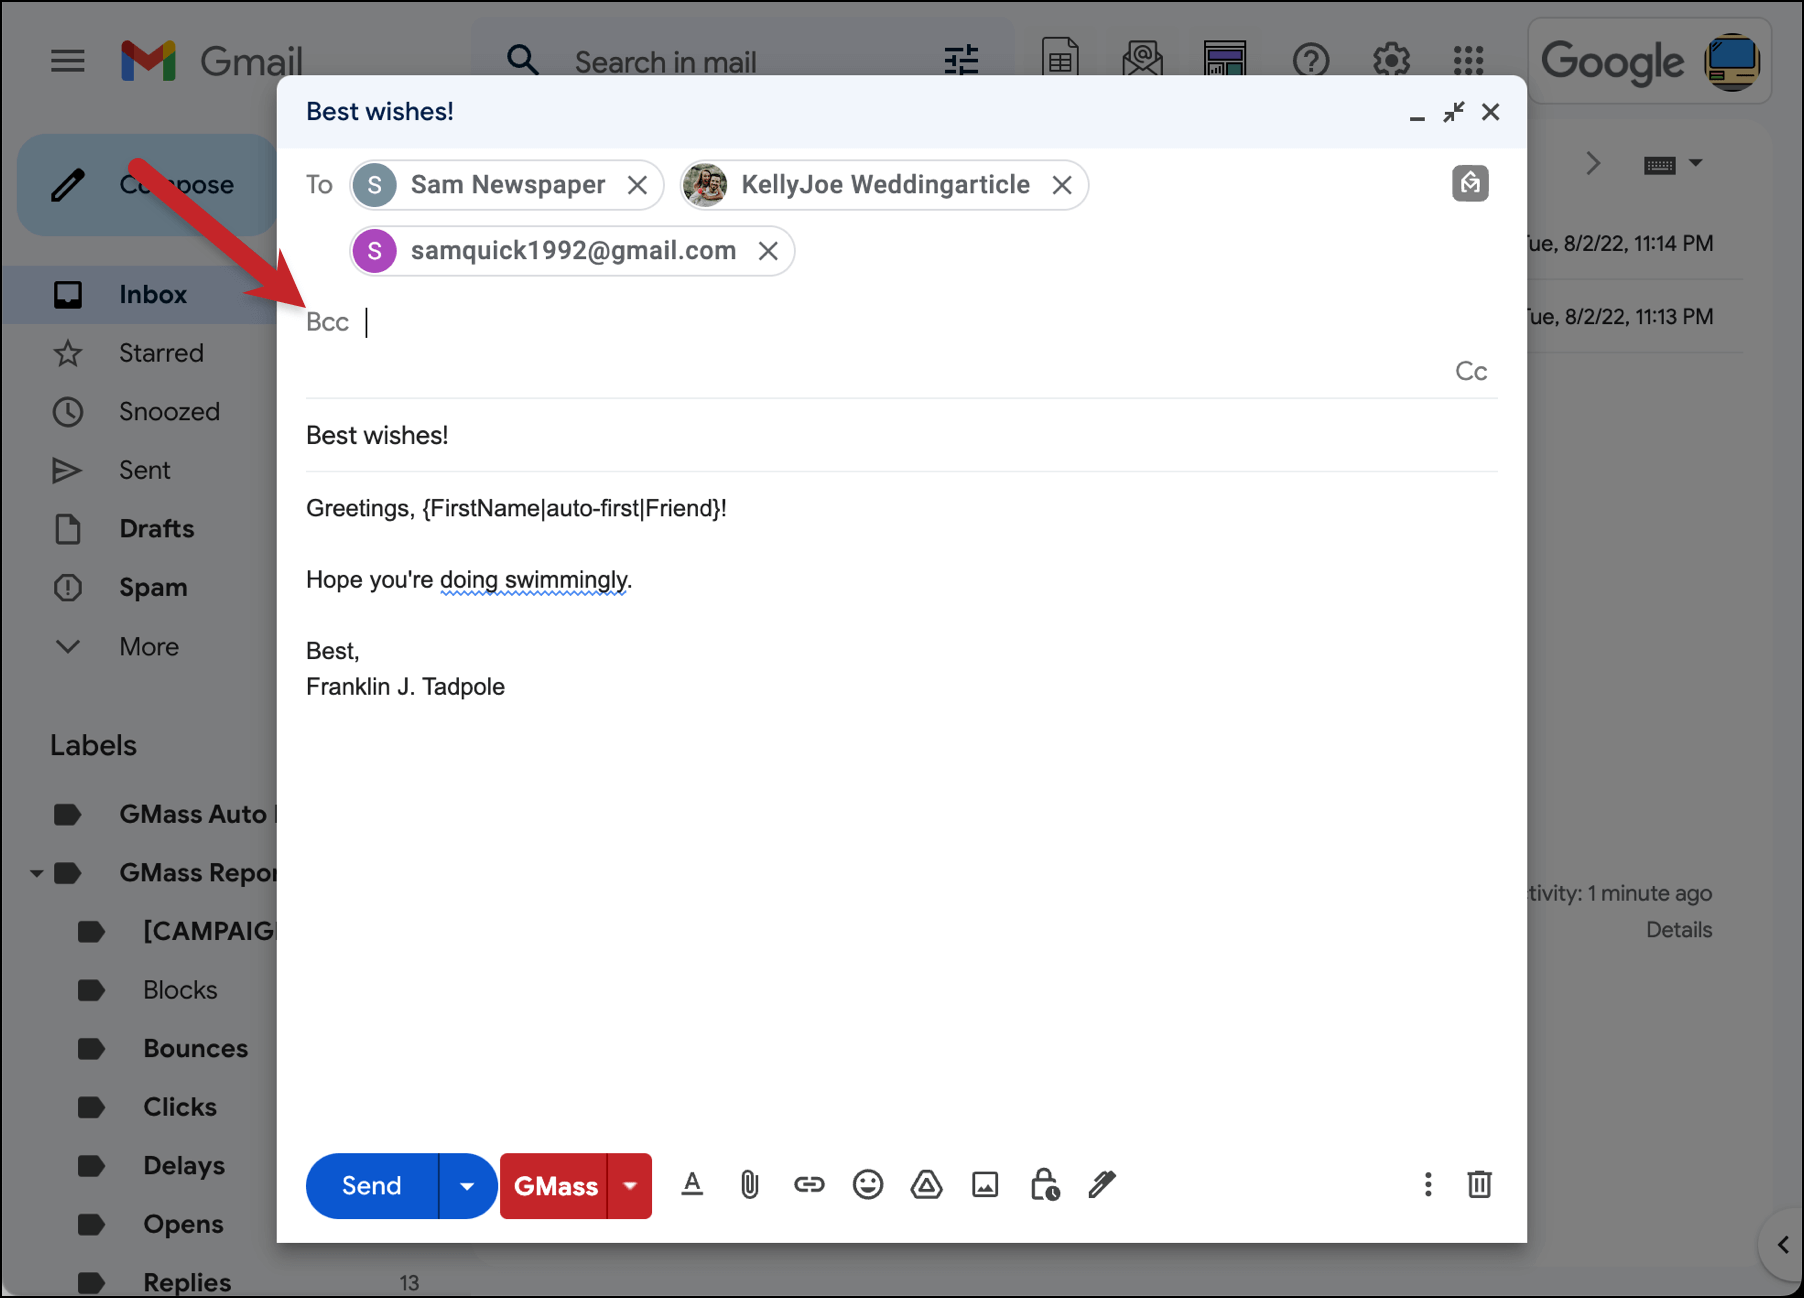
Head over to Gmail and compose a GMass campaign email as you normally would, with the recipients of the email included in the To field of the Gmail compose window. (You could also connect a Google Sheet for this campaign. For simplicity’s sake in this example, I just put three emails in the To field.)
Click anywhere in the To field in order to reveal the option for including a CC or BCC in this email. (Alternately, you can use Ctrl-Shift-B while in the Gmail compose window).
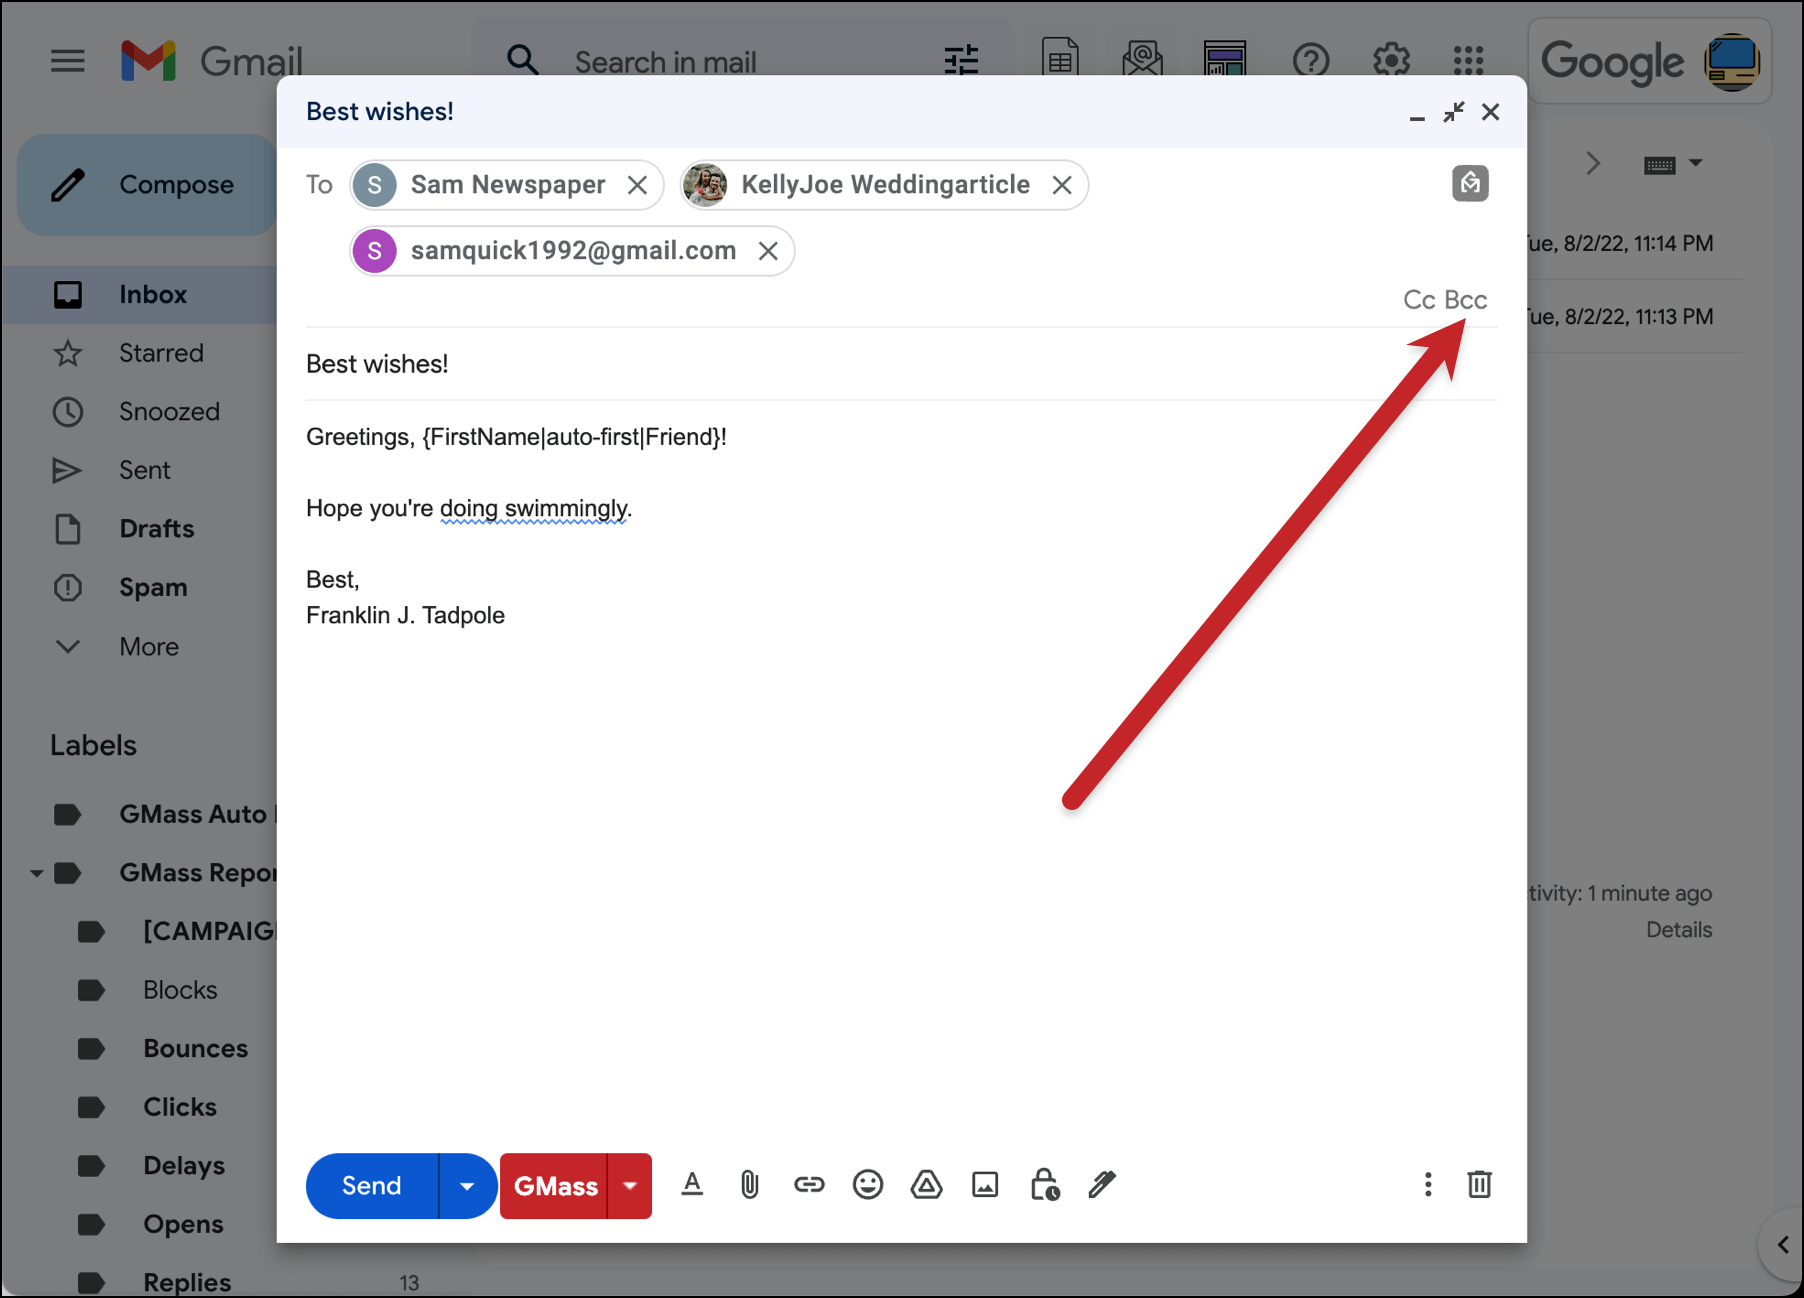
Click on BCC to create a BCC field.
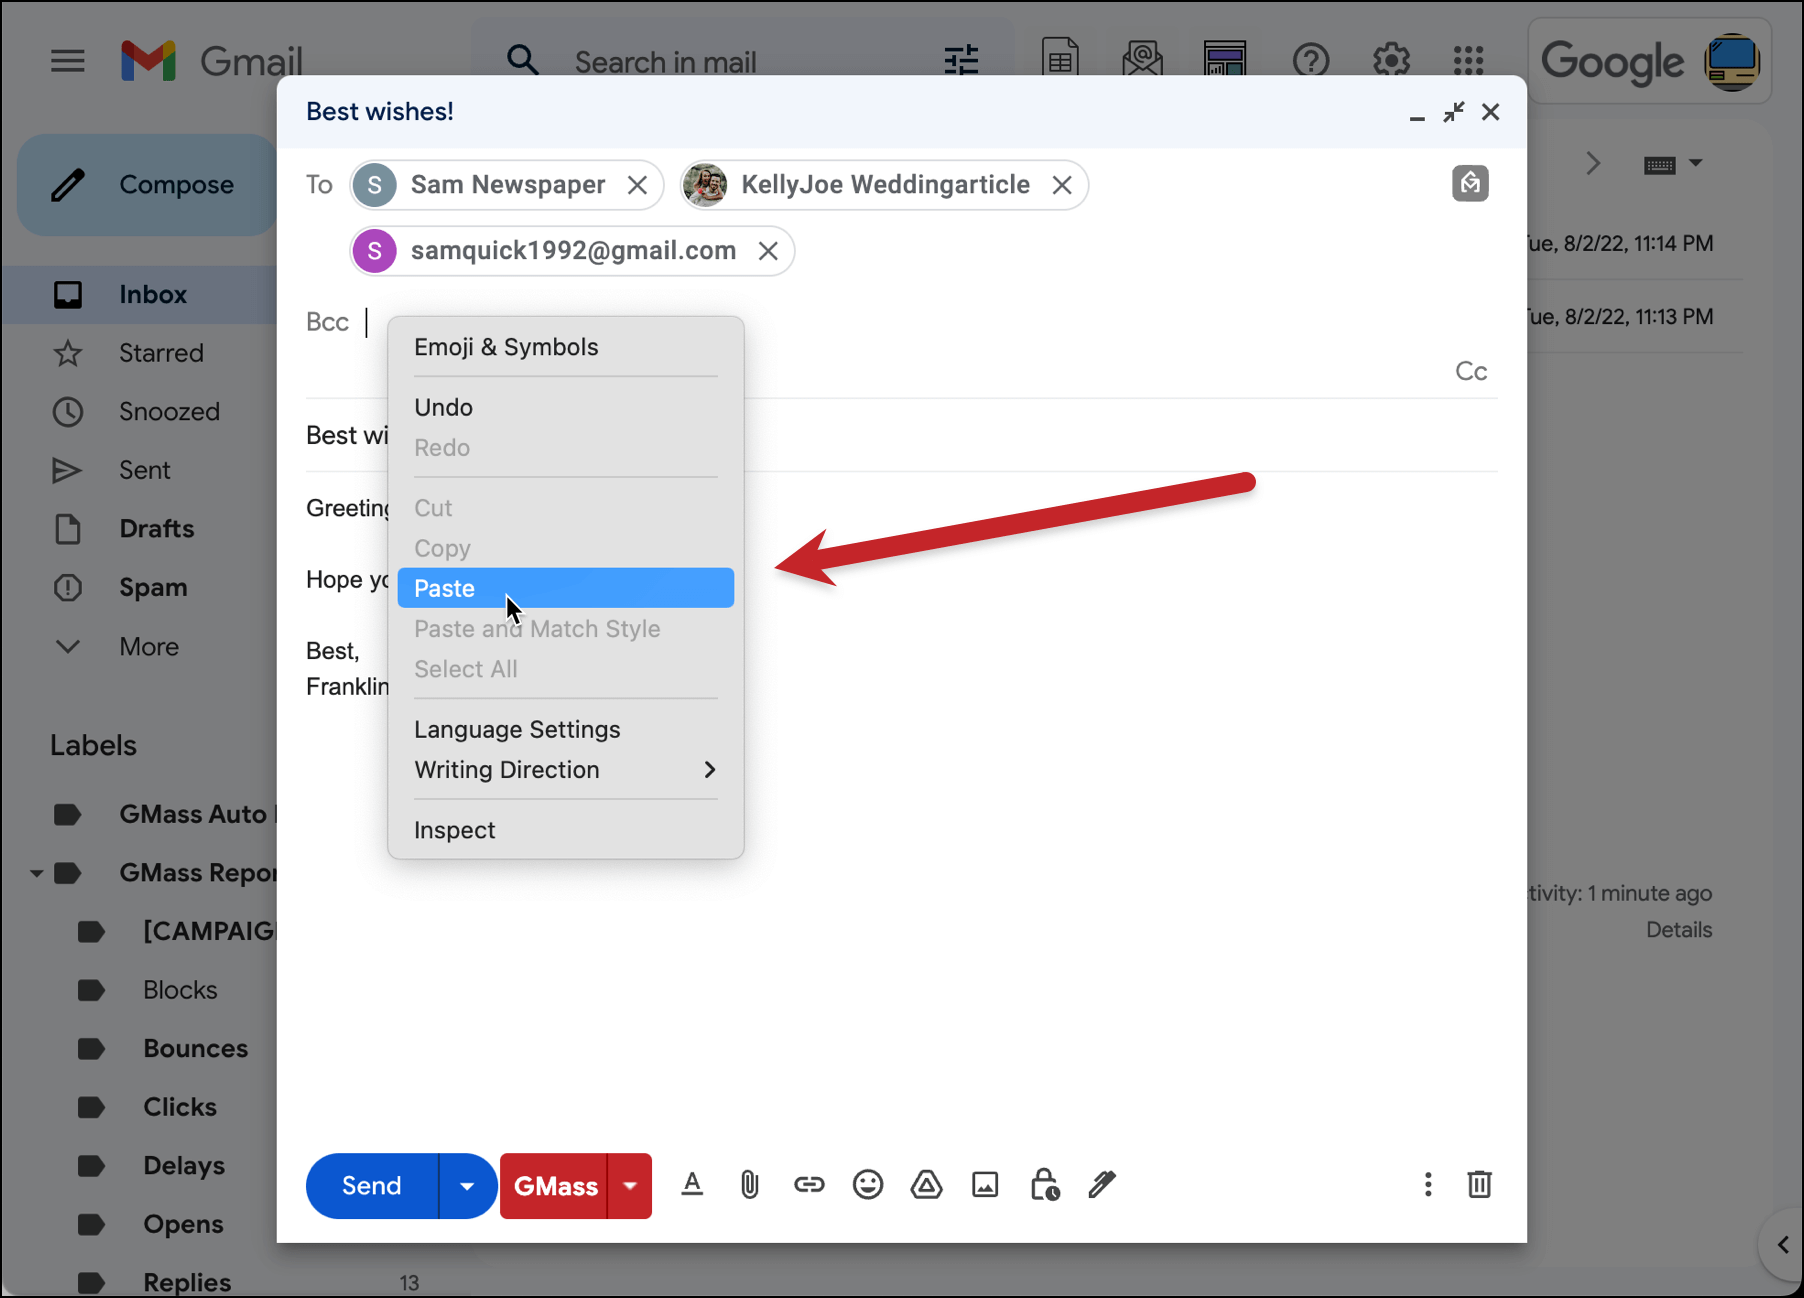
Now, paste your Hubspot BCC address into the BCC field.
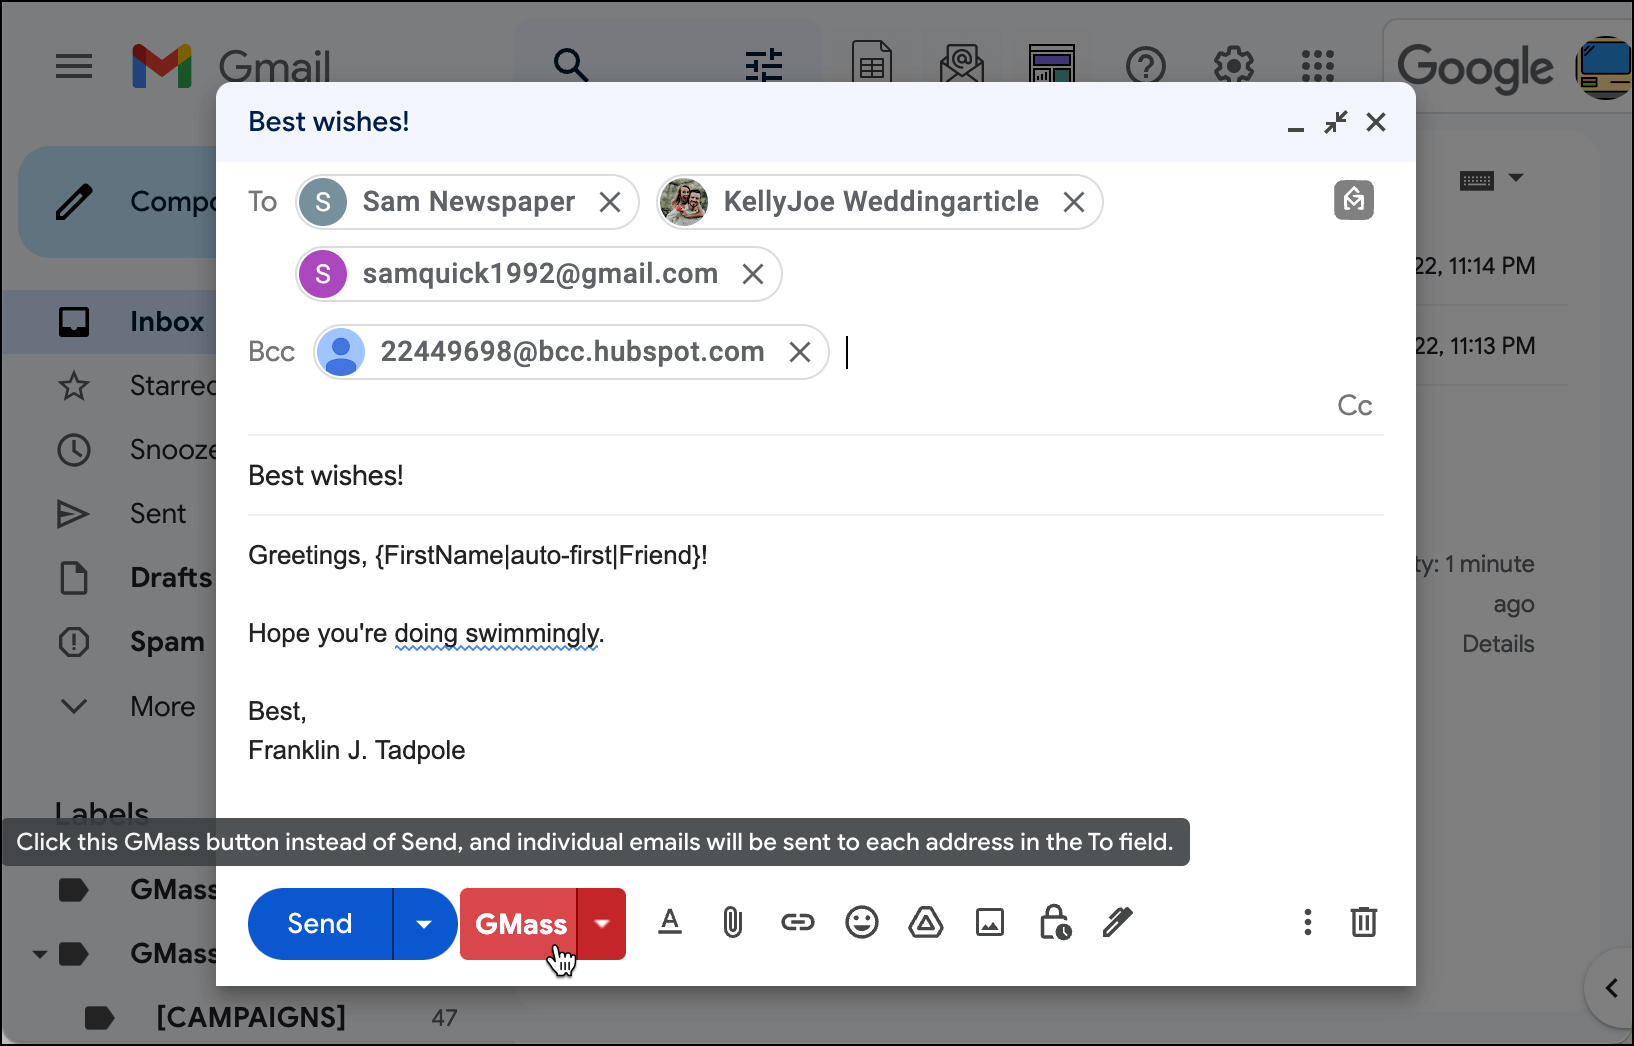
Your unique HubSpot BCC address is now a part of this campaign. That address will be BCCed on every email.

Sending your campaign
Now you can simply send via GMass as you normally would by clicking on the red GMass button.
At this point you’ll receive that a warning popup. That’s because you included an email address in the BCC field of this email and GMass is making sure you intended to do this.
(Note: The reason for this check is important: if there is anything included in the Gmail BCC field, GMass will send a copy of all of the emails sent to all of the recipients in your list. That will mean that the address in BCC can receive hundreds of emails — so we want to be sure that’s on purpose. In this case, that’s fine, because we do want HubSpot CRM’s BCC address to receive a copy of all these emails so that it can log the recipients as contacts.)
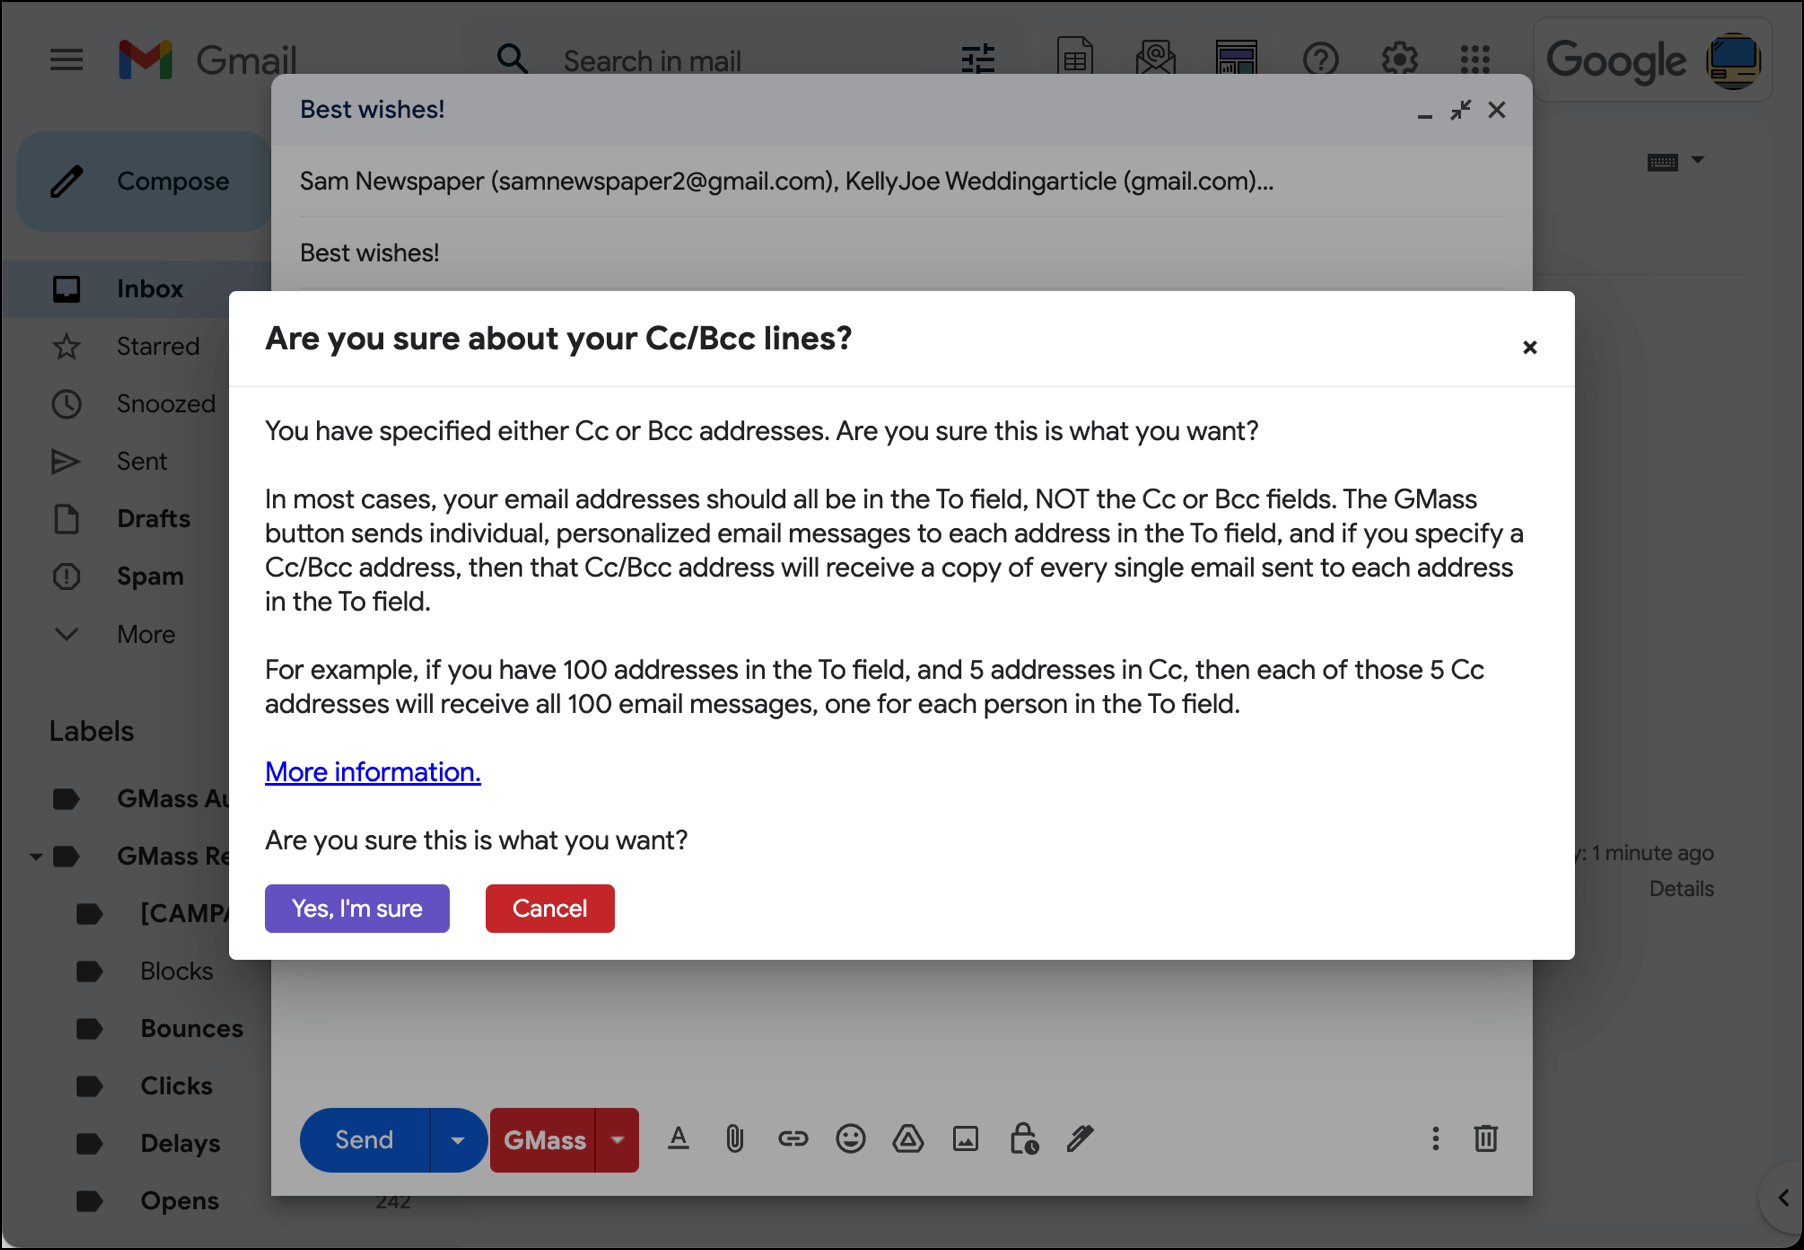
Click “Yes, I’m sure” in the warning popup window. GMass will then send out your emails.
As usual, your emails went out as individual emails to your list of recipients in the To field, but also, in each case, to the HubSpot BCC address as a BCC — meaning your recipients will not know that a copy of the email they got was also sent to HubSpot (which is what you want).
Here’s an example of one email from my Sent folder. I can see there was a BCC. The recipient wouldn’t see that.

Finding your new contacts in Hubspot
Now let’s see what happened back in HubSpot CRM. Go back to that tab and make sure you have the Contacts page open (if not, click on Contacts on the menu bar at the top).
You will see the three people you emailed in this example have automatically been added to your HubSpot Contacts, and their names (if available), email addresses, and the timestamp of last activity with this contact (in this case, the sending of this email) has been logged.
Congratulations! You’ve successfully logged your GMass recipients into HubSpot CRM!
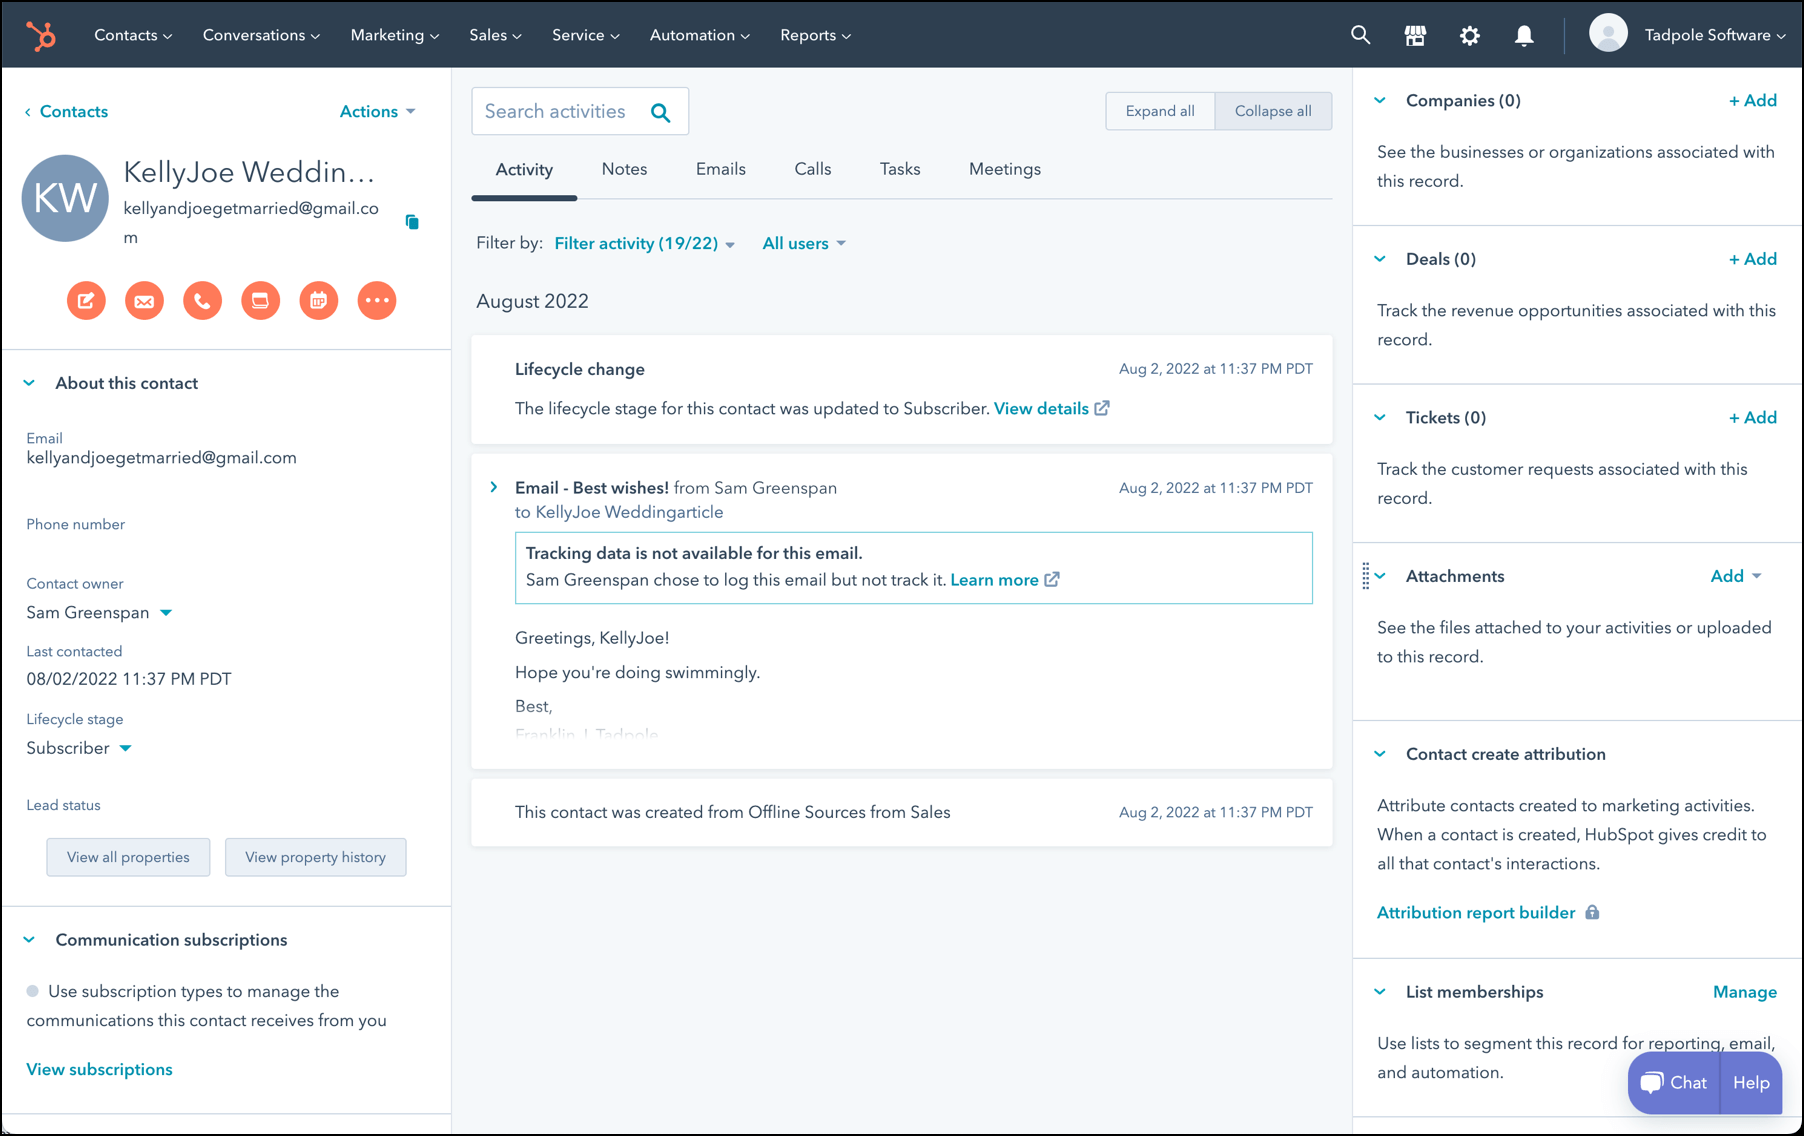
If you’d like to explore one of these newly-added contacts within HubSpot CRM, that’s easy. Click on the person’s name to bring up their whole profile page (or click Preview to see a simpler look). Note that this profile has a copy of the email and the time when you sent it.
Finally, in the future, if you send further emails to these same recipients and Bcc it to the Bcc address in HubSpot CRM, then HubSpot CRM will simply log the emails to these contacts, since they already exist in your HubSpot CRM account. However, if you include a new email address in the list of recipients, HubSpot CRM will create a new contact for that person as well as log the email that was sent to them.
Only GMass packs every email app into one tool — and brings it all into Gmail for you. Better emails. Tons of power. Easy to use.
TRY GMASS FOR FREE
Download Chrome extension - 30 second install!
No credit card required

Ajay is the founder of GMass and has been developing email sending software for 20 years.