Update a Google Sheet with Campaign Data (Opens, Clicks, Replies)

You’re probably using Google Sheets to send most (if not all) of your campaigns in GMass. So it only makes sense that you’d want to get campaign data back into those sheets.
There are a few different methods for getting your campaign data into Google Sheets with GMass. In this article we’ll cover those methods and walk you through their pros and cons.
Method #1: GMass’s Automatic Google Sheet Updating
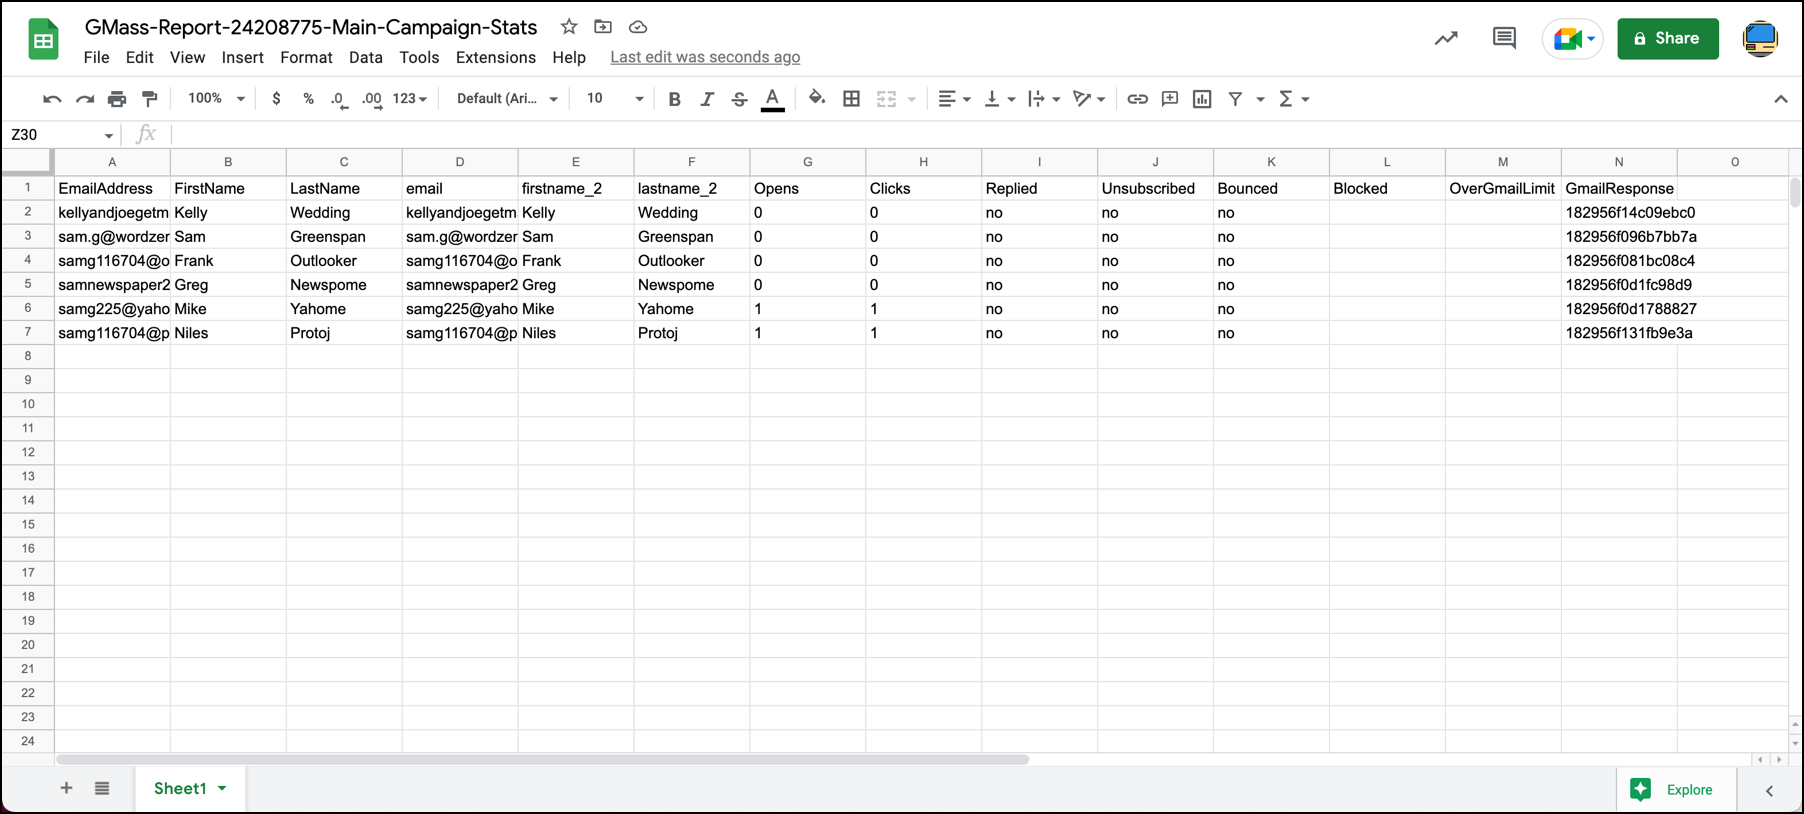
With GMass, you can set your Google Sheet to automatically update as your campaign sends. Opens, clicks, replies, and bounces will update columns in your Google Sheet so that you can easily see how each person has engaged with your mail merge or cold email campaign.
This is a popular feature with GMass users — in fact, we’ve even had people tell us they switched to GMass for this feature alone.
Go ahead and stare!
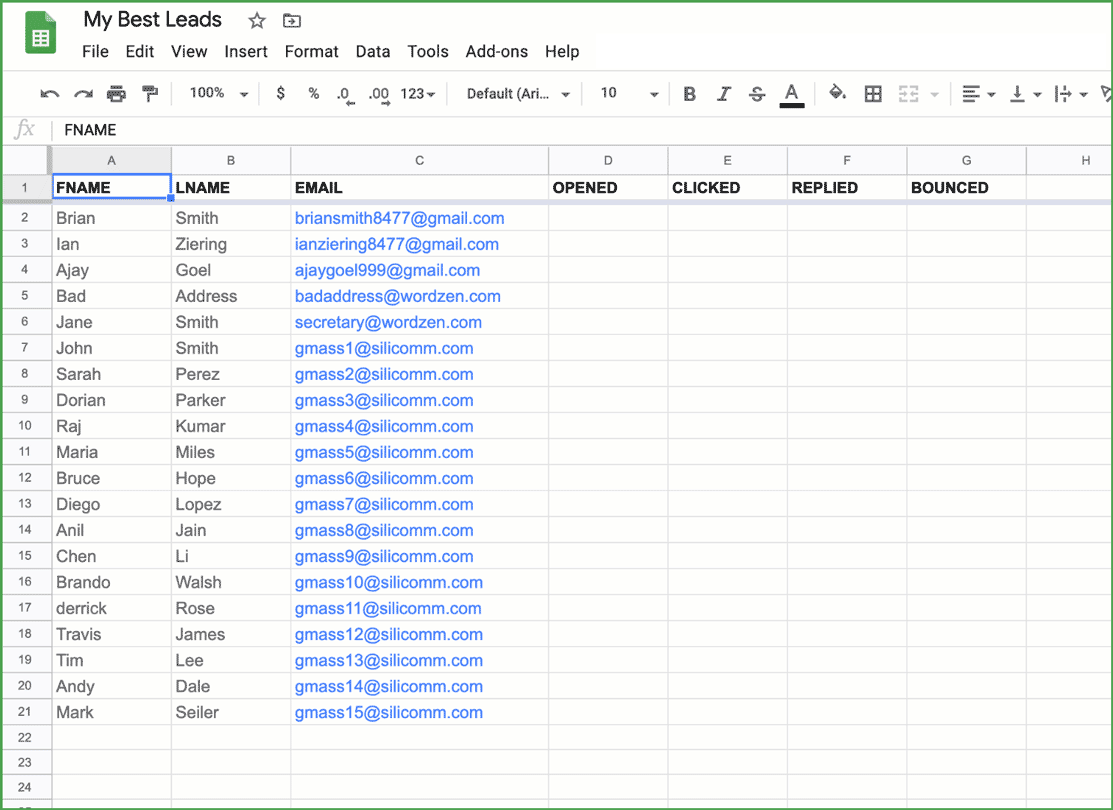
You can use this data to further refine follow-up campaigns by filtering on the columns that have values equal to X.
Activating automatic Google Sheet updating for a campaign
In order for your Sheet to be updated, there are two basic steps you must follow:
- Check the box to update your Sheet at the time you connect to your Google Sheet inside Gmail.

- Grant GMass permission to write to your Google Sheet. When you first sign up for an account, GMass does not ask for the permissions necessary to write to your Sheet; at sign-up it only asks for permission to read from your Sheet. The first time you check the above-shown box, a popup will ask you to grant GMass the additional permissions:

The first time you check the box to update a Sheet, you’ll get this popup.
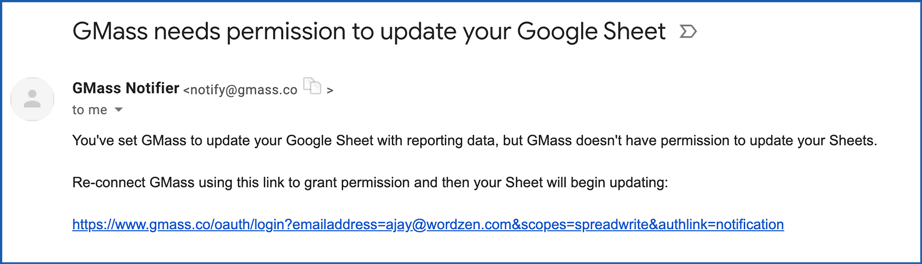
If you don’t grant the necessary permissions before you launch your campaign, you will hear from us! You will eventually get an email notification requesting permission, but this will be after GMass has already tried and failed to update at least one cell in your Sheet. That email notification will look like this:
Make sure there are blank columns
If your Sheet looks like this and doesn’t have any available columns, the reporting metrics won’t be written to your Sheet.

If your Sheet does look like this, just right-click on the right-most column to add a few more columns. You should have at least four empty columns after your last column of data. To future-proof your spreadsheet, in case we add more data to this feature (like “blocks” for example), add even more blank columns. By default, when you first create a new Sheet, columns A-Z exist, giving you a total of 26 columns. Generally, the only reason you would need to eliminate some columns entirely is to reduce the overall size of your Sheet, but that only becomes necessary if you have more than 100,000 rows of data.
GMass will write the column headings to the first row as soon as the first event takes place. For example, on the first “open,” GMass will label the column “OPENED” and mark the appropriate row with an X to indicate the open. You do not need to add the column headings; you just need to ensure there are blank columns available for use.
Once reporting events start to register on your Sheet, do not move or delete the reporting columns. Doing so could cause your other columns of data to get overwritten by Xs if GMass thinks that a column containing your actual merge data is a reporting column that we created automatically. That’s because GMass caches the structure of your Sheet and “memorizes” which columns are where in order to optimize computing resources, so if you suddenly alter the columns while it’s updating your Sheet, that will throw the process off until it caches your Sheet again during the next hour.
Troubleshooting GMass Google Sheet Updating
If your Sheet isn’t updating the way you expect:
- Make sure you’ve given GMass permission to edit your Google Sheets (see above).
- If the Sheet has been shared with your Google account by someone else, do you have EDIT permissions? If you only have READ permissions, then GMass won’t be able to update it, even if you’ve given GMass permission to update your Sheets, because the read-only permission on the shared Sheet takes precedence.
- Make sure you have enough blank columns to the right of your data.
- Make sure you checked the “Update Sheet with reporting data…” box when connecting to the Sheet. If you forget to to this and then launch a campaign, there’s currently no way to change it.
Method #2: Exporting Data to a Google Sheet
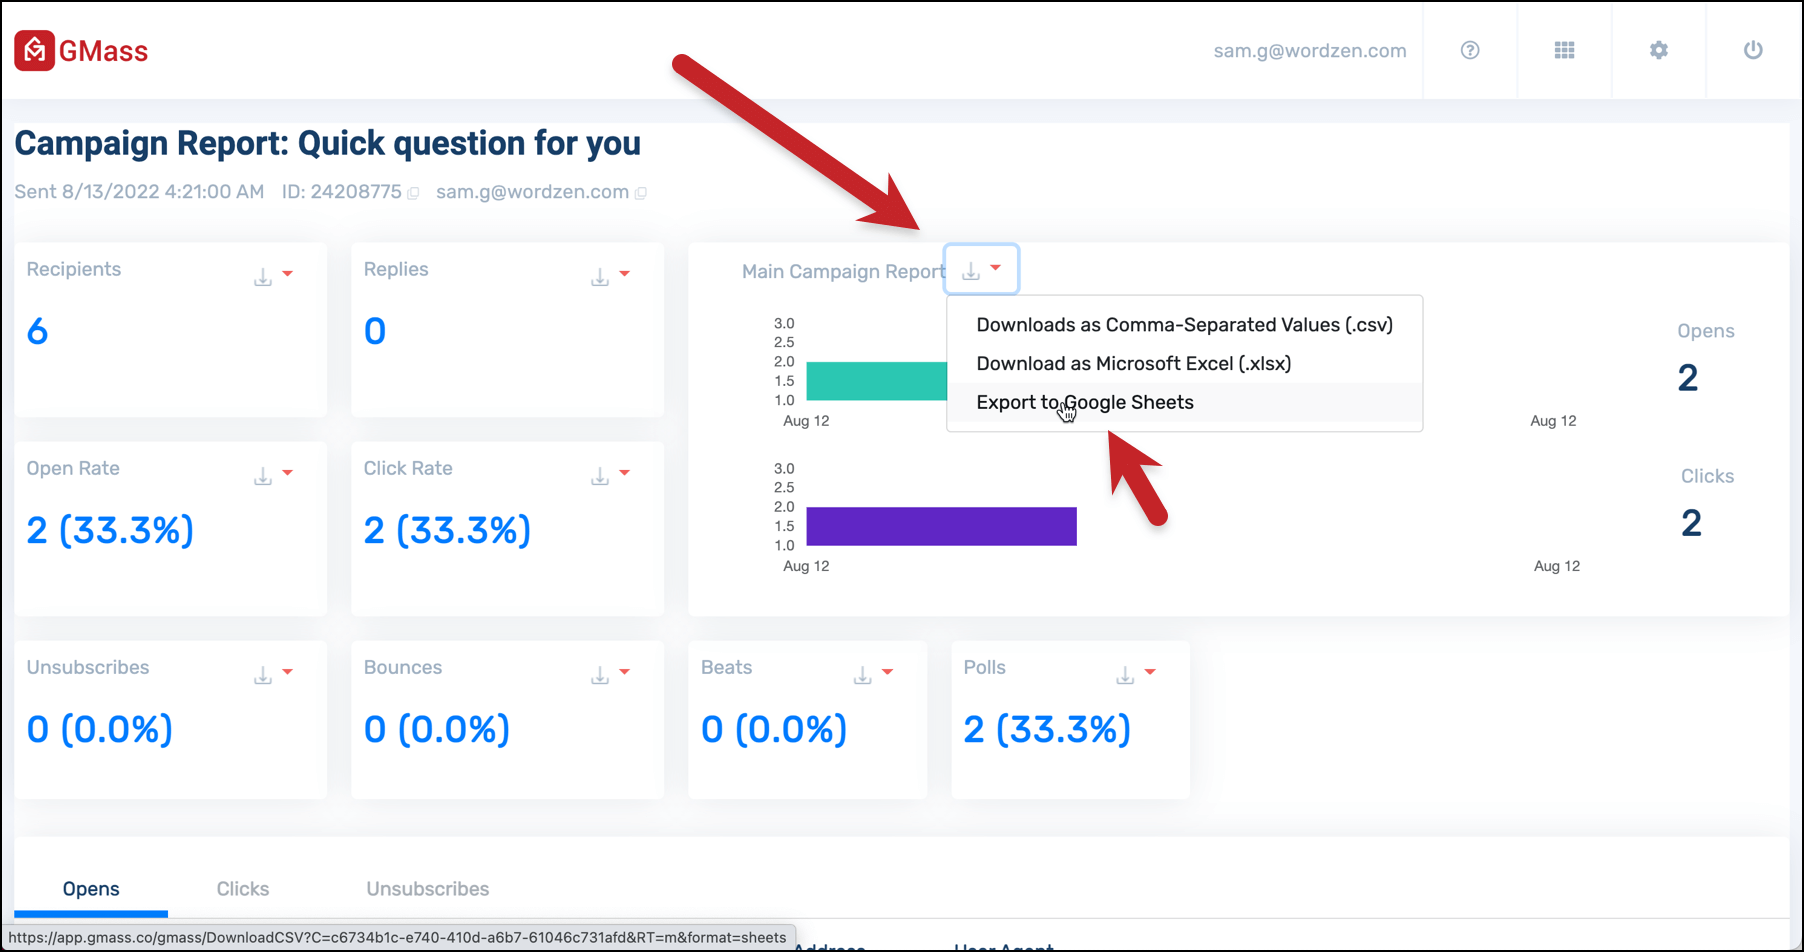
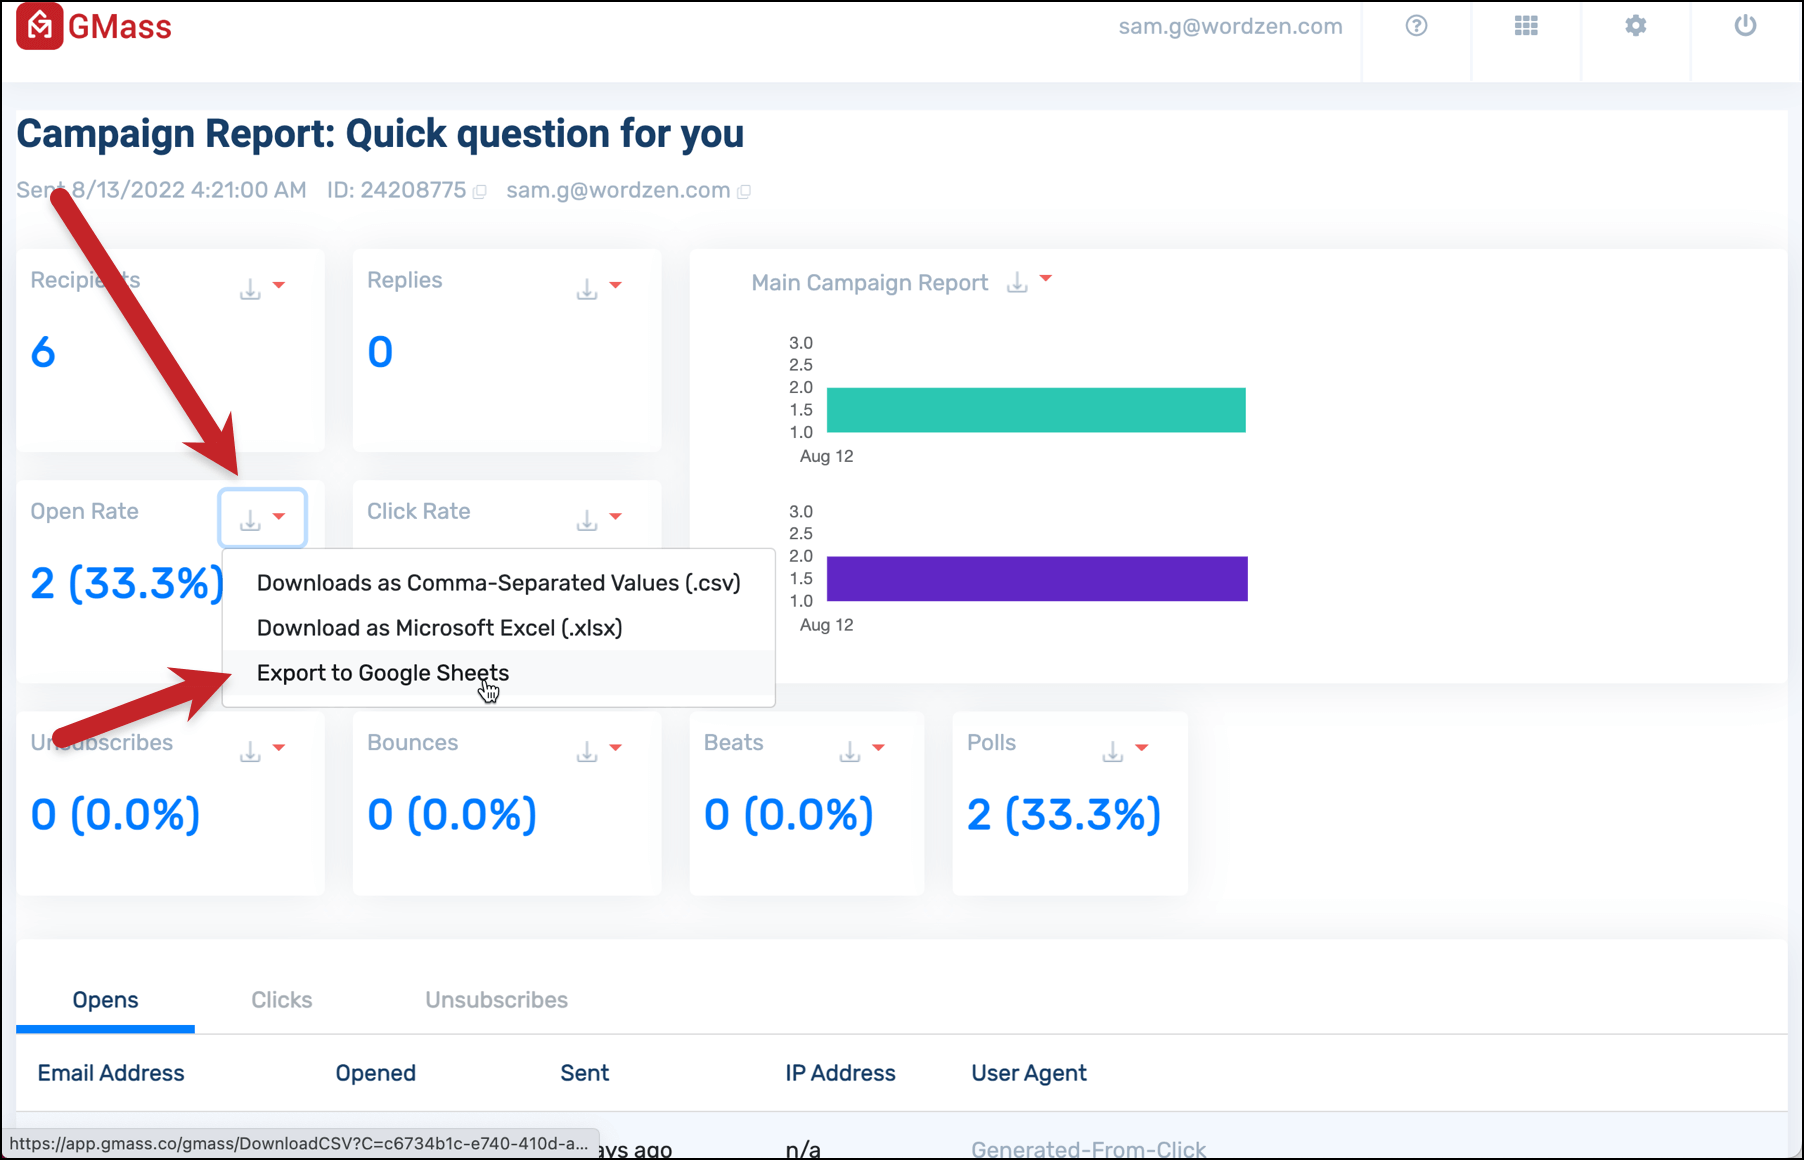
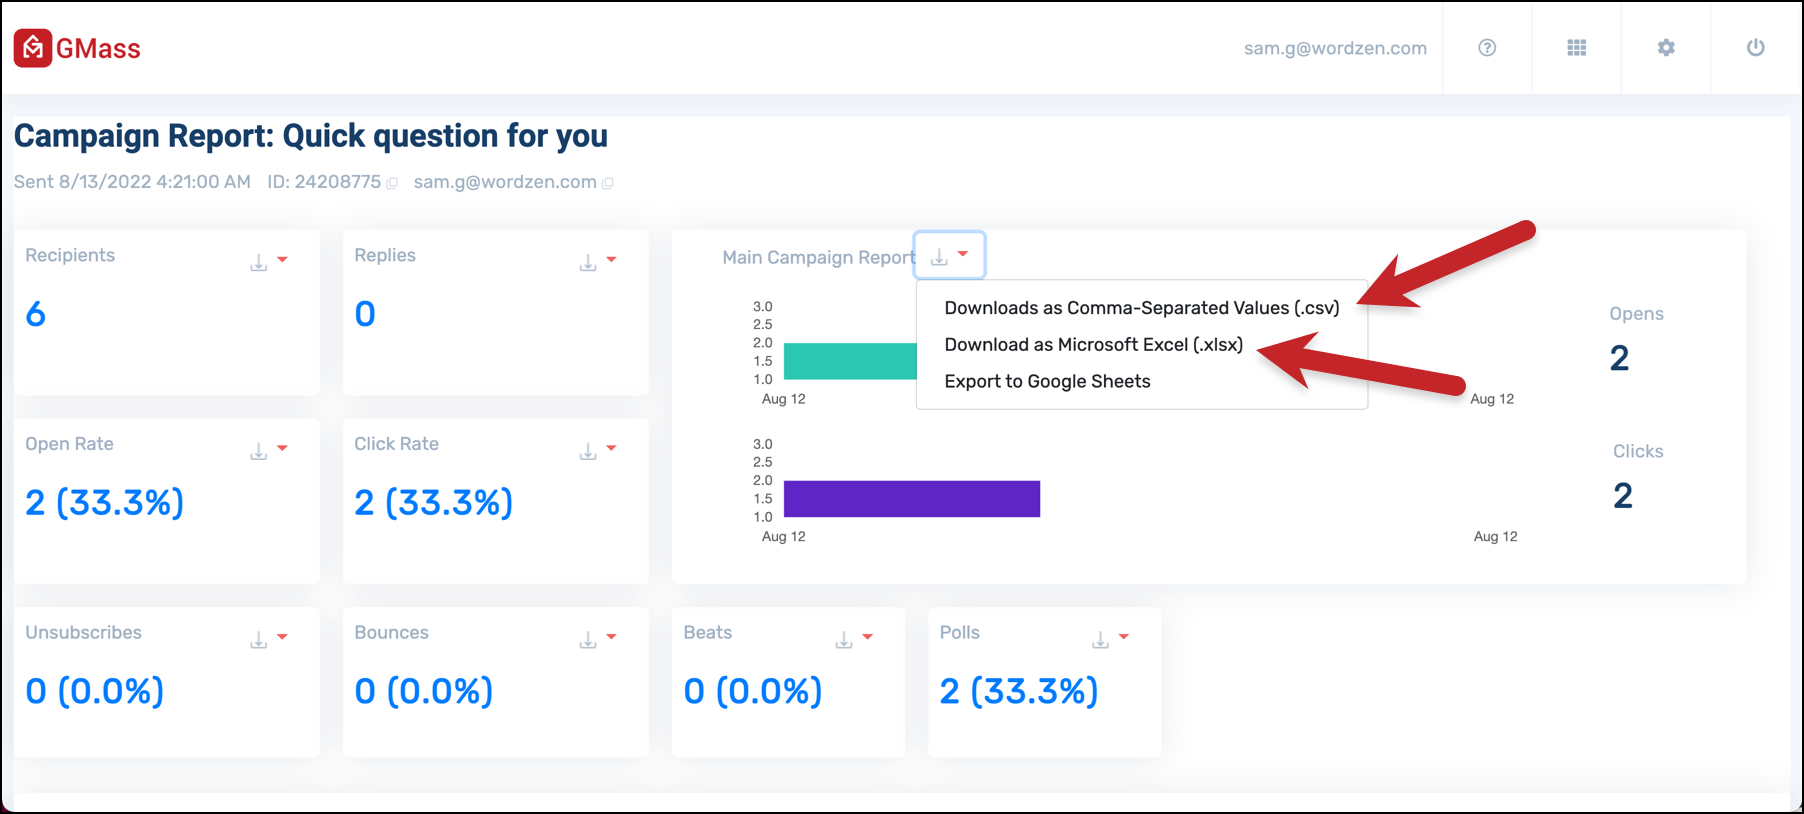
GMass’s web-based campaign reports offers a way for you to export full campaign data to a Google Sheet.
In the web-based report for your campaign, click on the download icon next to “Main Campaign Report”. Then choose “Export to Google Sheets”.
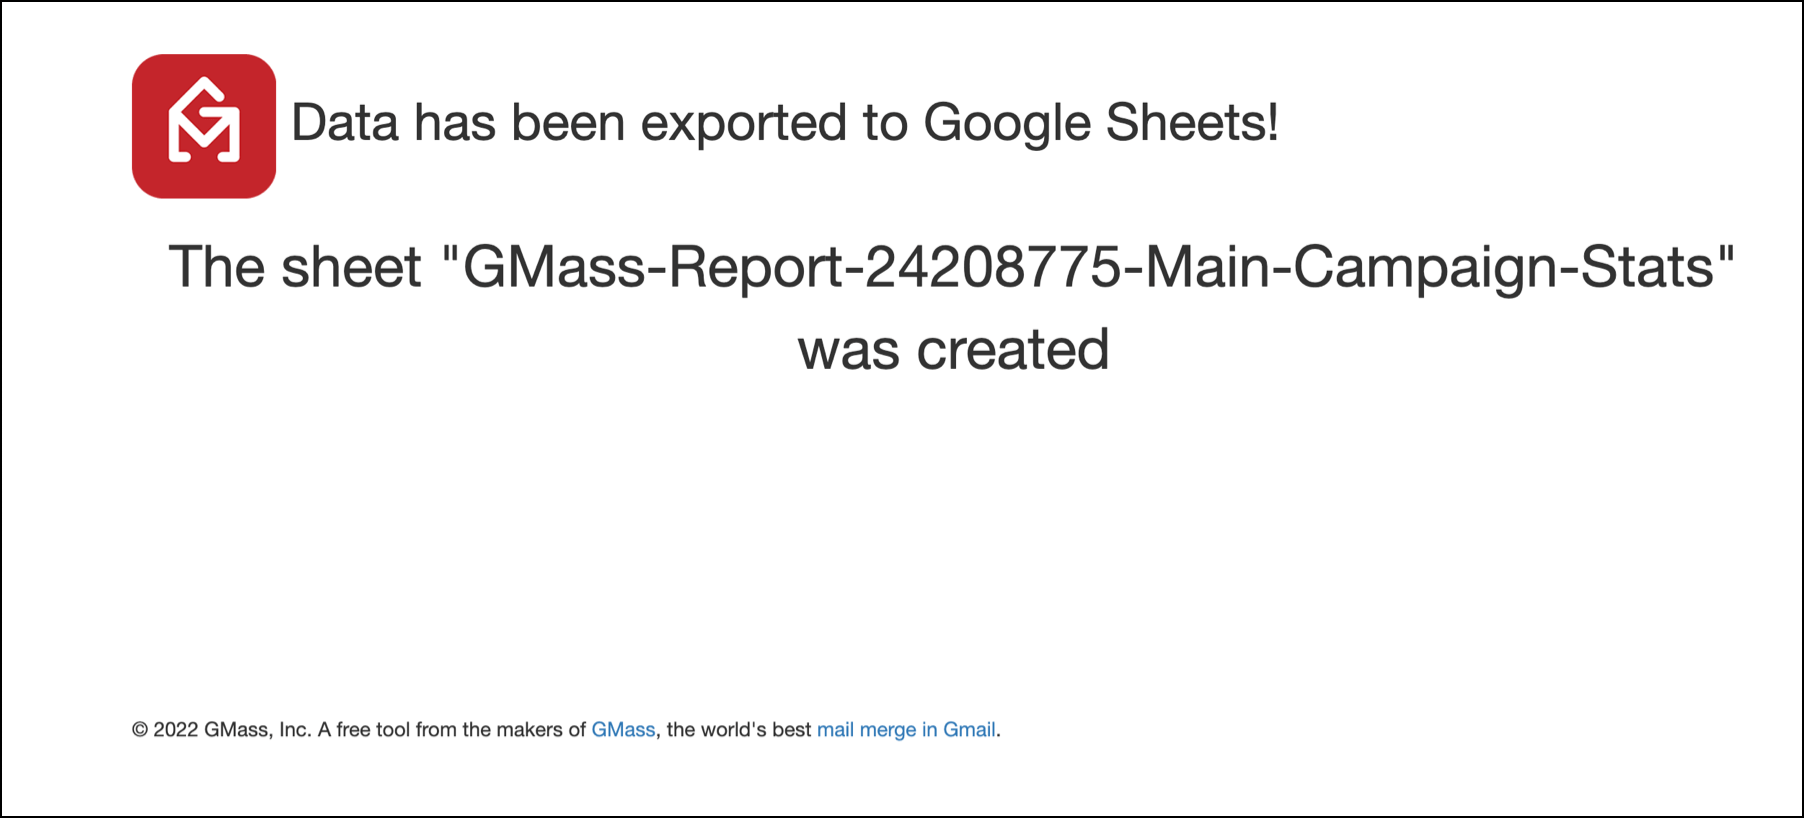
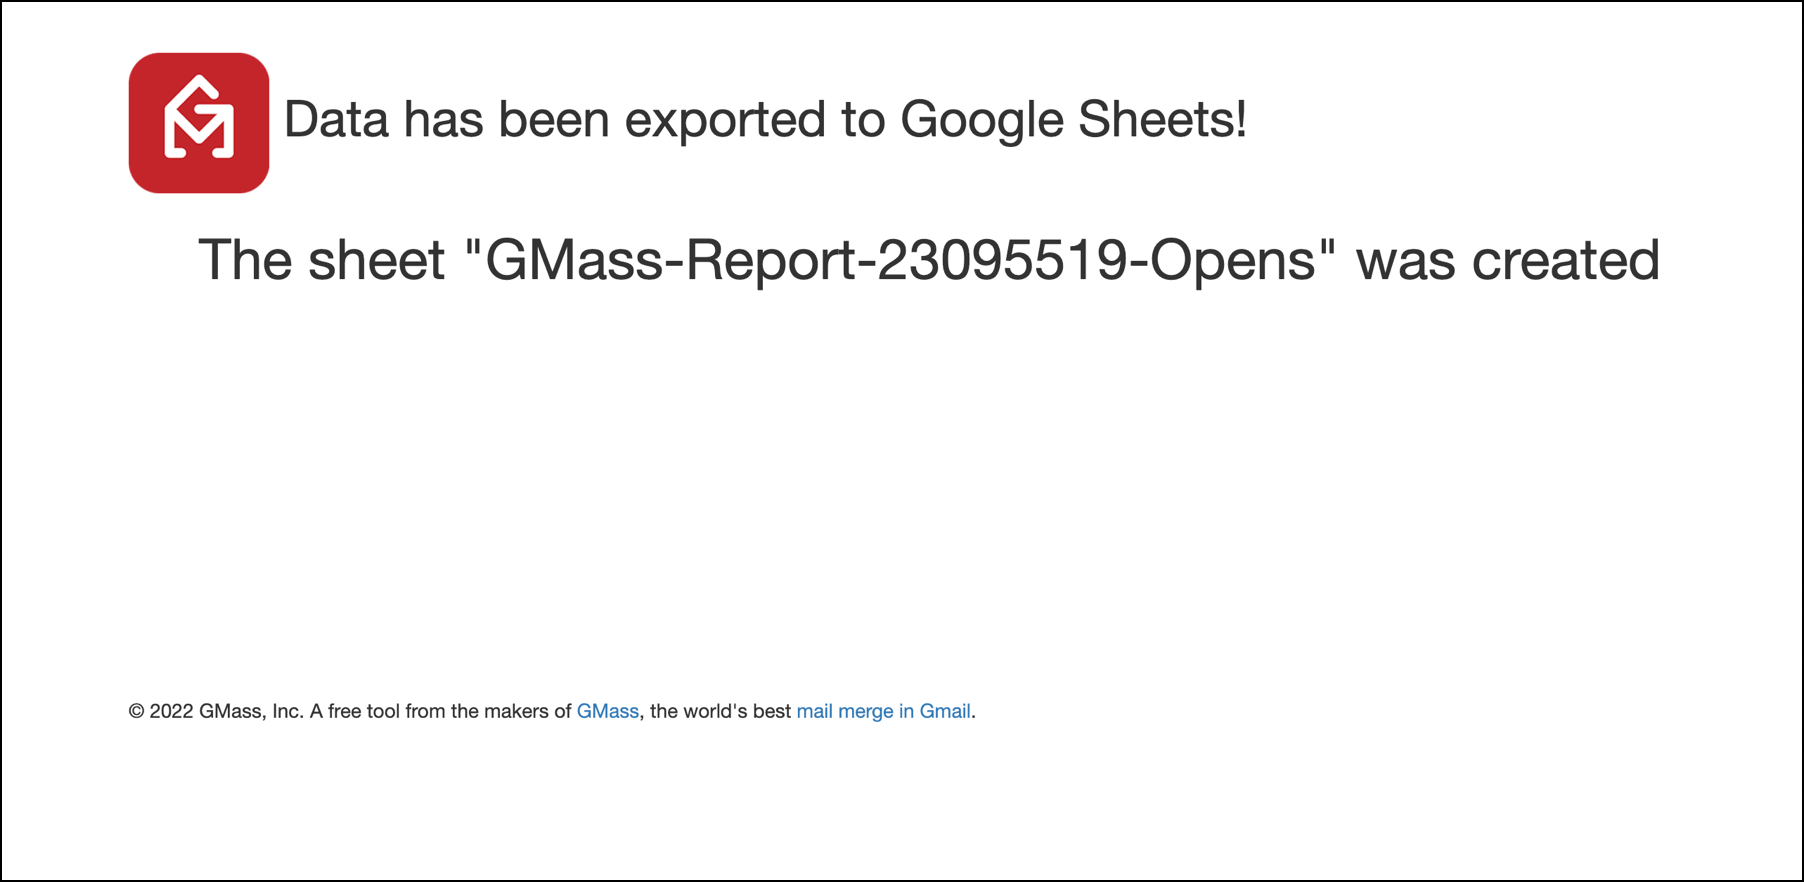
GMass will then take a moment to export to Google Sheets and let you know the name of the sheet.
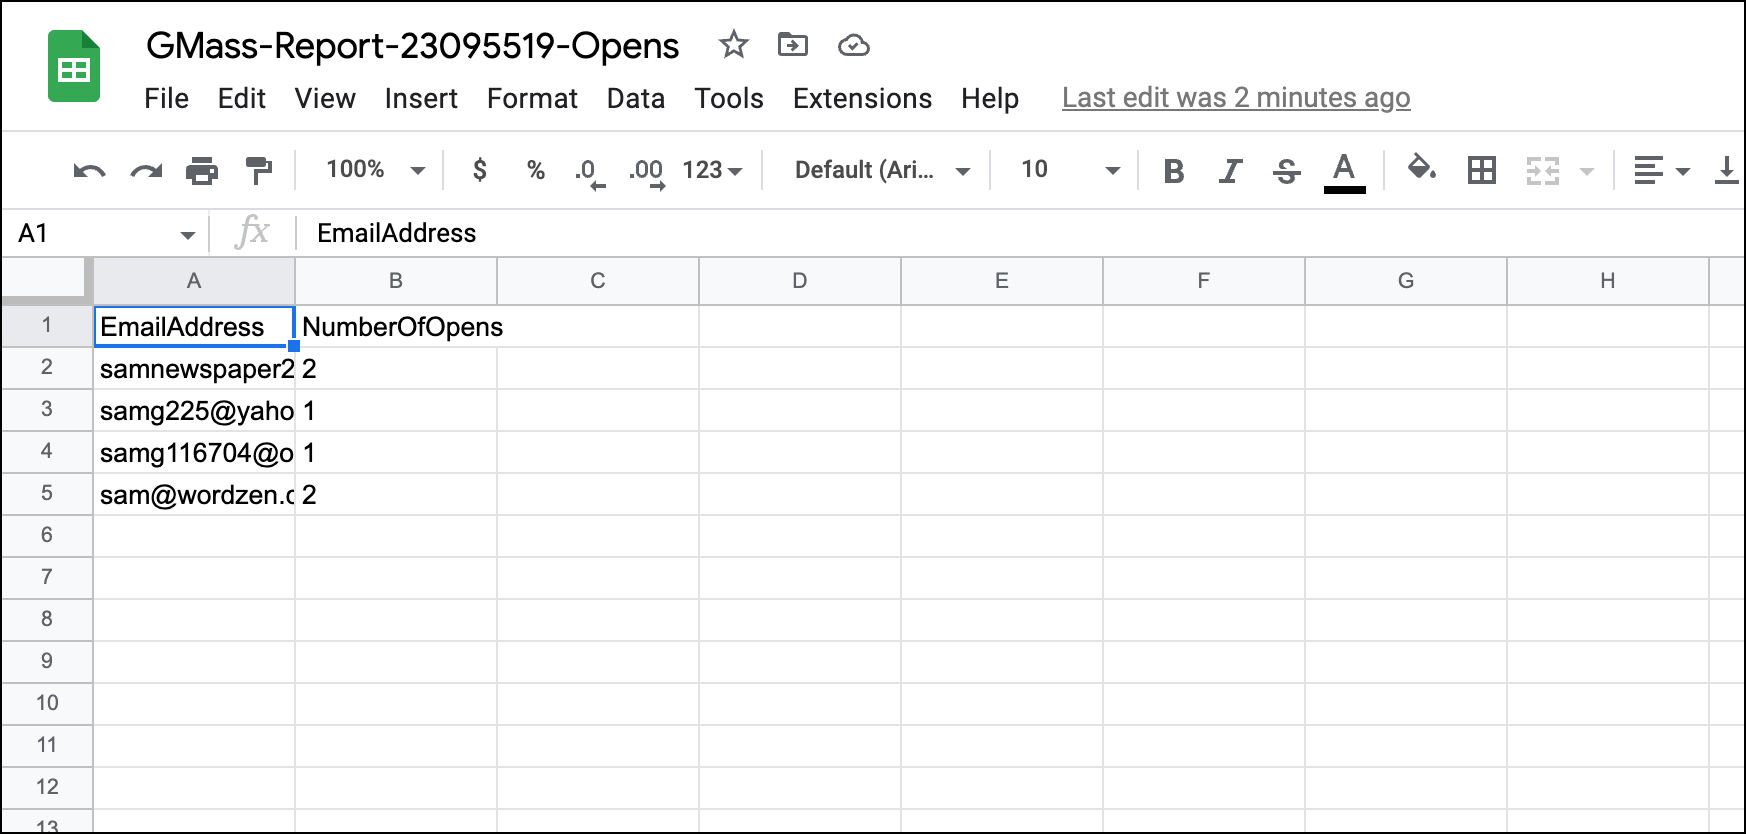
Now you can check out your results in Google Sheets.
And if you want to merge this data with the original Google Sheet you used for your campaign, you can copy and paste it in. Just make sure both Sheets are sorted the same way so the right data goes in the right spot. (For instance, sort both by email address, then paste in the new data.)
You can also export individual stat reports to Google Sheets
Want to export the results from an individual stat to Google Sheets? You can do that in both the web-based campaign report and from the GMass dashboard reports.
In the web-based campaign report, click on the download icon in any statistic box, then choose “Export to Google Sheets”.
In the dashboard, click on the number for any stat in a campaign. Then click the “Download” link at the top of the right fly-out panel. (Note: This method also works on the web-based report; when you click on stats in that report you’ll also get the right panel with the download option.)
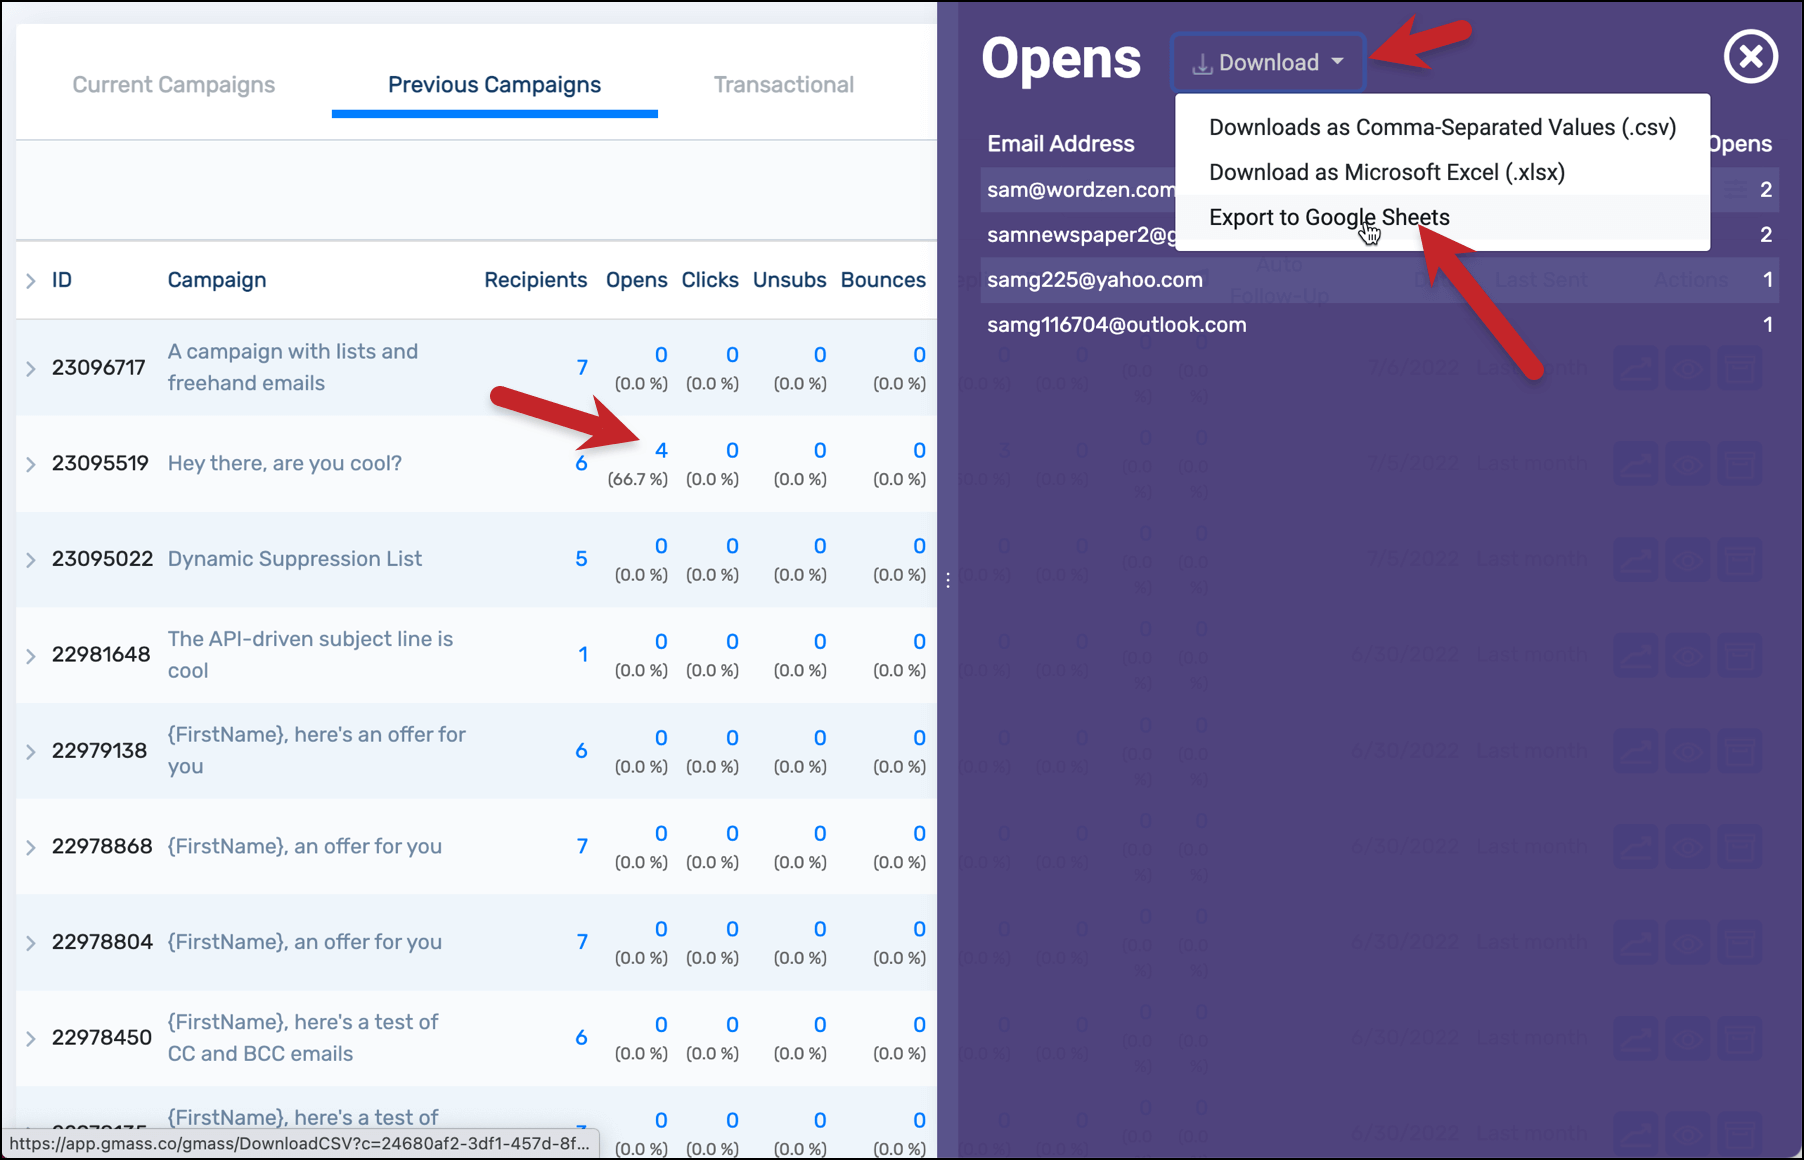
In both cases, GMass will export your Google Sheet (and tell you the name of the Sheet file).
You can now open that report in Google Sheets.
Method #3: Download Campaign Data as a CSV or Excel File, Then Import to Google Sheets
While this method doesn’t make sense — since you can just export your data directly to Google Sheets — you could download your campaign data as a CSV or Excel file, then import to Google Sheets.
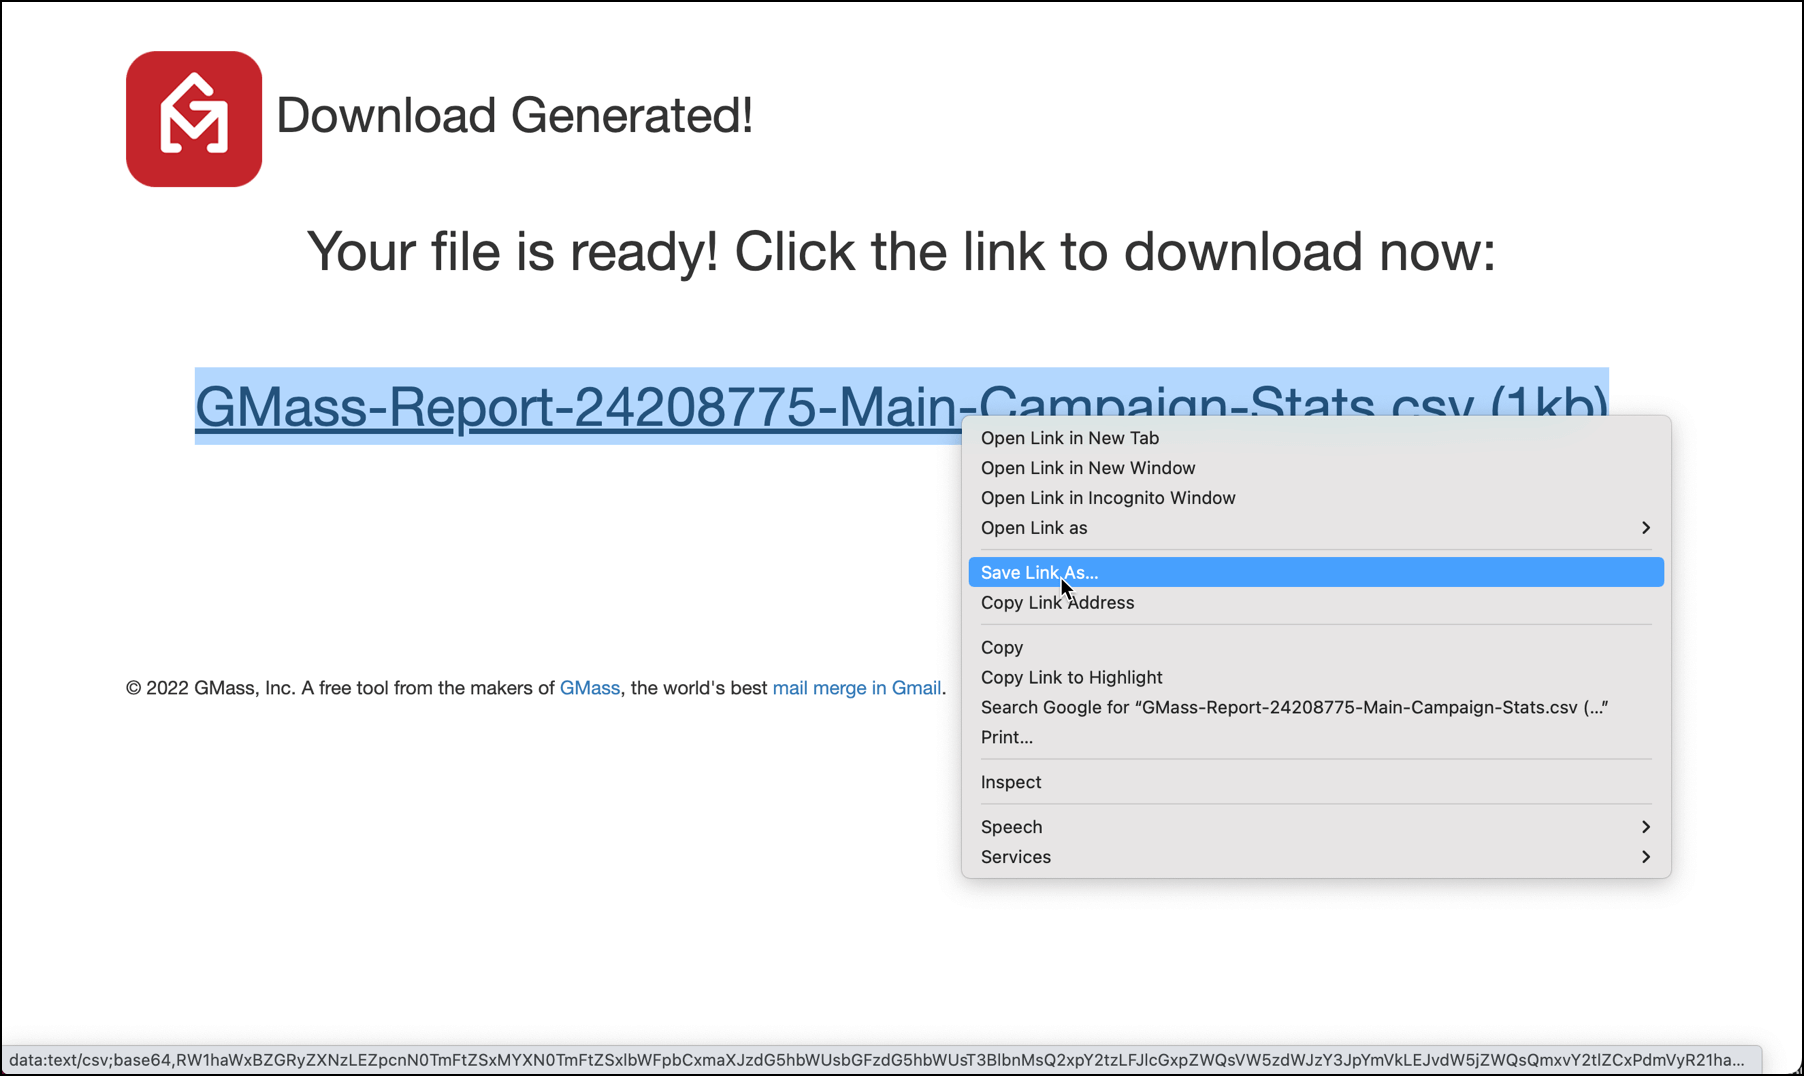
If you want to use this method, go to the web-based campaign report, click the download icon in the Main Campaign Report section, then choose the CSV or Excel option.
Once GMass generates the download, right click on the file to save it.
Then head into Google Sheets. Open a blank sheet. Go to the File menu and choose Import.
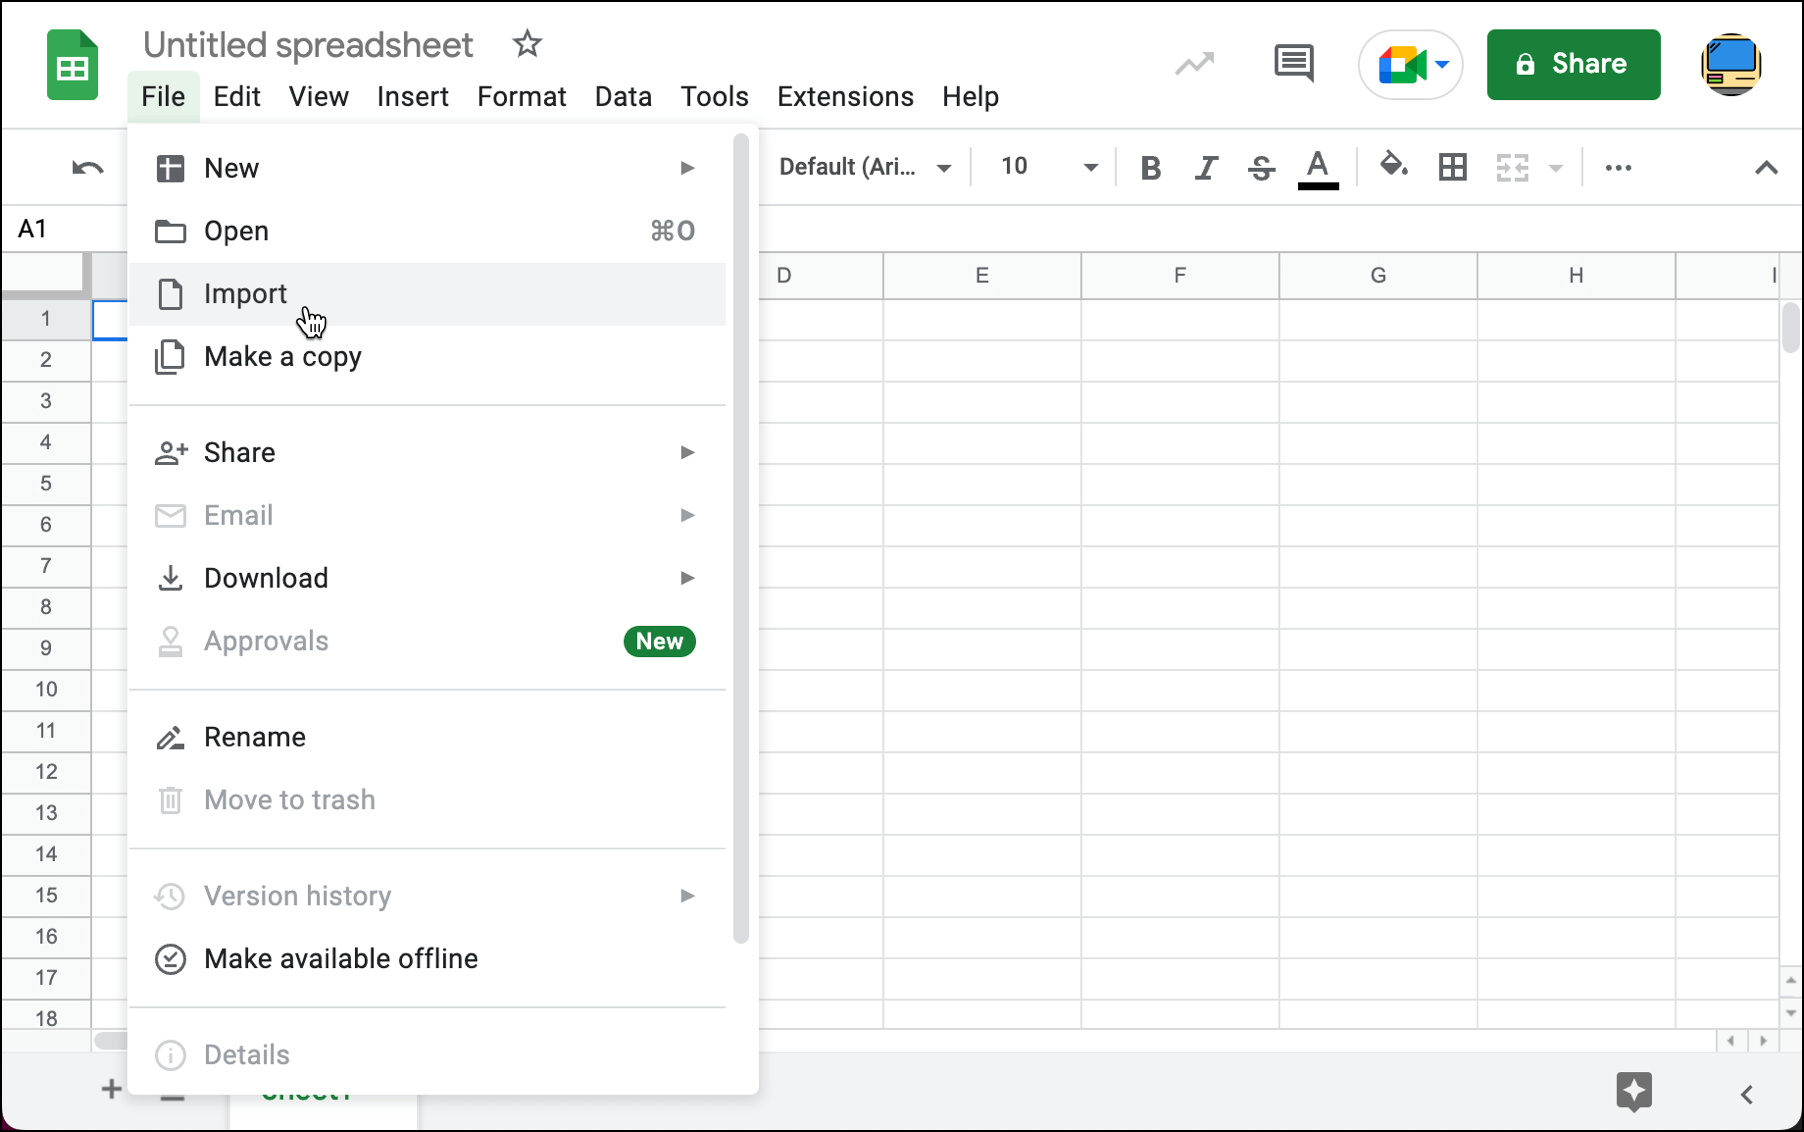
Choose “Upload” then pick the file on your computer. Google’s default options to “Replace spreadsheet” and “Detect automatically” are correct. Click “Import Data.”
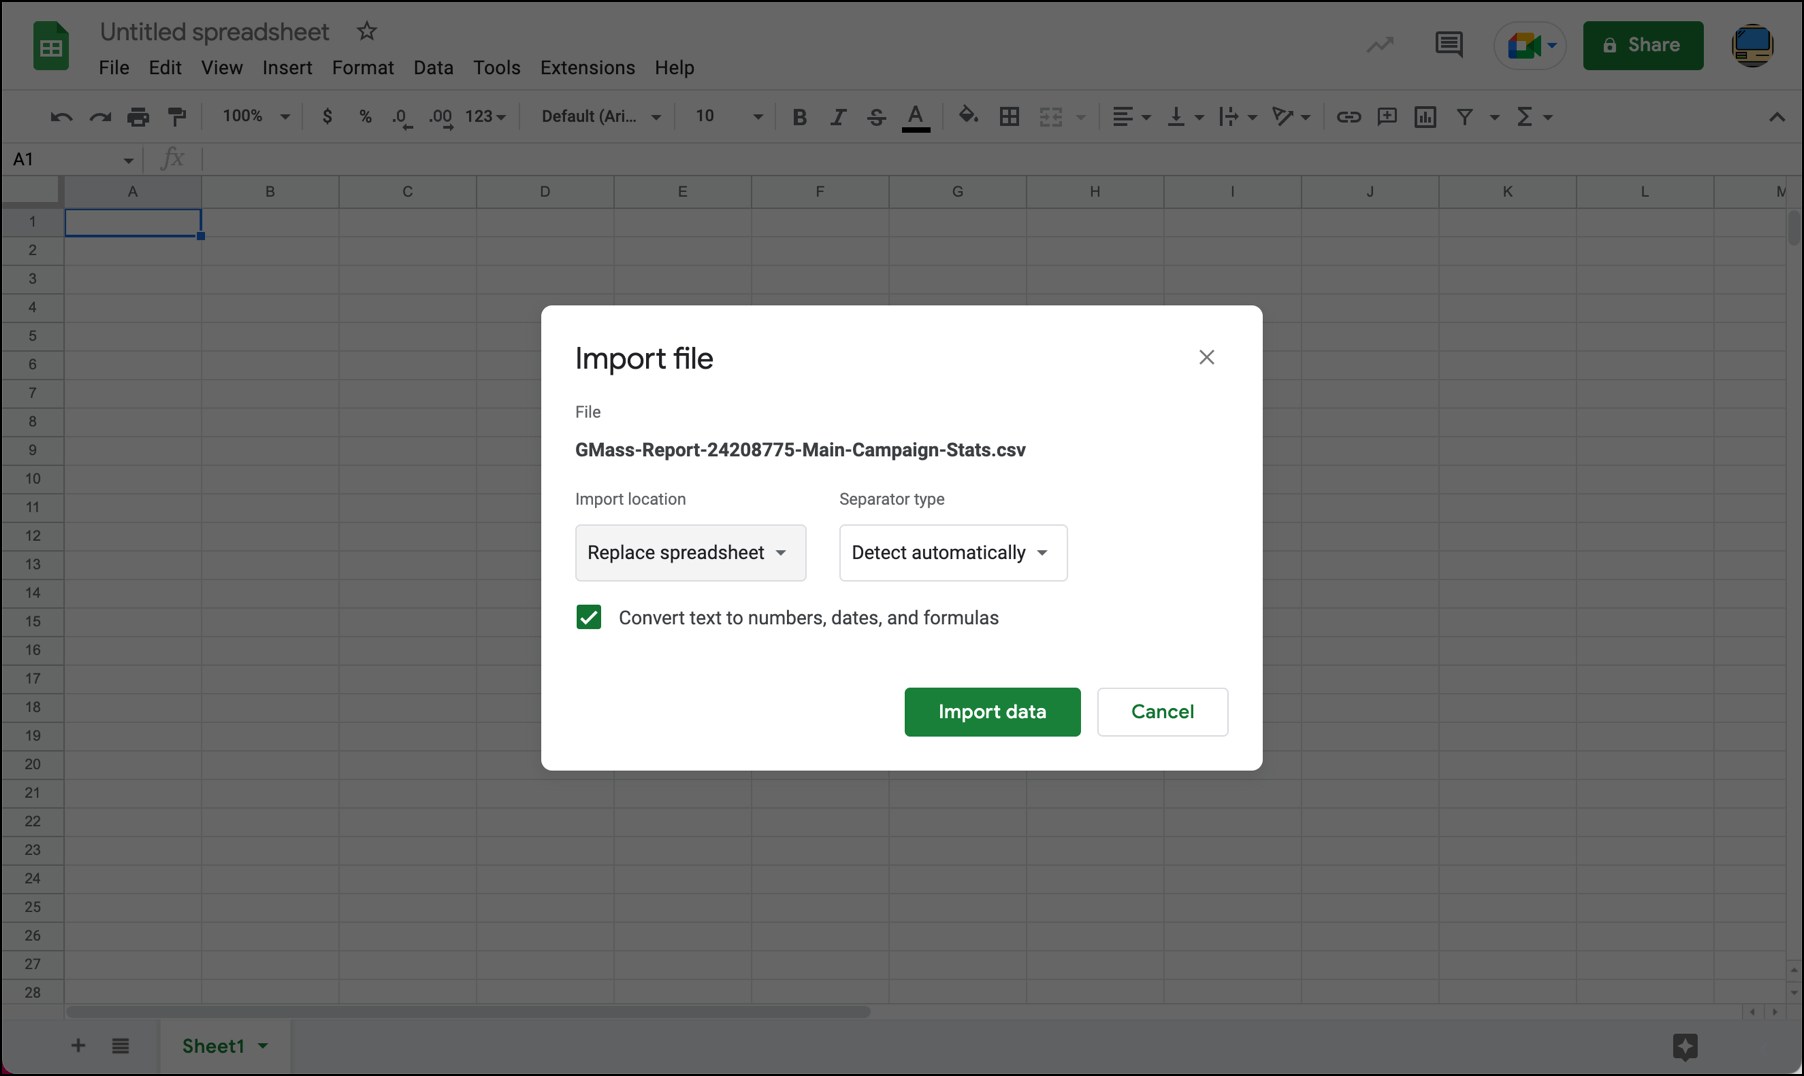
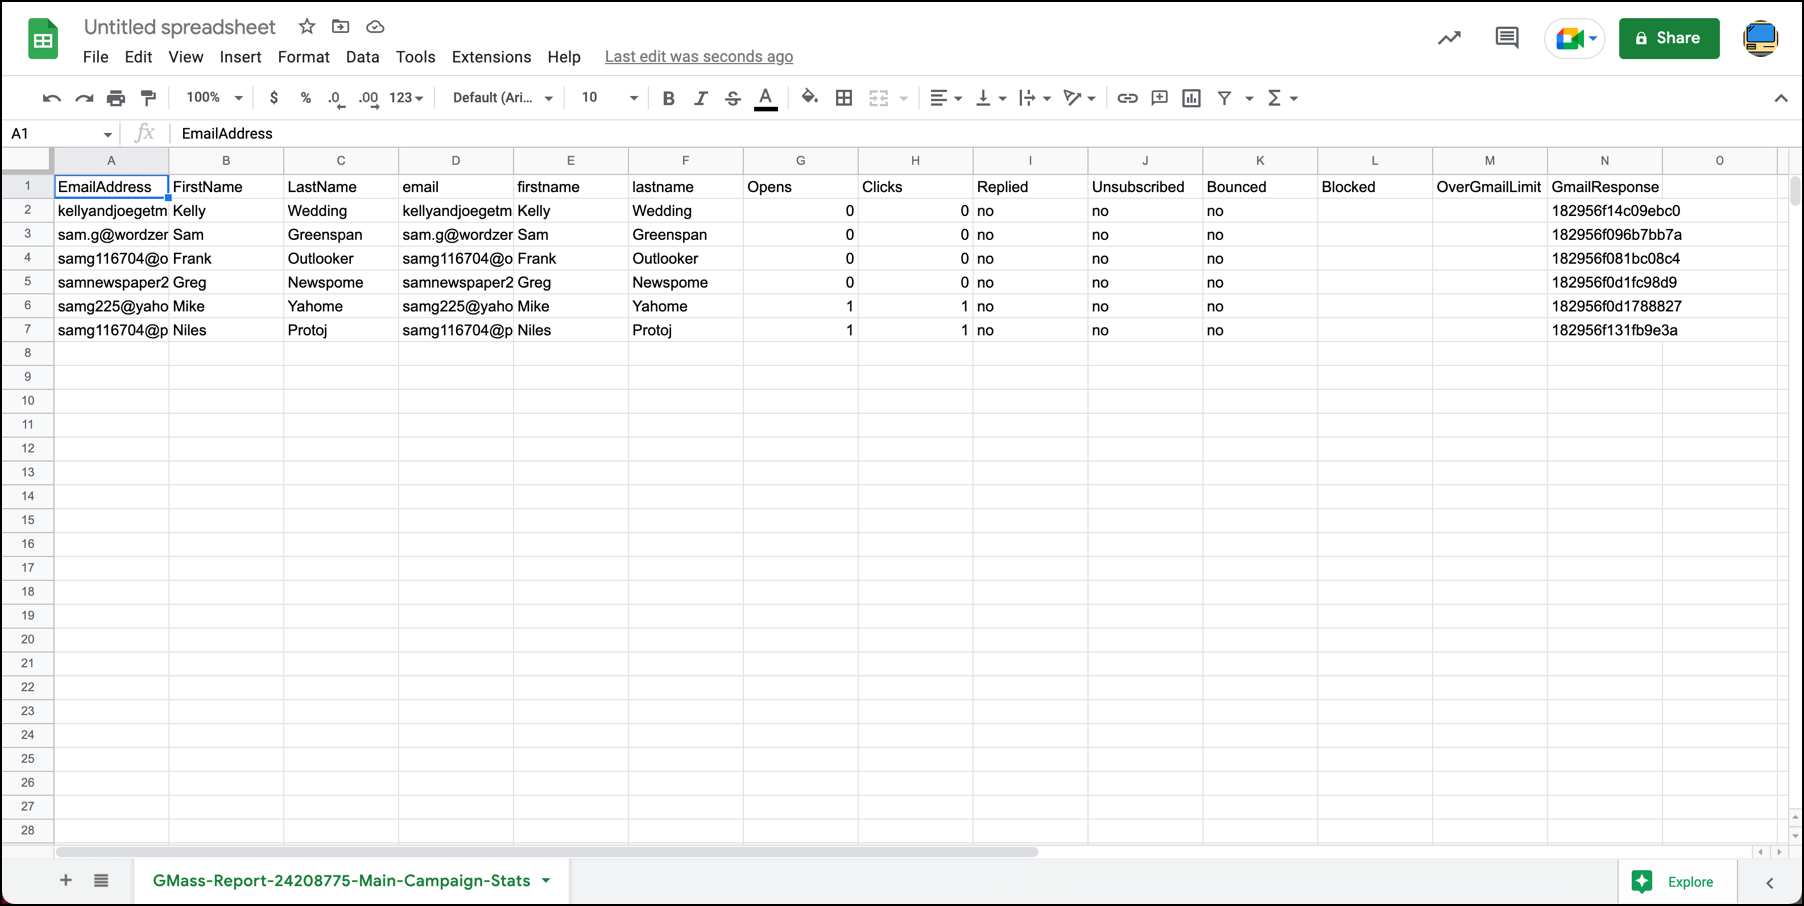
Your data is now in your Google Sheet.
Again, there’s no particularly good reason to get your data into Google Sheets this way. But it is an option.
Updating Google Sheets with Campaign Data: Pros and Cons of the Different Methods
We’ve now covered the three methods for getting your campaign data into Google Sheets. Here are the pros and cons of the methods as you’re choosing between them.
GMass automatically updating Google Sheet
Pros:
- Requires no manual work on your part
- Unifies your campaign into a sole Google Sheet
Cons:
- Does not show you numbers for stats like opens and clicks, just shows an “X” whether someone opens the email once, twice, or 17 times
- If you use one Google Sheet for multiple campaigns, this method stops making sense
- You may not want your list spreadsheets to contain data; you want to keep the two separate
Exporting campaign reports to Google Sheets
Pros:
- Numbers for stats like opens and clicks (so you’d see how many times someone opened)
- Your full list information and campaign data is all in one place
- If you’re using one Google Sheet for multiple campaigns this is a better option than updating the Sheet
Cons:
- Requires manual work on your part to export this file, then more manual work if you want to combine it with your original campaign spreadsheet
- You now have two Google Sheets for the campaign rather than everything unified in one spot
Exporting campaign reports as CSV or Excel file then importing to Google Sheets
Pros:
- Only pro is if you want to edit the data in another spreadsheet app before importing to Google Sheets
Cons:
- Adds lots and lots of unnecessary steps
Whatever you choose, we hope you’ll get a lot of benefit out of bringing your campaign reports into Google Sheets — where you can run deep analyses on your campaigns.
GMass is the only tool for marketing emails, cold emails, and mail merge — all inside Gmail. Tons of power but easy to learn and use.
TRY GMASS FOR FREE
Download Chrome extension - 30 second install!
No credit card required

Ajay is the founder of GMass and has been developing email sending software for 20 years.