Create Rich Content for an Automatic Follow-Up Email Sequence

The automatic follow-up email feature allows you set a an automatic timed sequence of emails to be sent to your recipients until they reply or open or click. Sometimes this is also known as a drip campaign or a sequence campaign and is popular amongst cold emailers.
You can also set up your sequence so every recipient gets every email regardless of whether they open, click, or reply — say, for instance, a welcome series where you’re introducing someone to a set of features. This is great for evergreen email sequences.
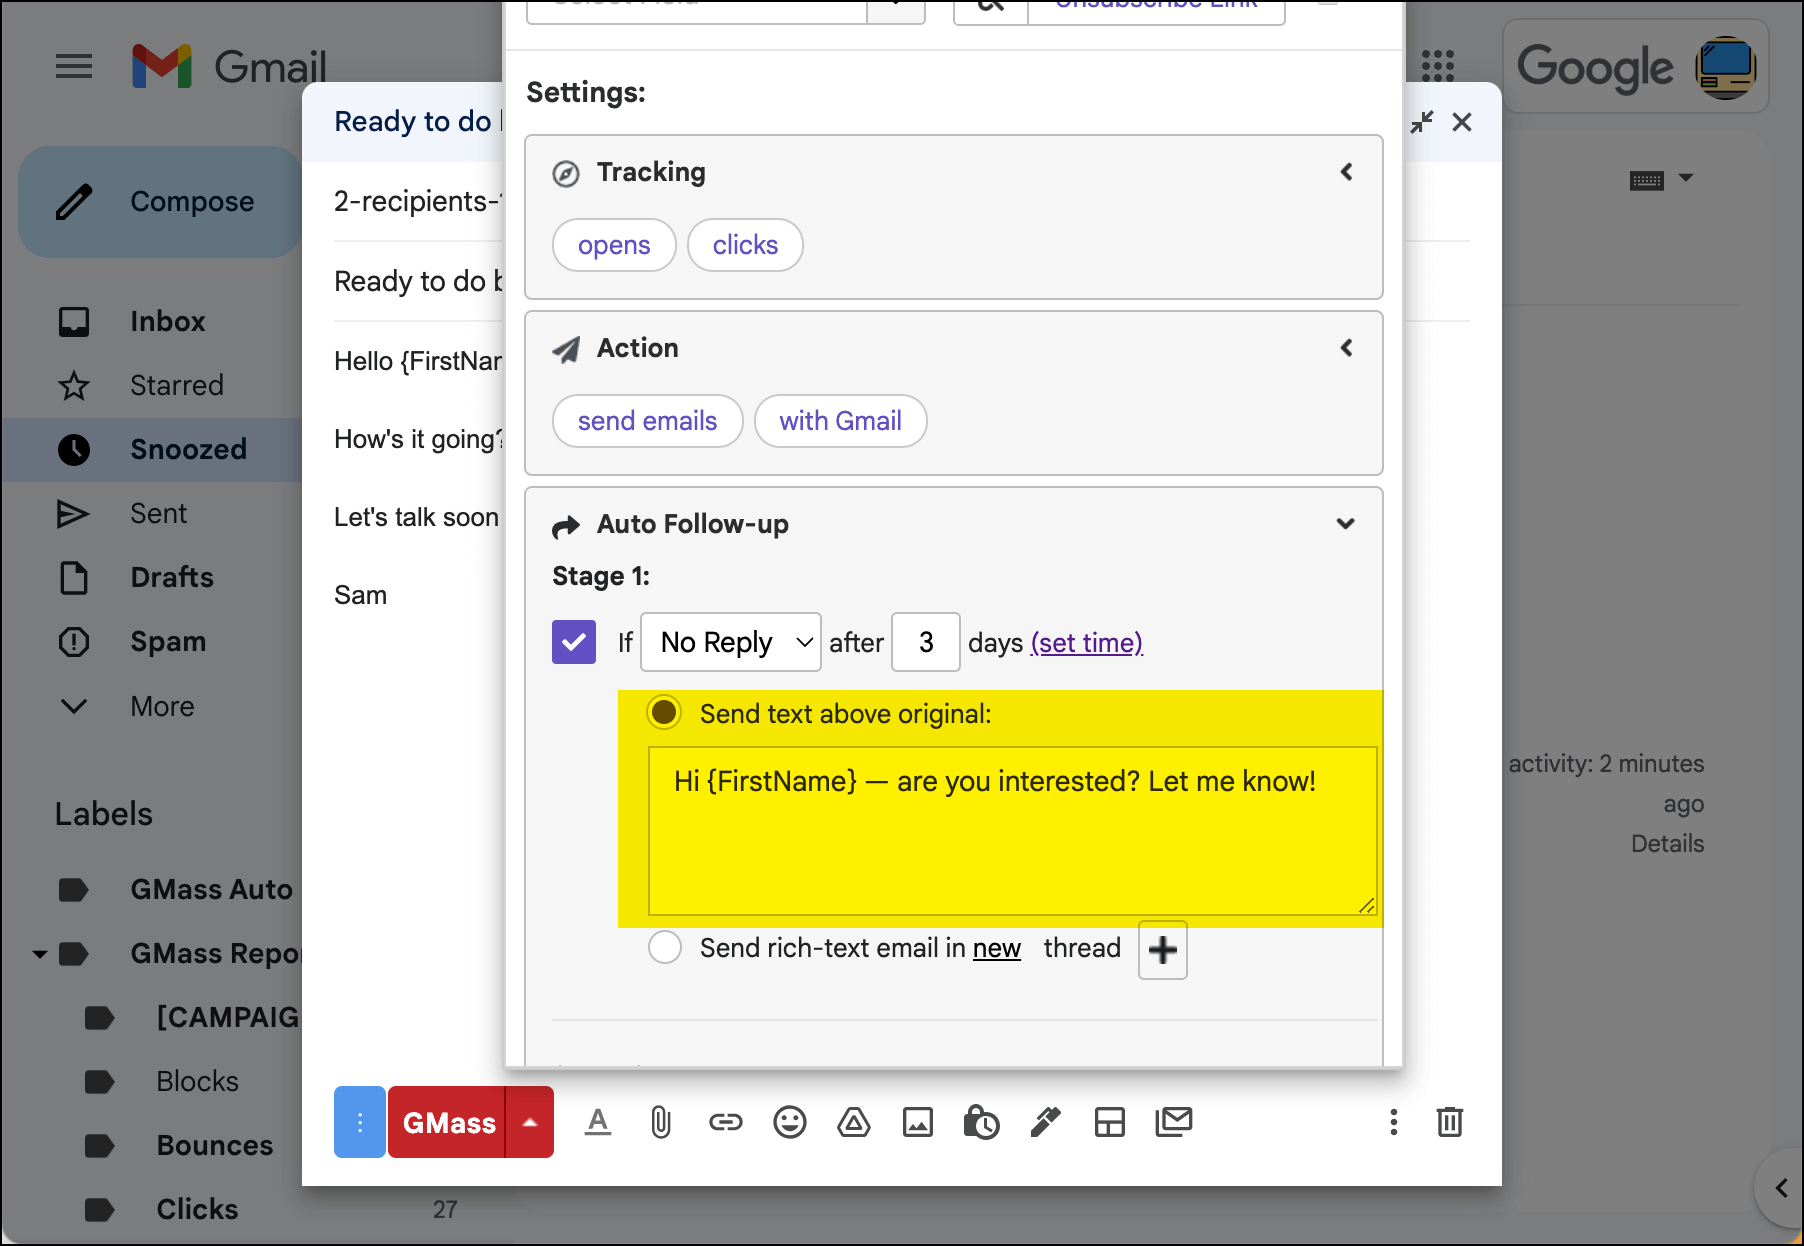
In the GMass interface inside Gmail, it’s easy to set the text of the follow-up email using the default “Send text above original” option, but this option is limited to just text without rich formatting. (You can use mail merge tags.)
Still, even without rich formatting, this option will suffice for most users wanting to use the automatic follow-up email feature.
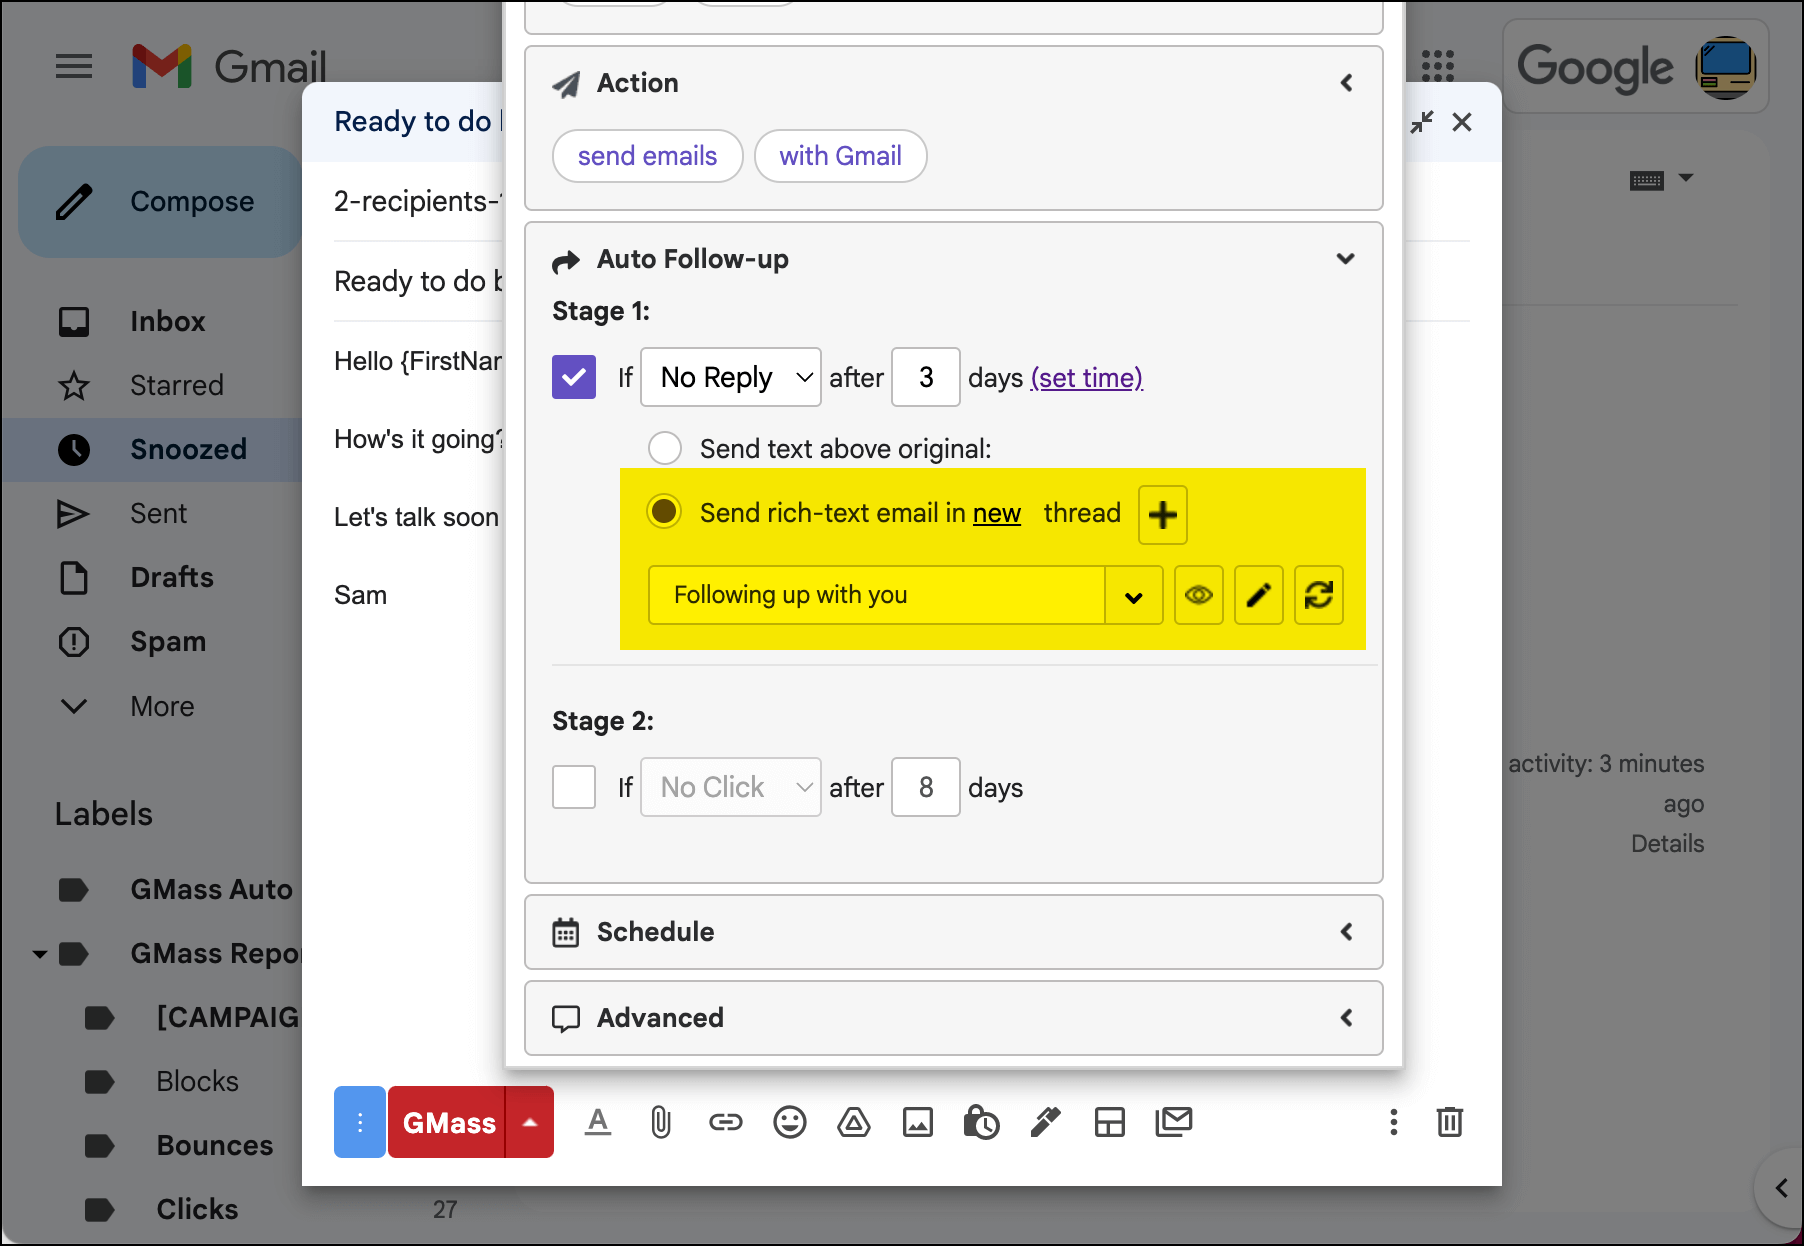
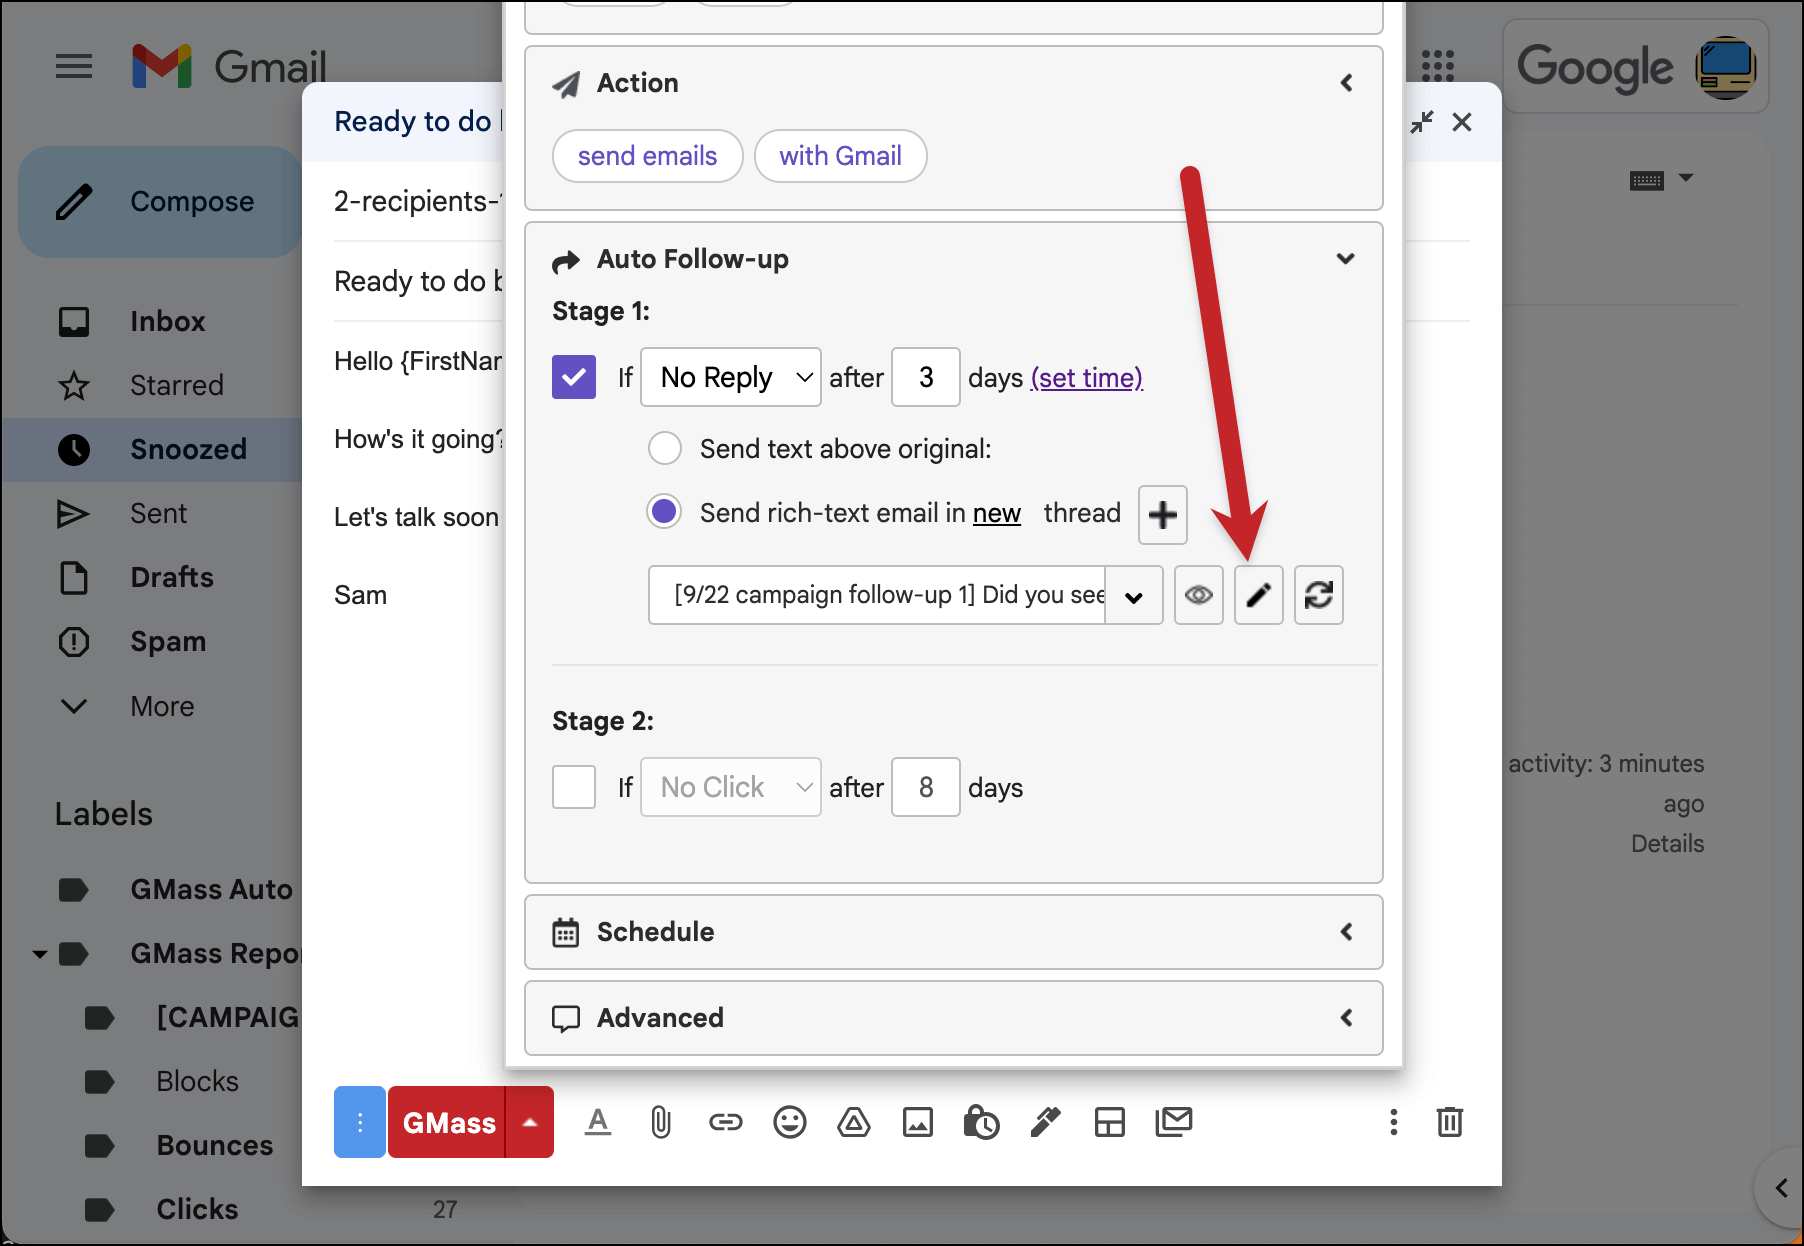
But… if the plain text option doesn’t suffice for your purposes and you want to apply formatting like hyperlinks, formatted text, images, or attachments to the follow-up email, then you need to choose the Send rich text… option rather than Send text above original.
If you want to have click tracking in your follow-up, you need to use rich-text as HTML is required for click tracking.
You’ll also need to use the rich text option if you want your follow-up to start a new thread with a new subject line, rather than going out as a reply in the same thread as the initial email.
This article will teach you how to create the follow-ups you can choose from that dropdown, as well as how to edit those follow-up templates in the future.
In order to set formatted content as a follow-up email, you first need to create the content and save it in the GMass system.
How to Create and Use a Rich Text Follow-Up Template
Creating your rich text follow-up template
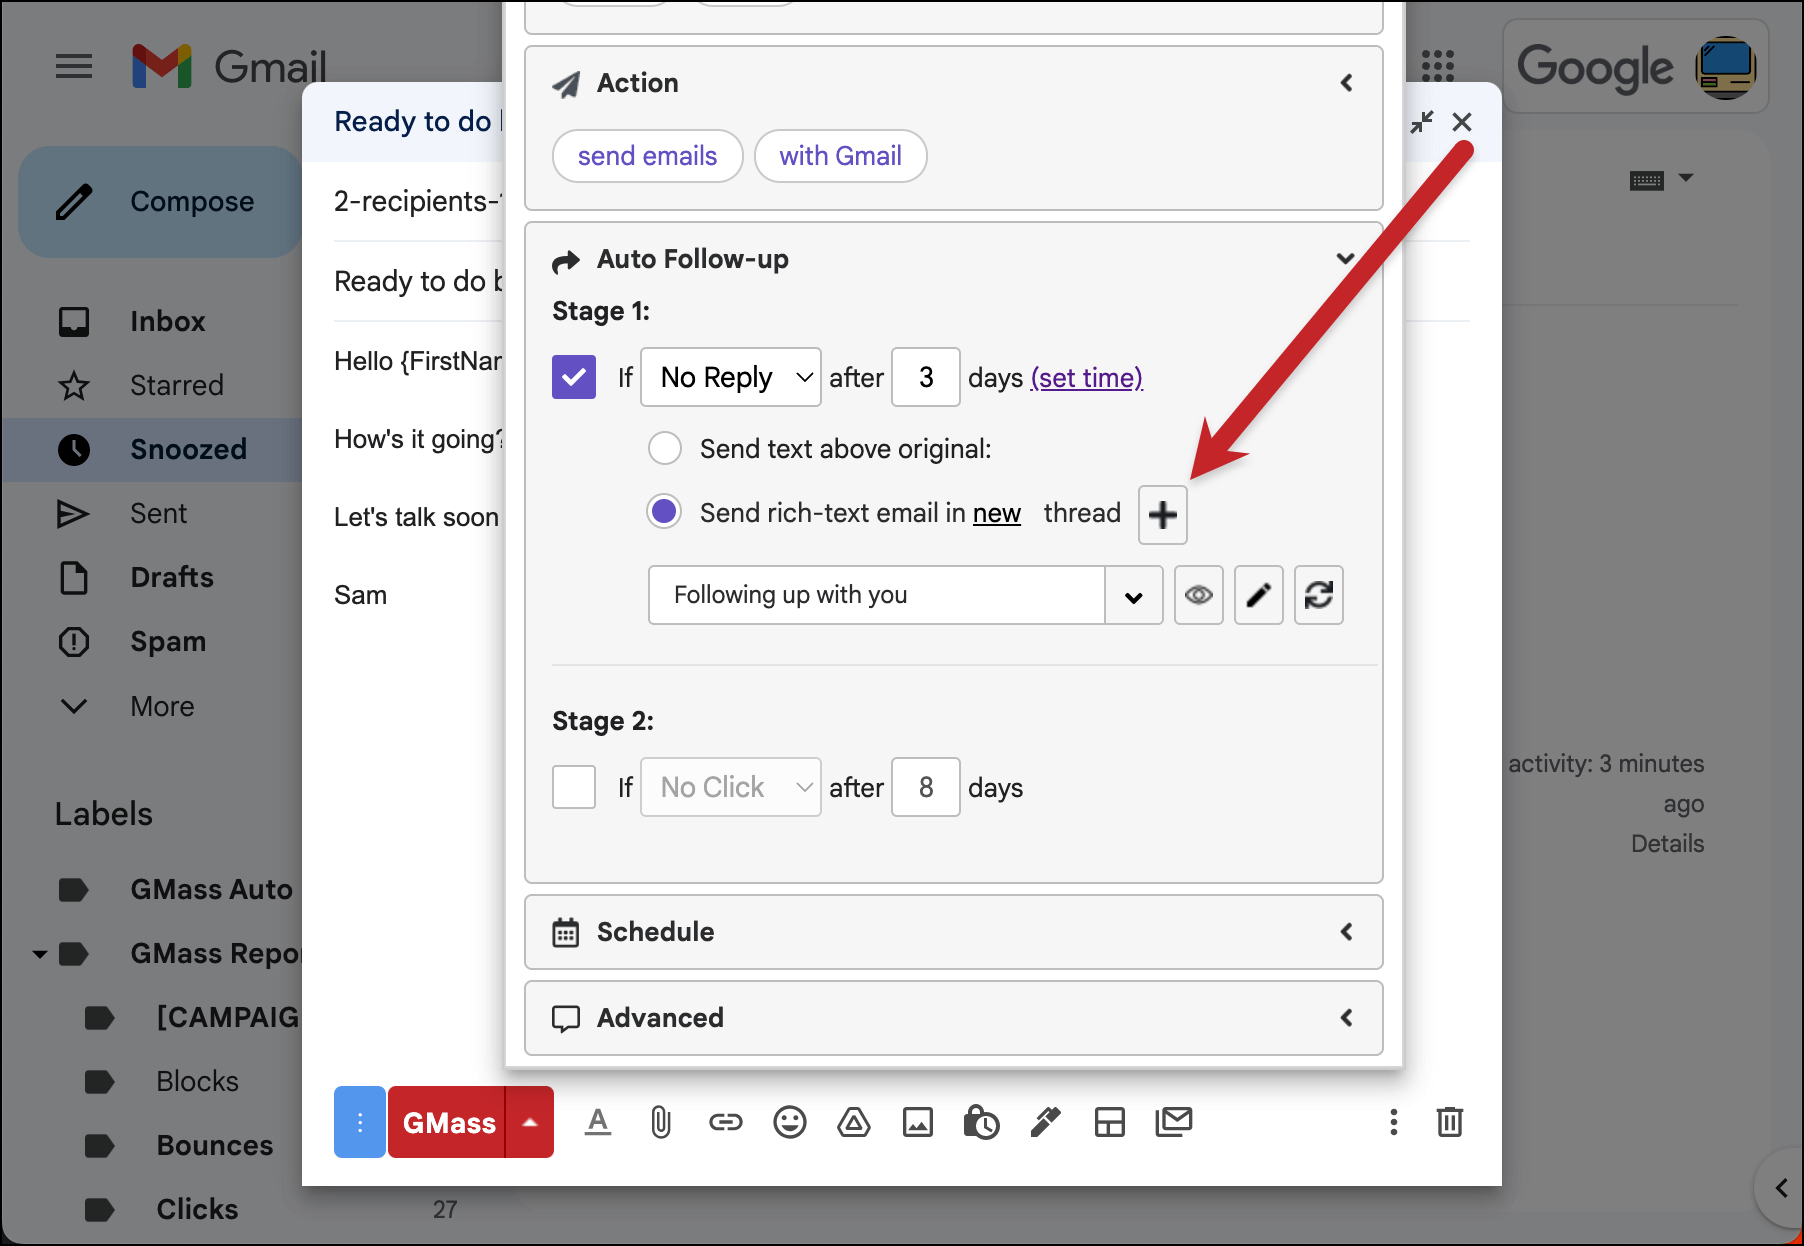
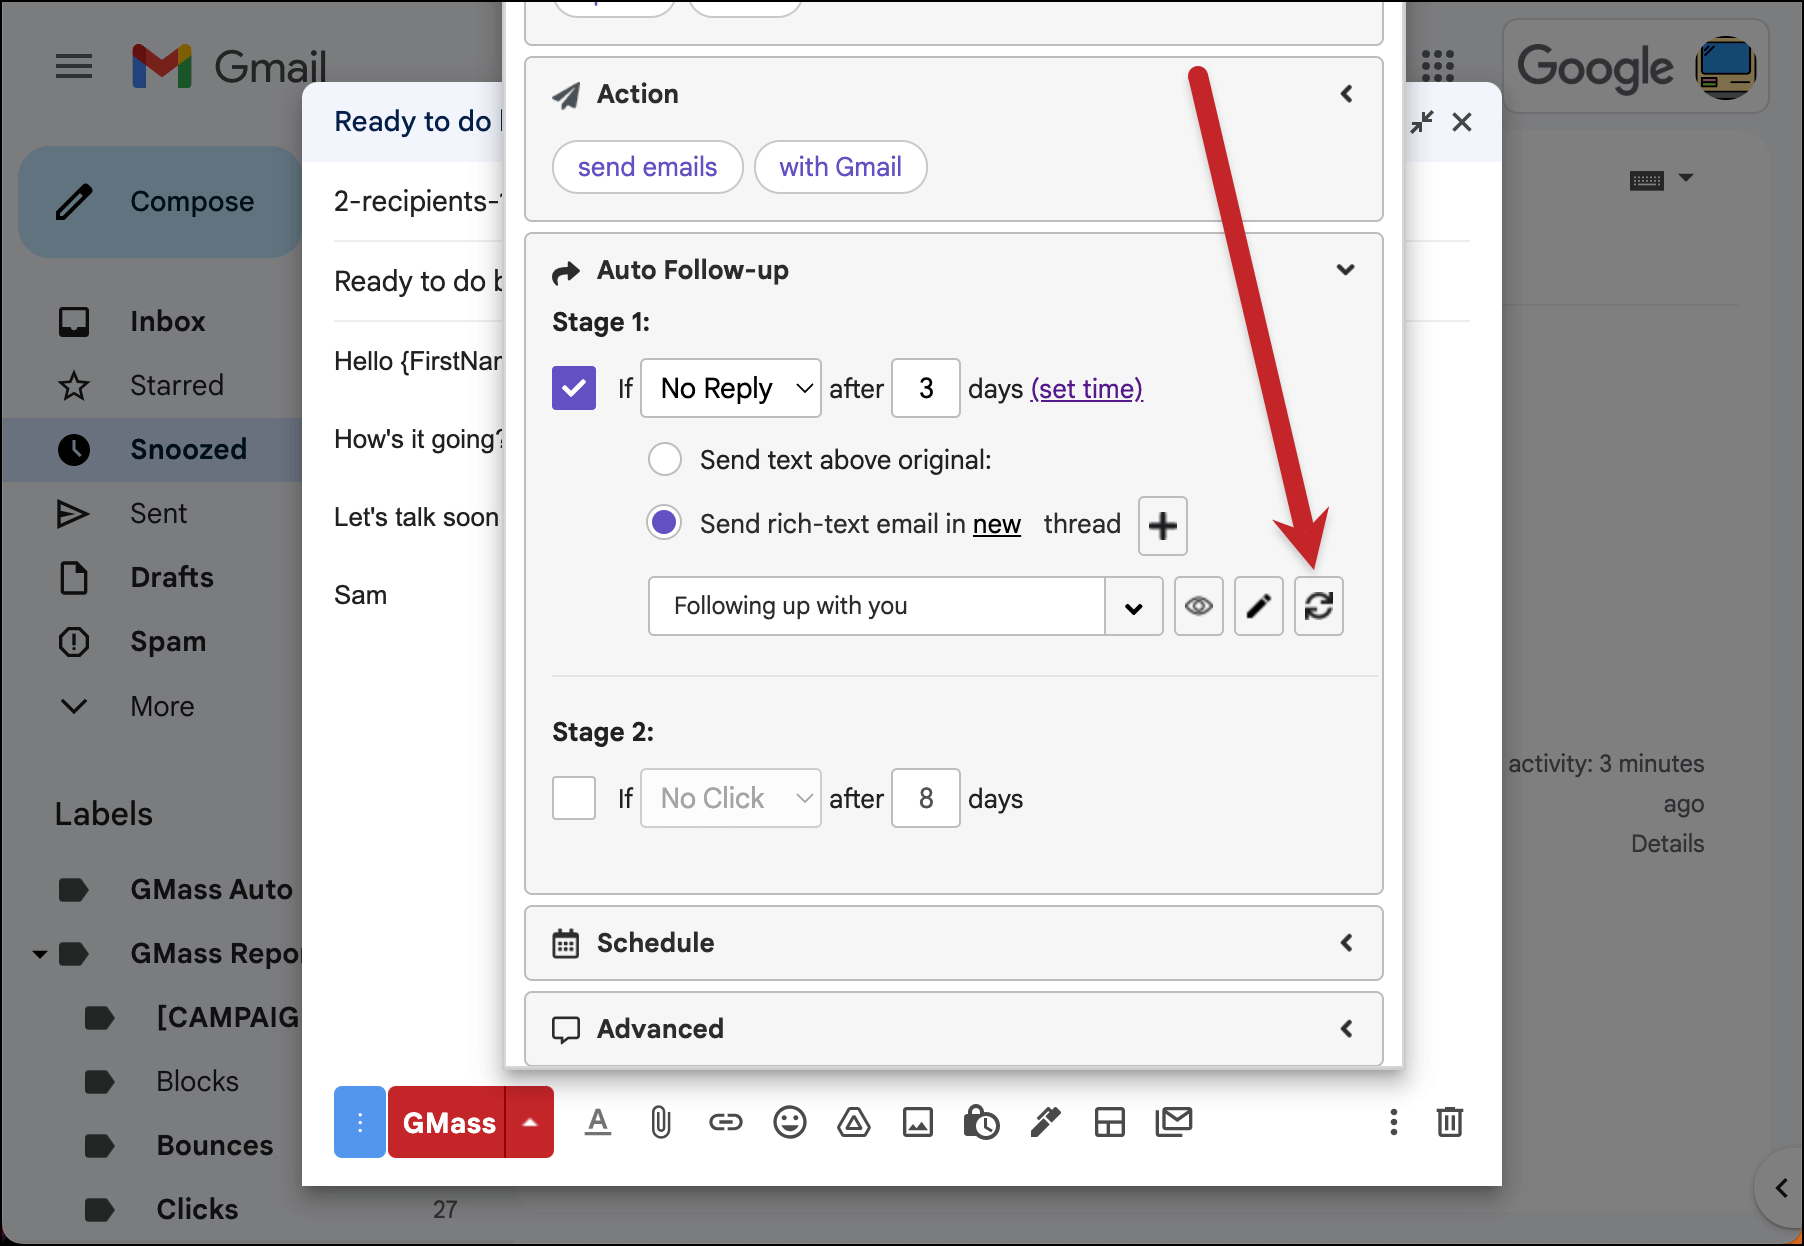
Click the plus sign button (+) in the Auto Follow-up section of the GMass campaign settings box.
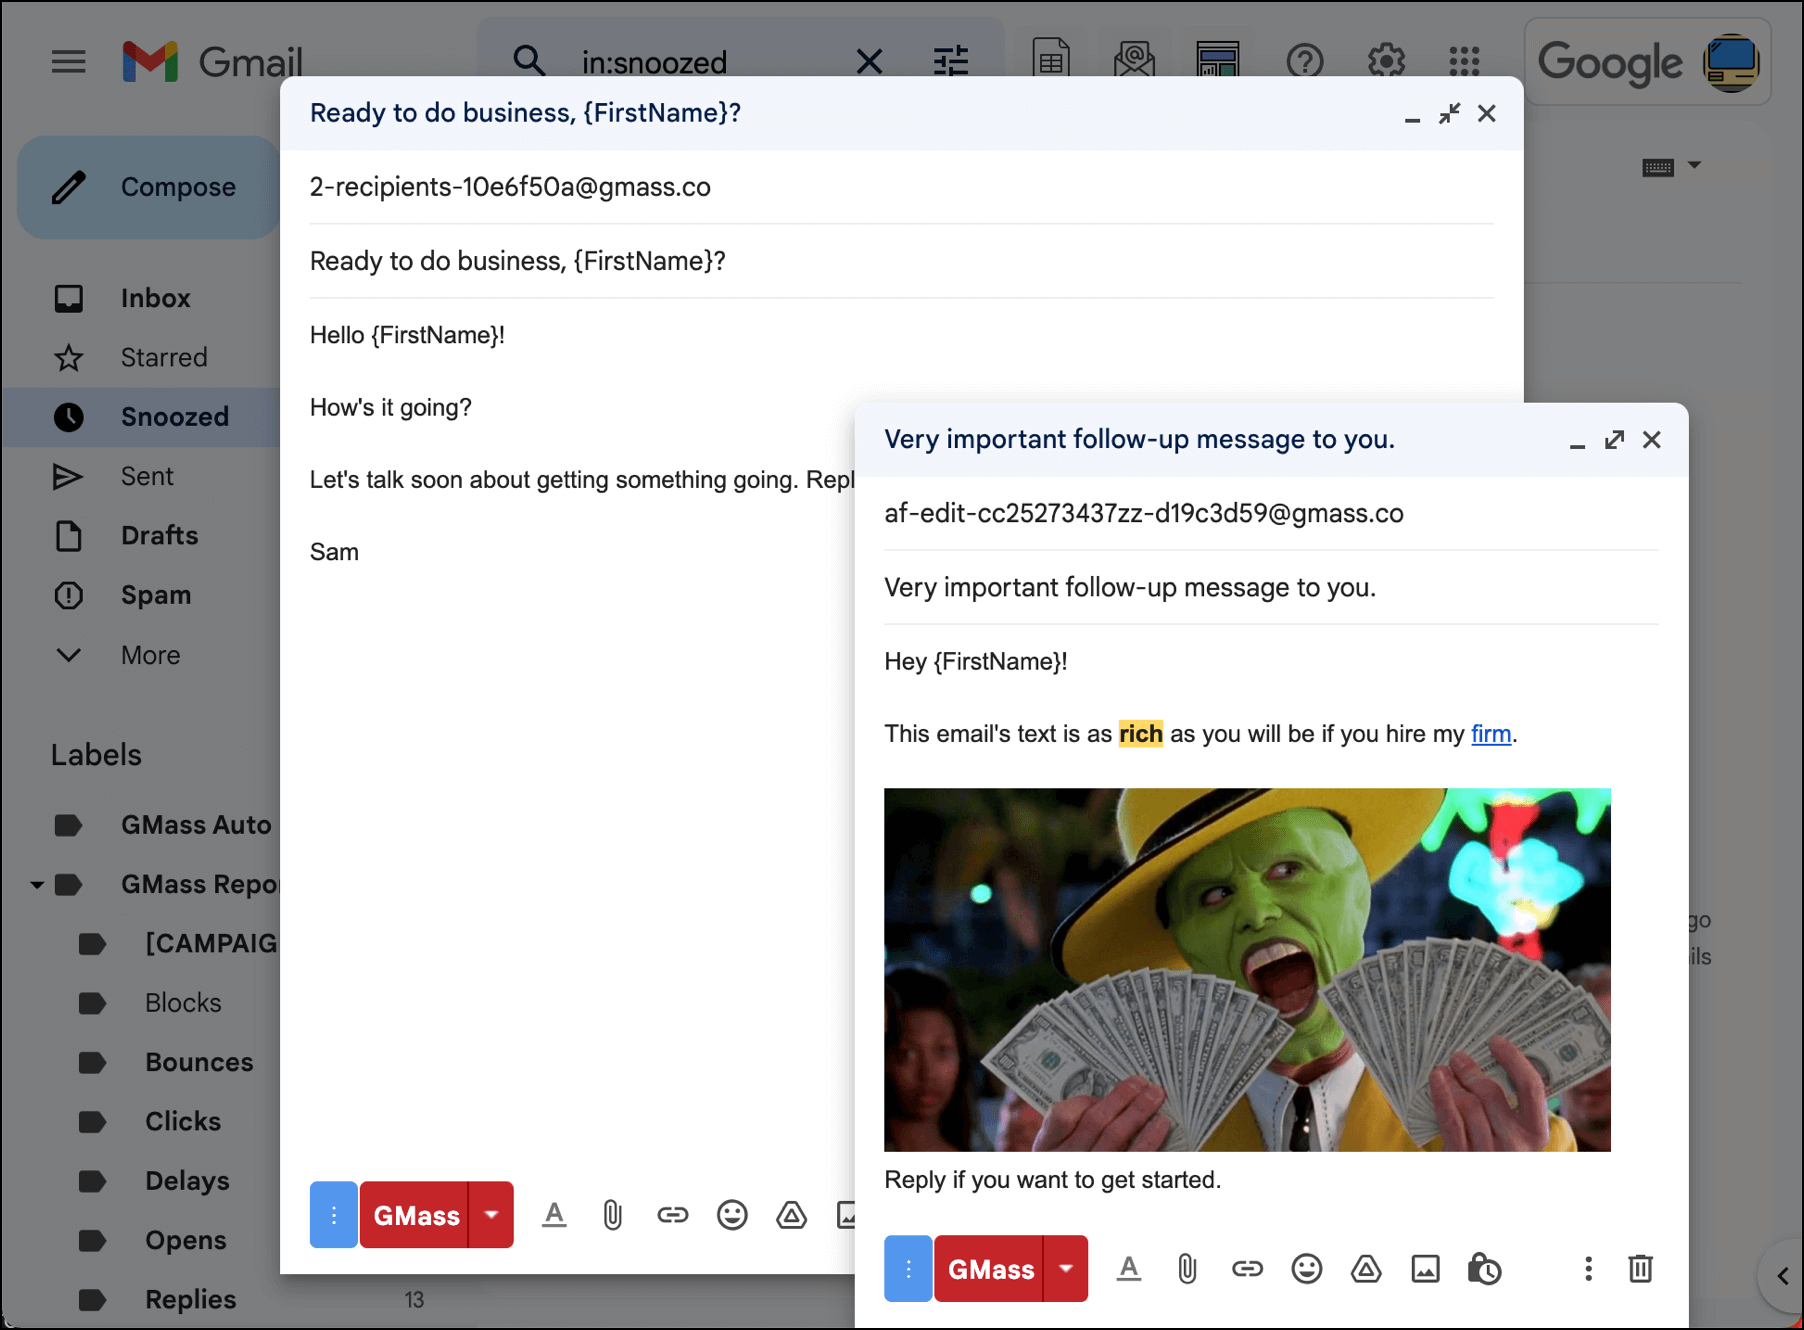
A new Compose window will launch with the To address and Subject pre-filled.

Do not edit the email address in the To field. That address is used to save your template in the GMass system.
You can (and should) replace the subject line. That’s especially true if you are sending this email in a new thread where your recipients will see the subject line. But even if you’re going to send this in the same thread, the subject line is useful for identifying this email template in the follow-up dropdown menu in the settings.
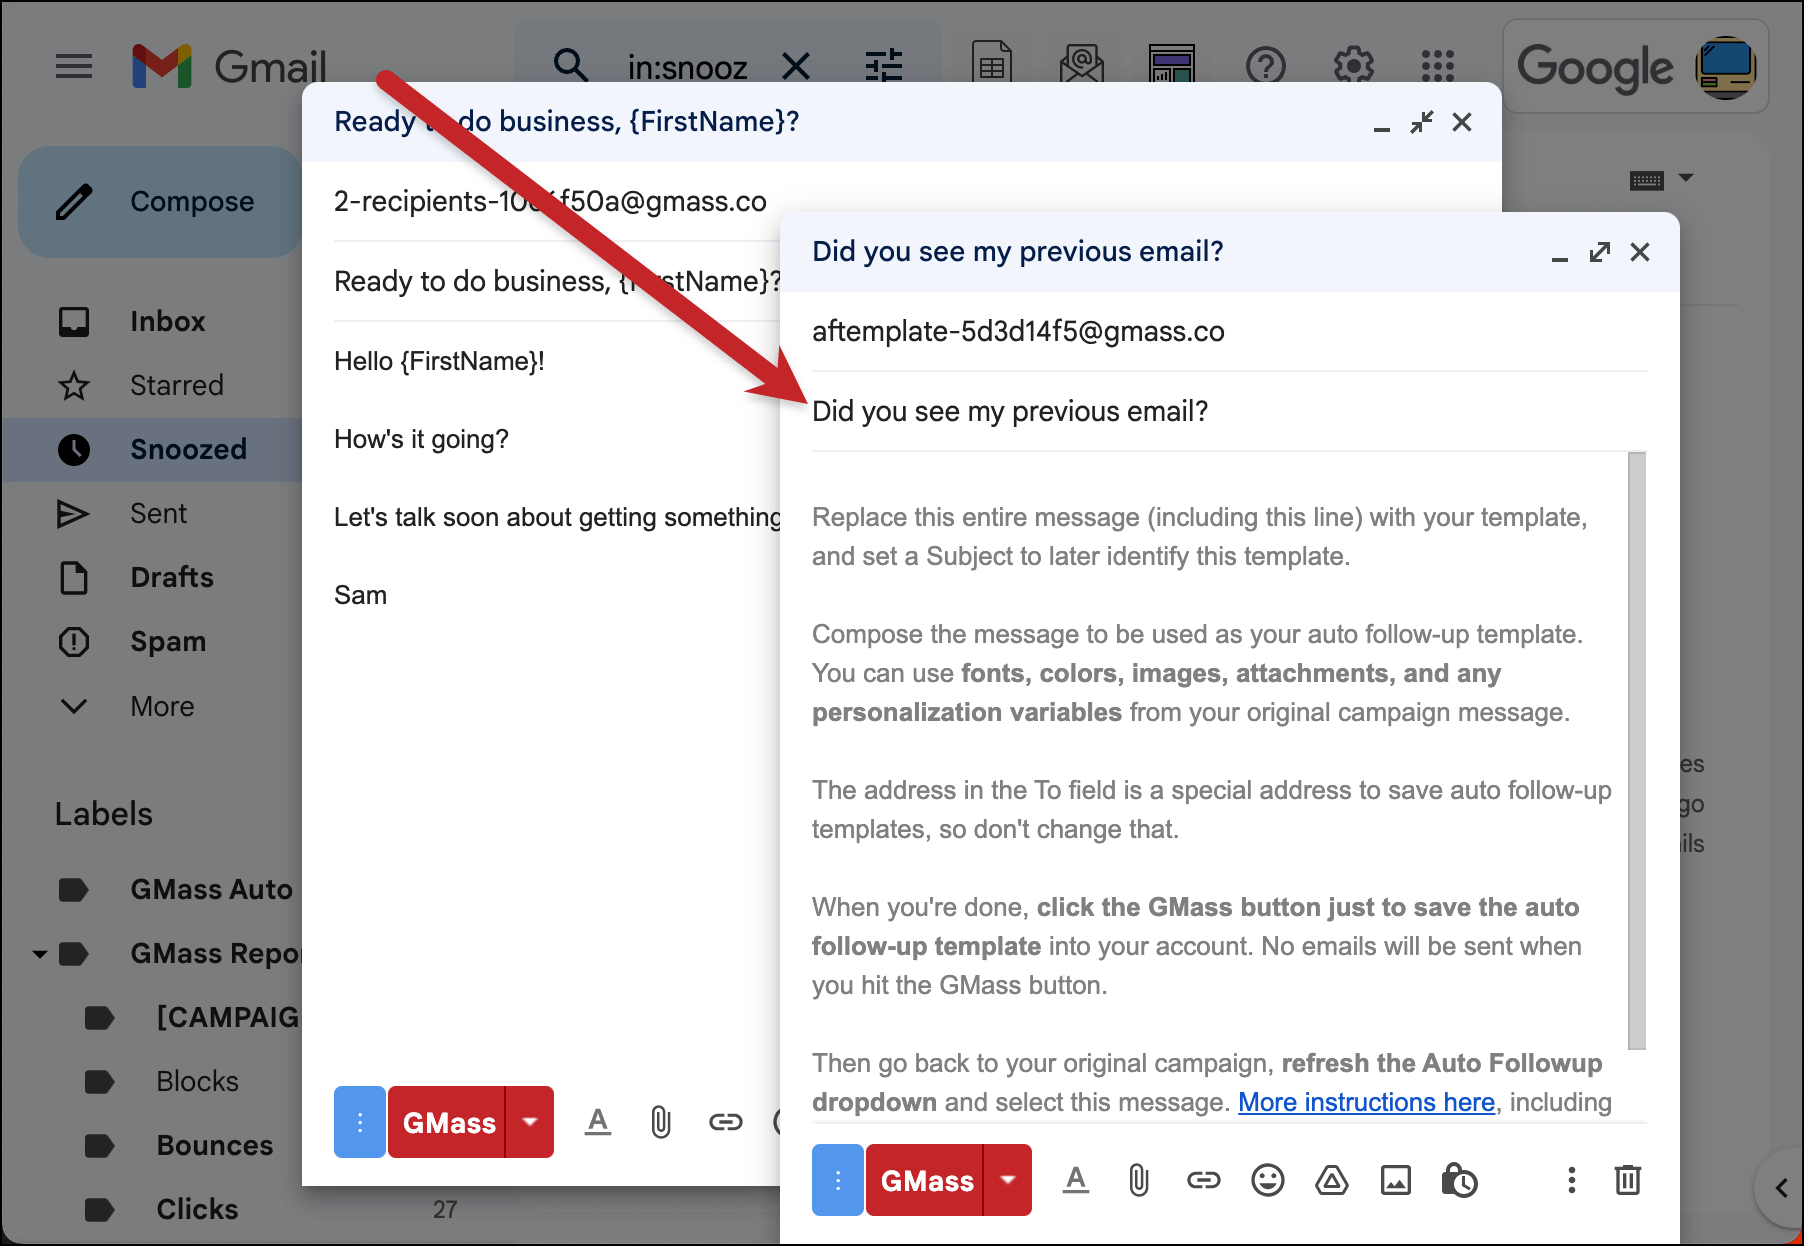
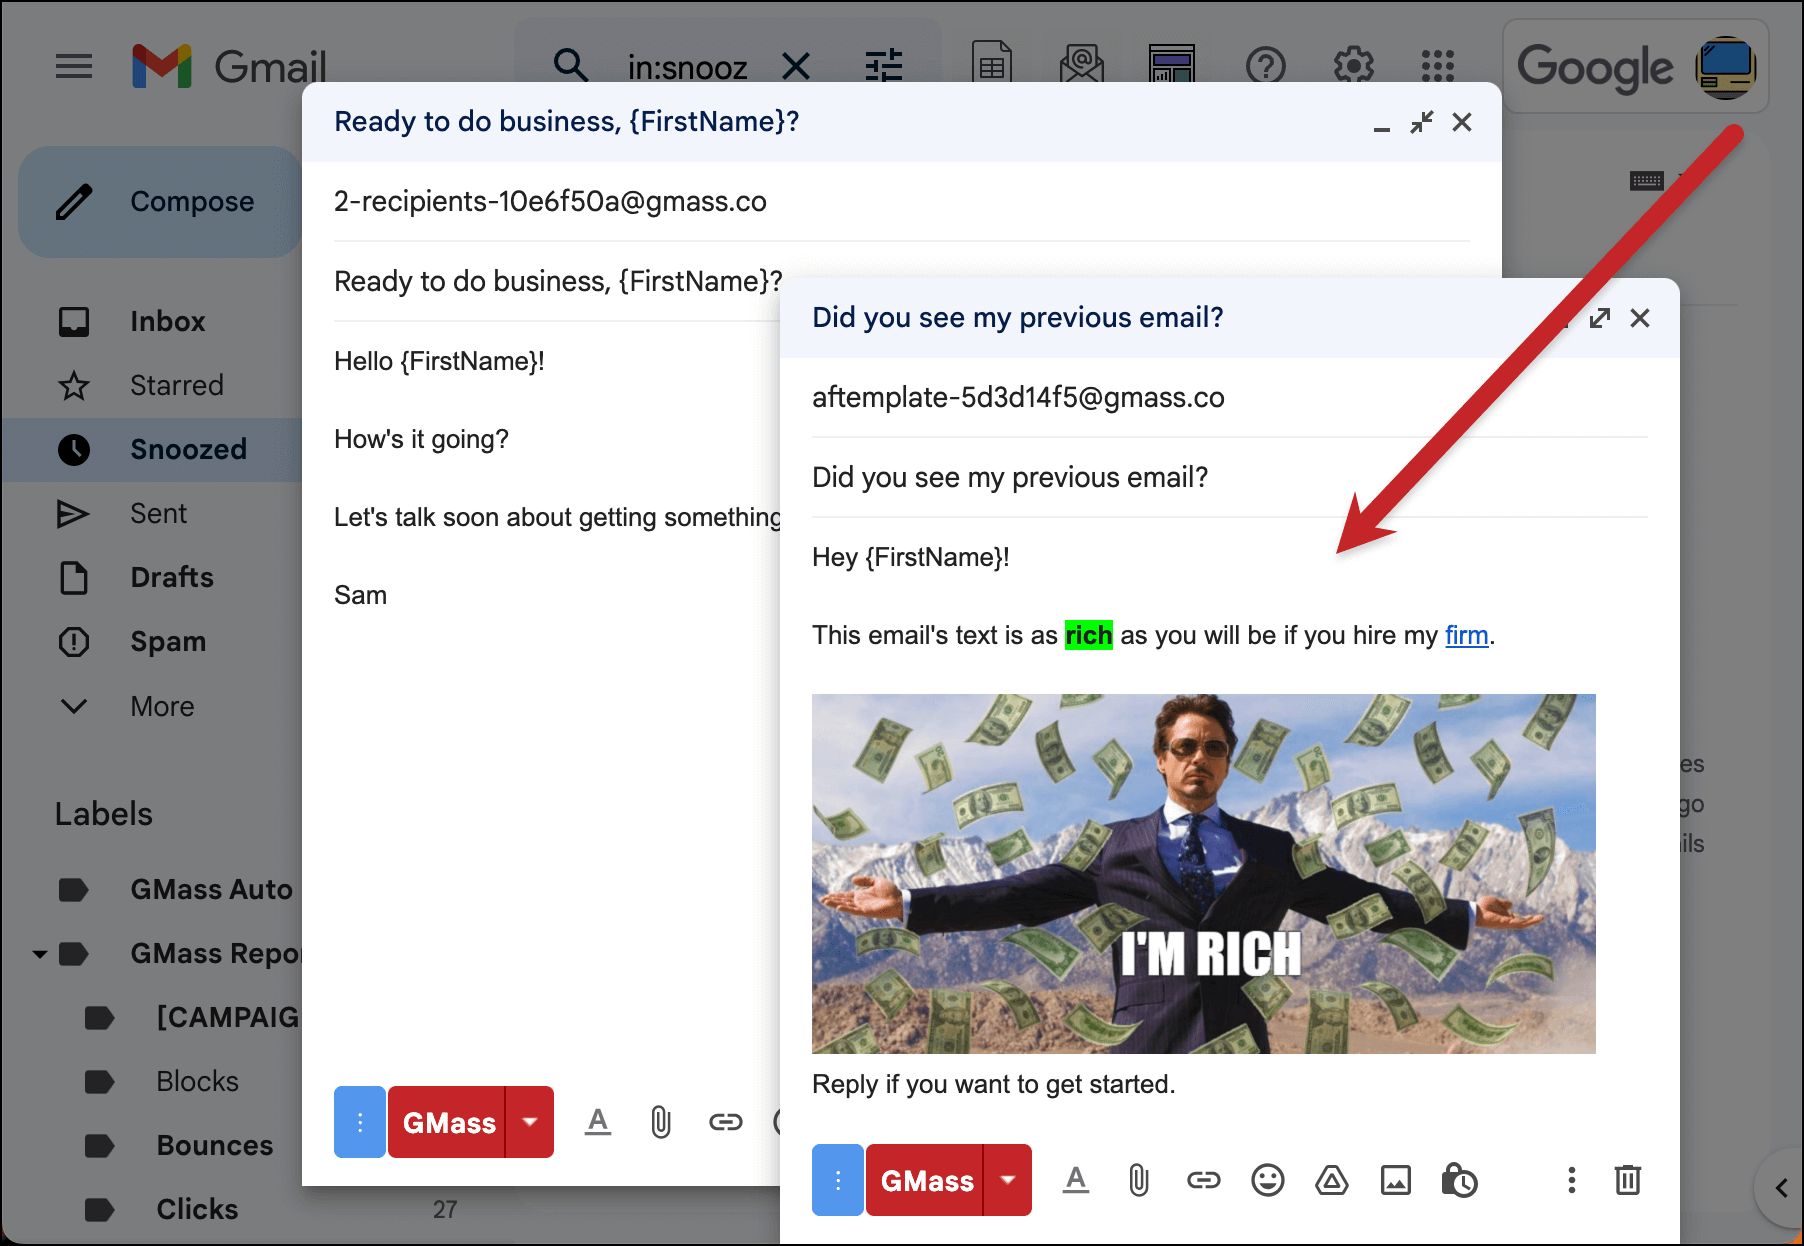
Now compose the message by deleting the text that’s already there. You can use the same mail merge tags you’re using in your initial email template as well. You can use links, font colors, and even attachments.
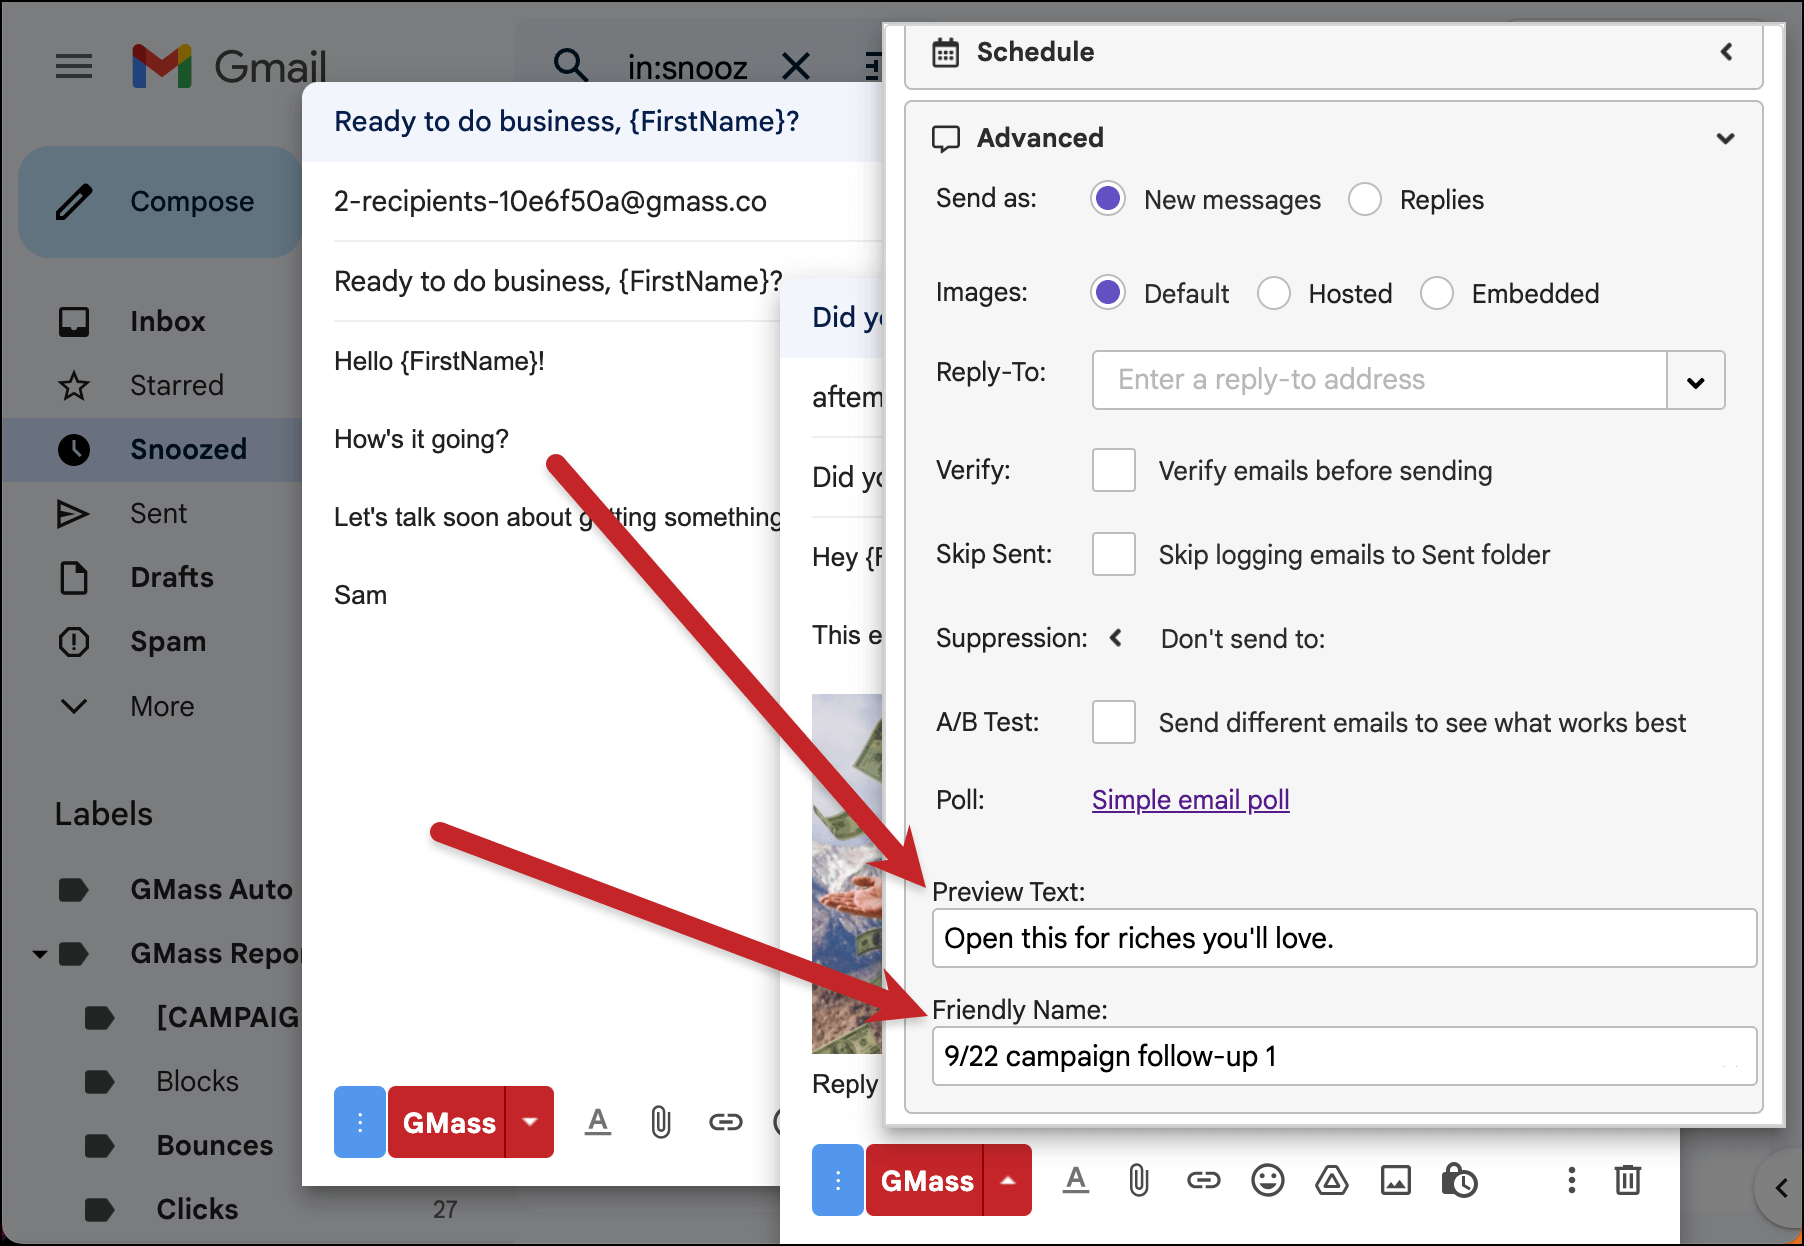
You can set the preview text for your message in the GMass settings box for the follow-up template. Go to the Advanced section to edit the Preview Text.
You can also set a Friendly Name for your campaign — that’s an internal use field that your recipients will never see. You’ll also be able to see the Friendly Name in the follow-up template dropdown.
In the example here, I’ve used the Friendly Name to add some identifying info about this template to help me know exactly what it is in the future.
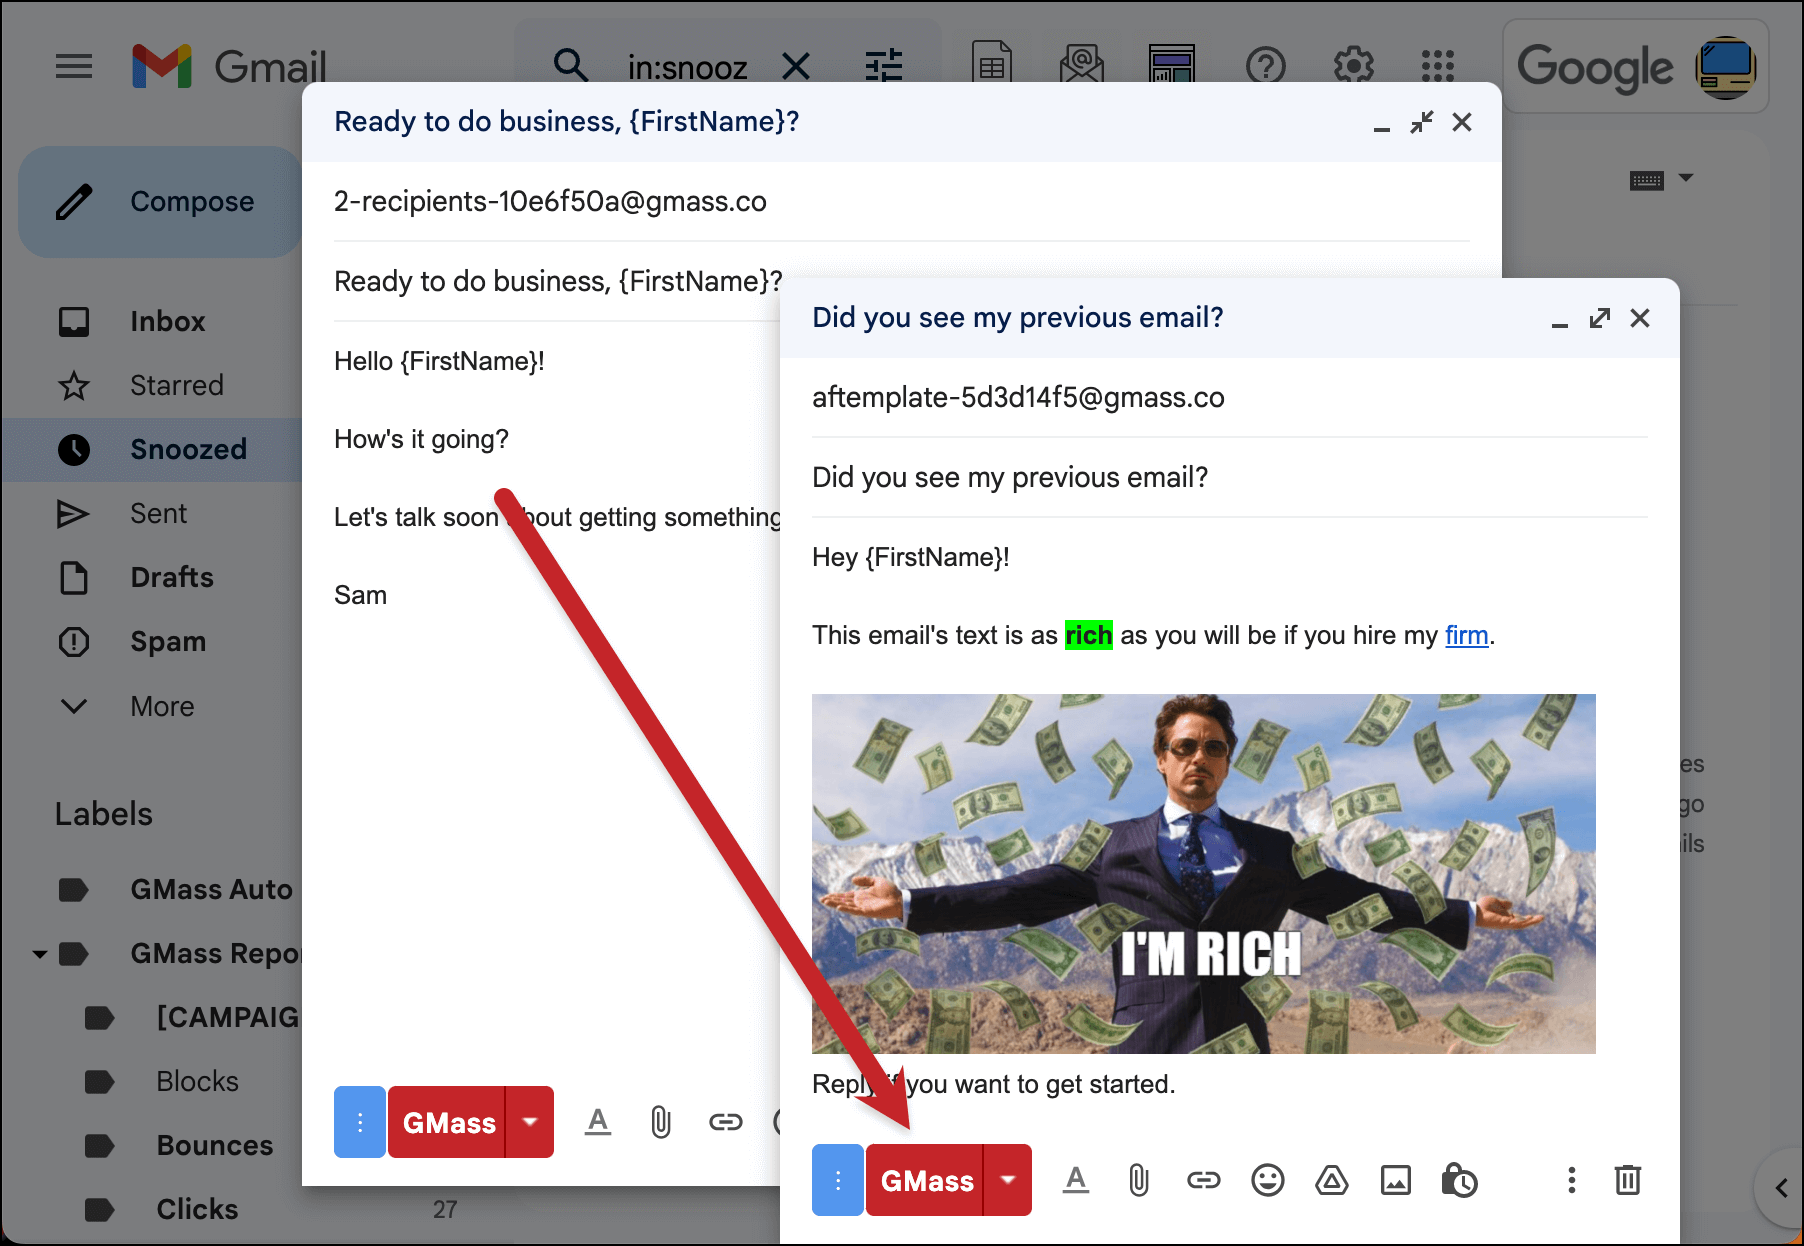
Once you’re all set, click the red GMass button to save the follow-up template into your account, so you can choose it from the dropdown later.
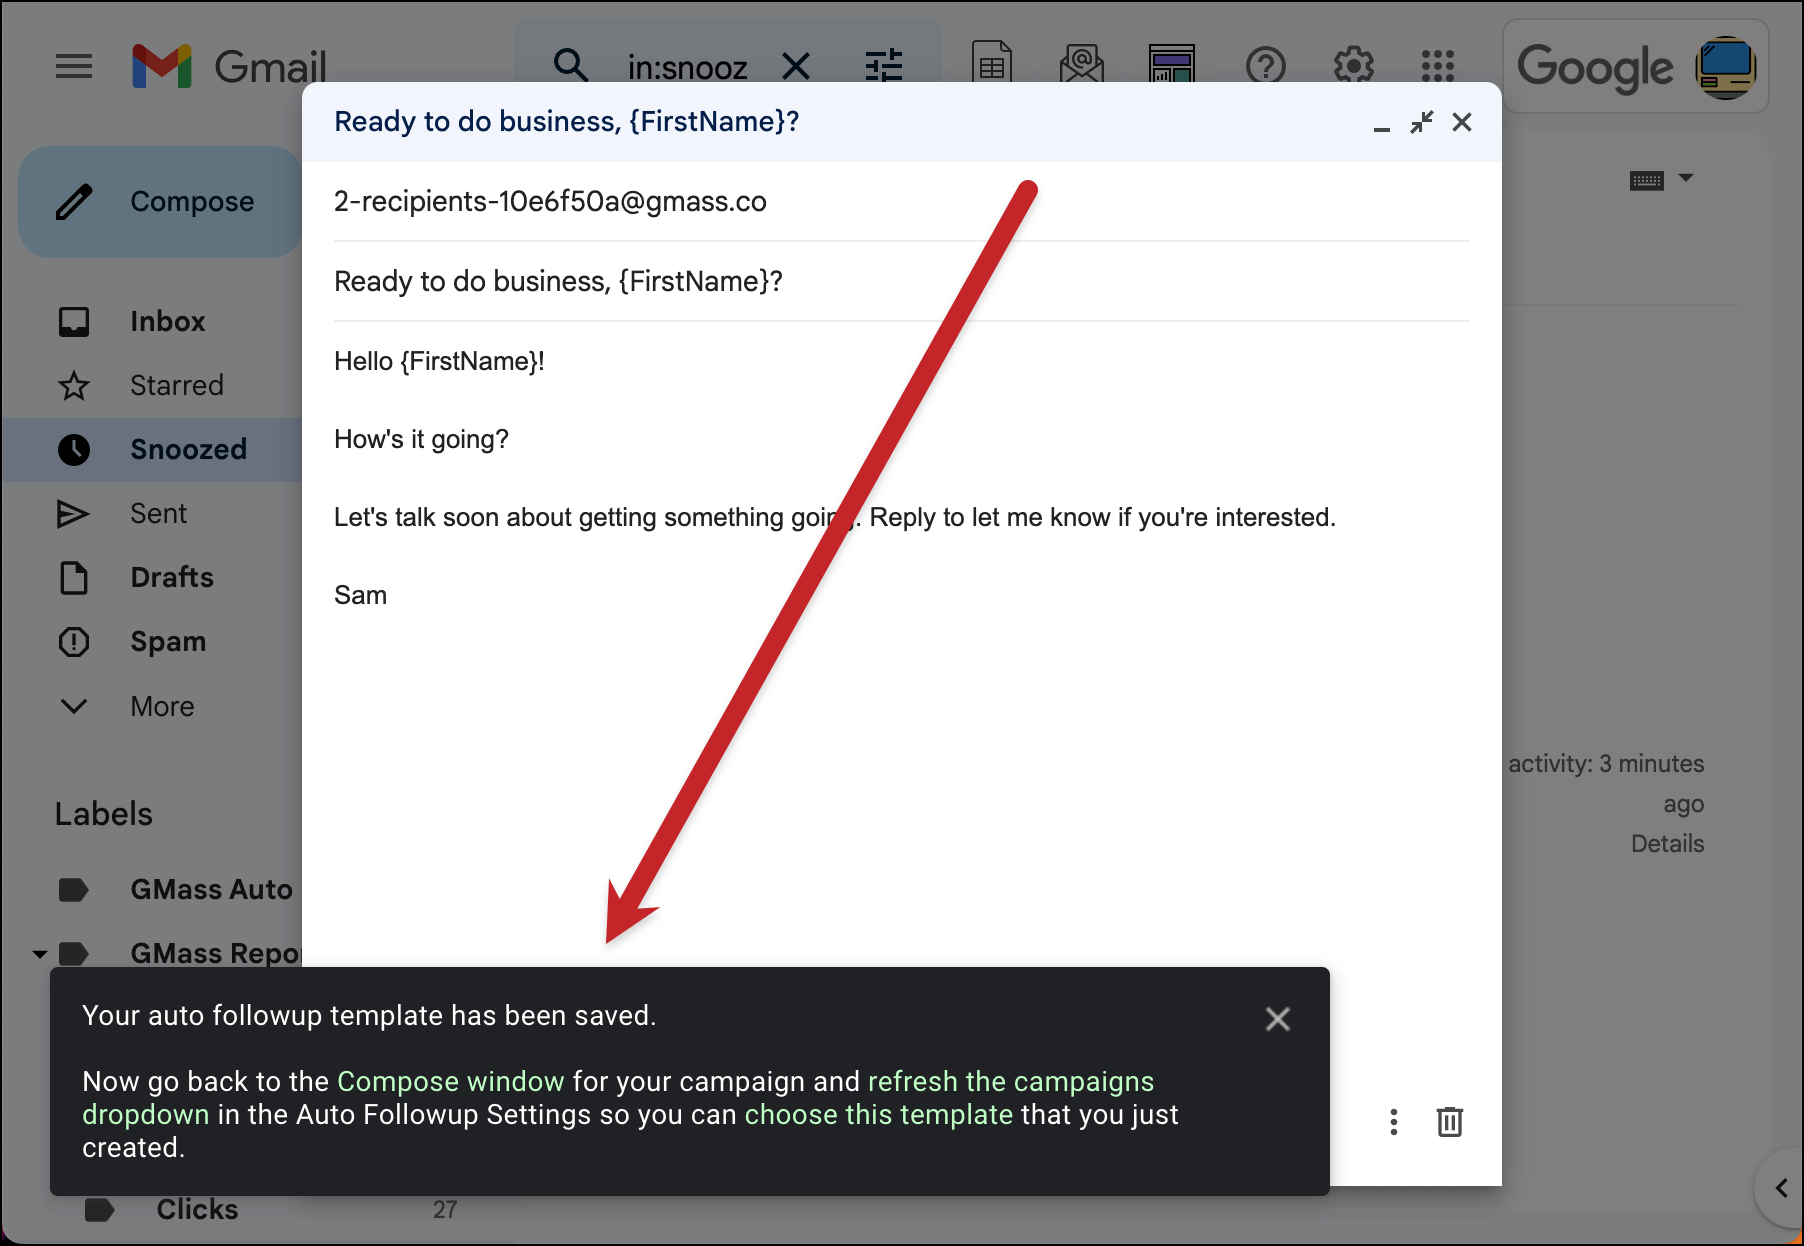
You should see this pop-up message telling you all was successful.
Using your rich text follow-up template
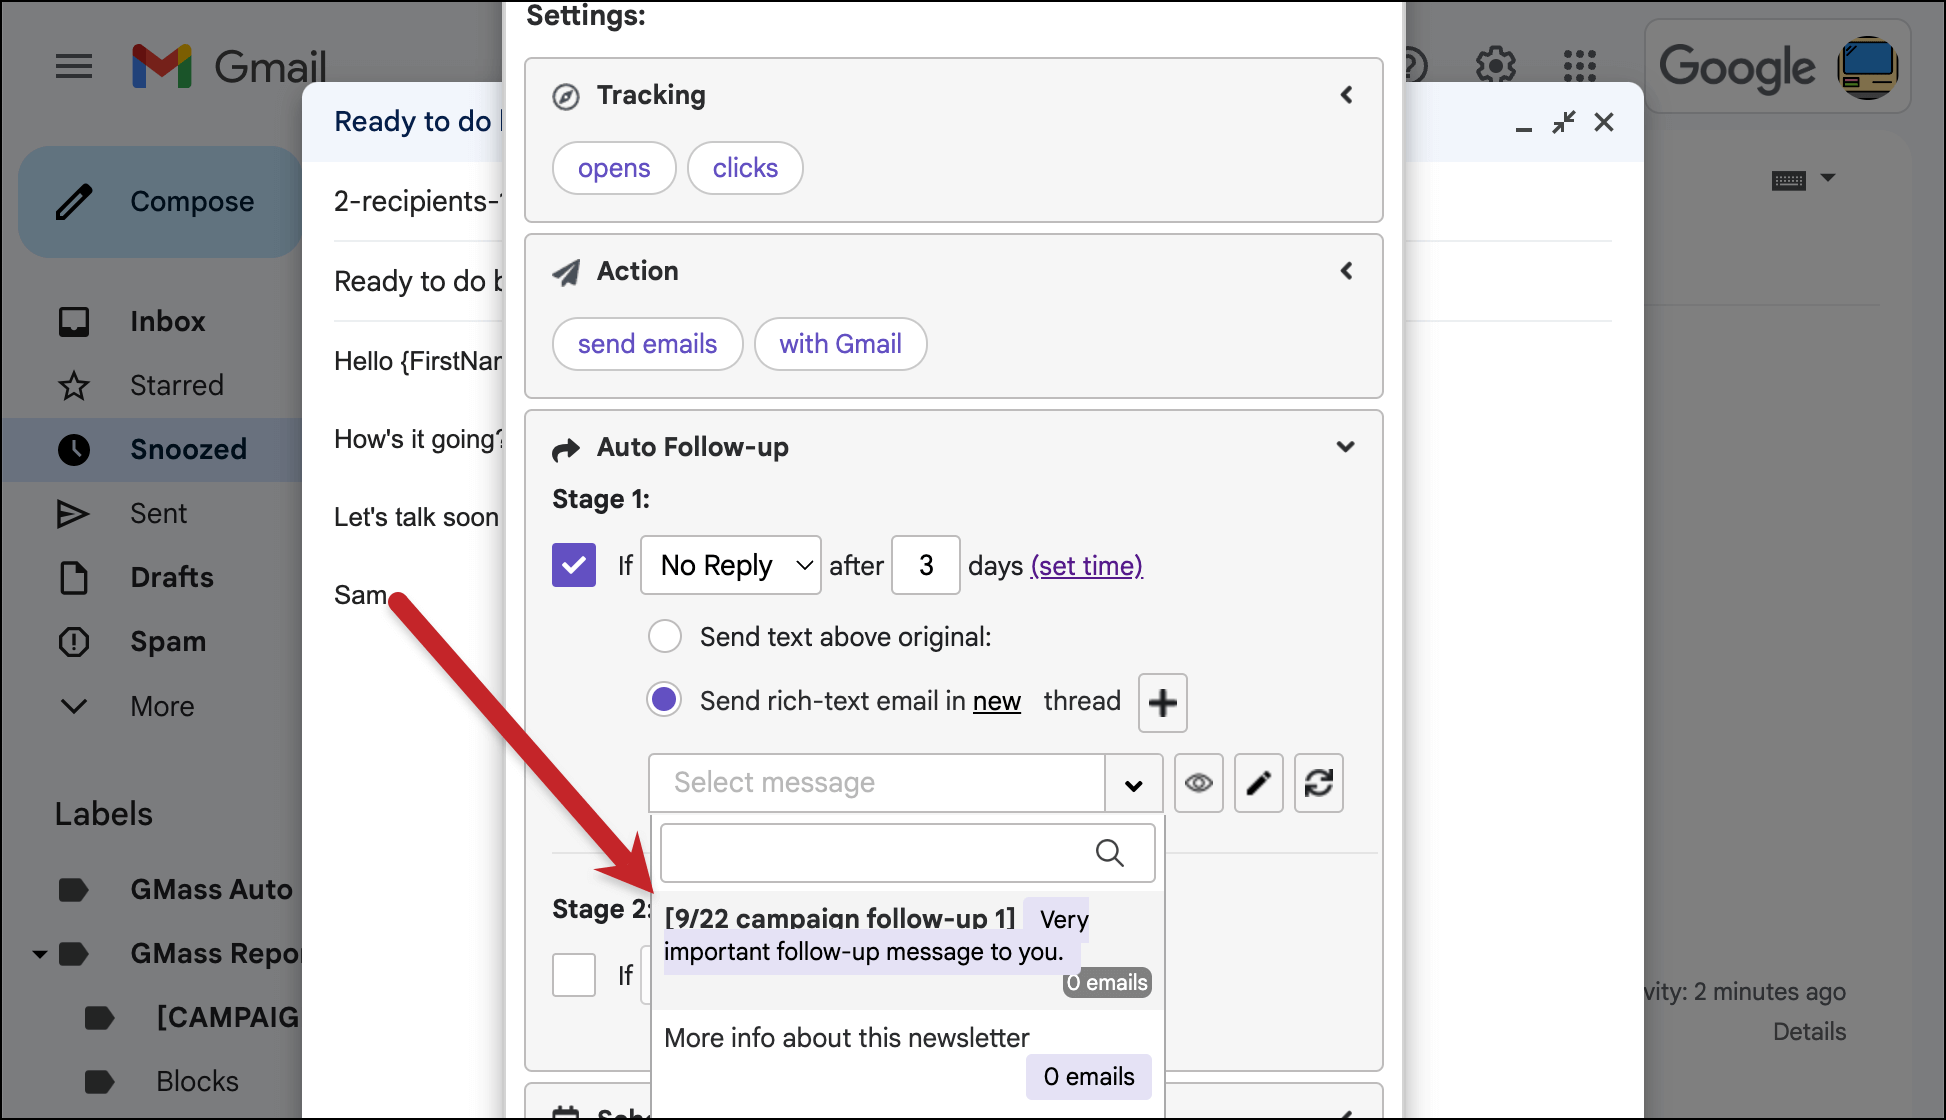
In the initial campaign email draft, re-open the GMass settings and head back into the Auto Follow-up section. GMass auto-saves your settings so you don’t have to worry about losing any of your work on these follow-ups through this process.
Then click the refresh button next to the template dropdown.
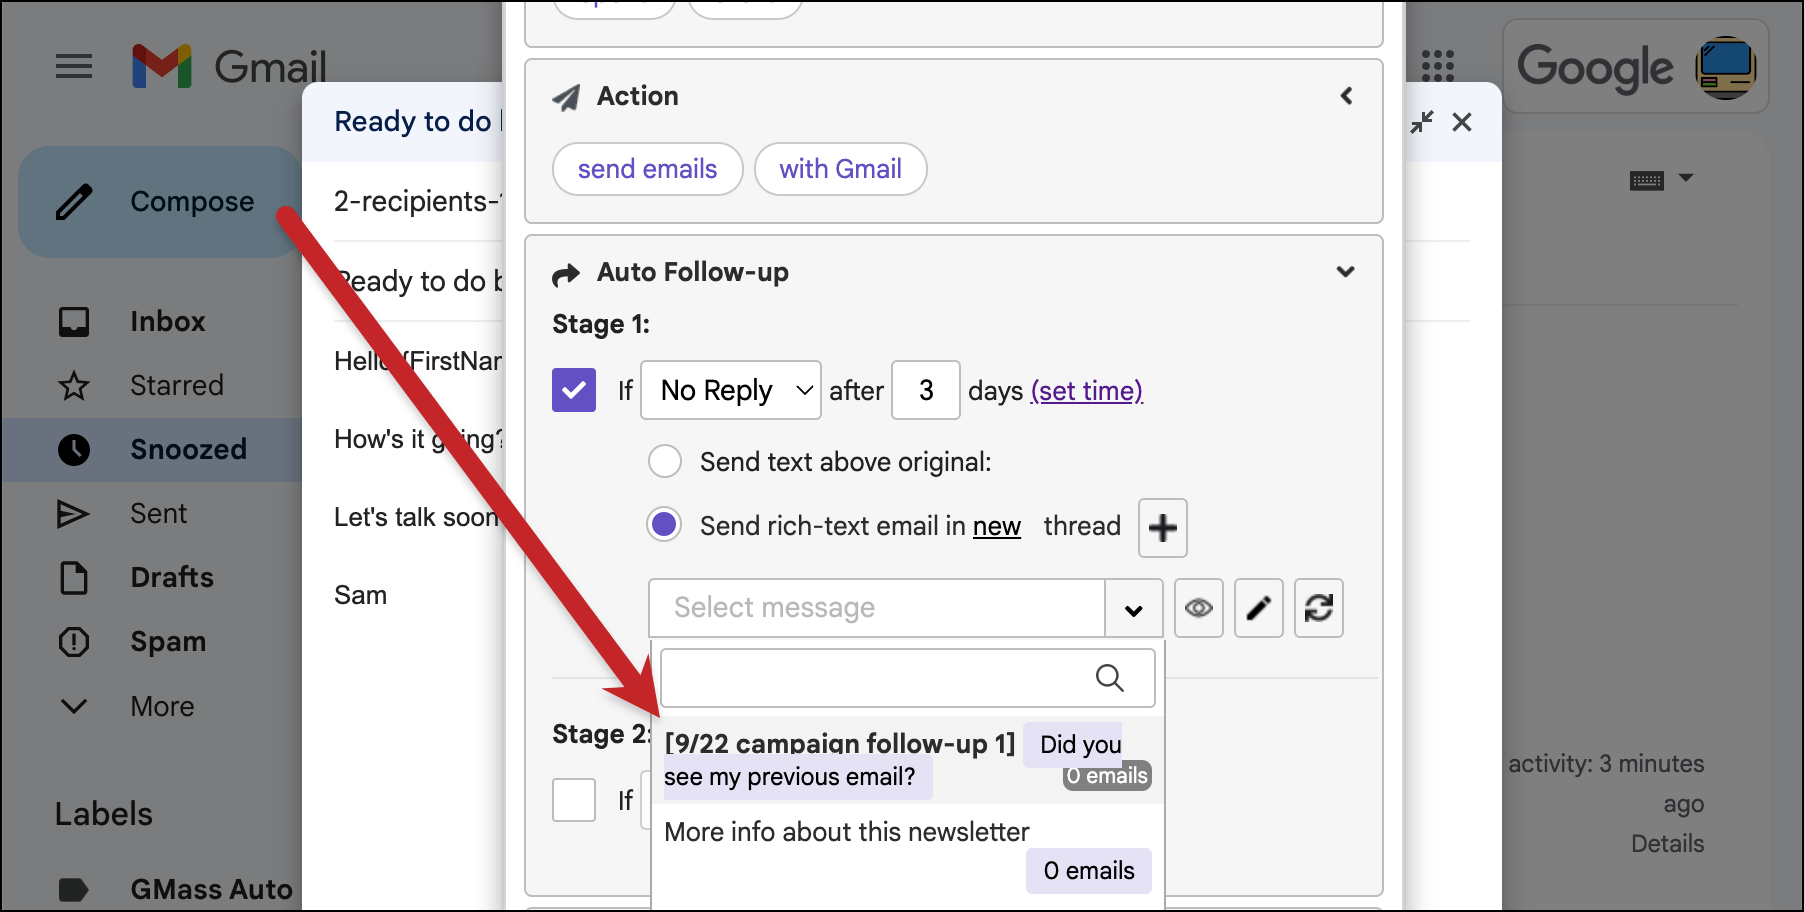
Select the template you just created from the dropdown. The friendly name is bolded and in brackets; the subject line is in purple. If you didn’t create a friendly name, you’ll just see the subject line. You can also search for templates in the box by name, or use the search filter is:template to just show your auto follow-up and triggered email templates.
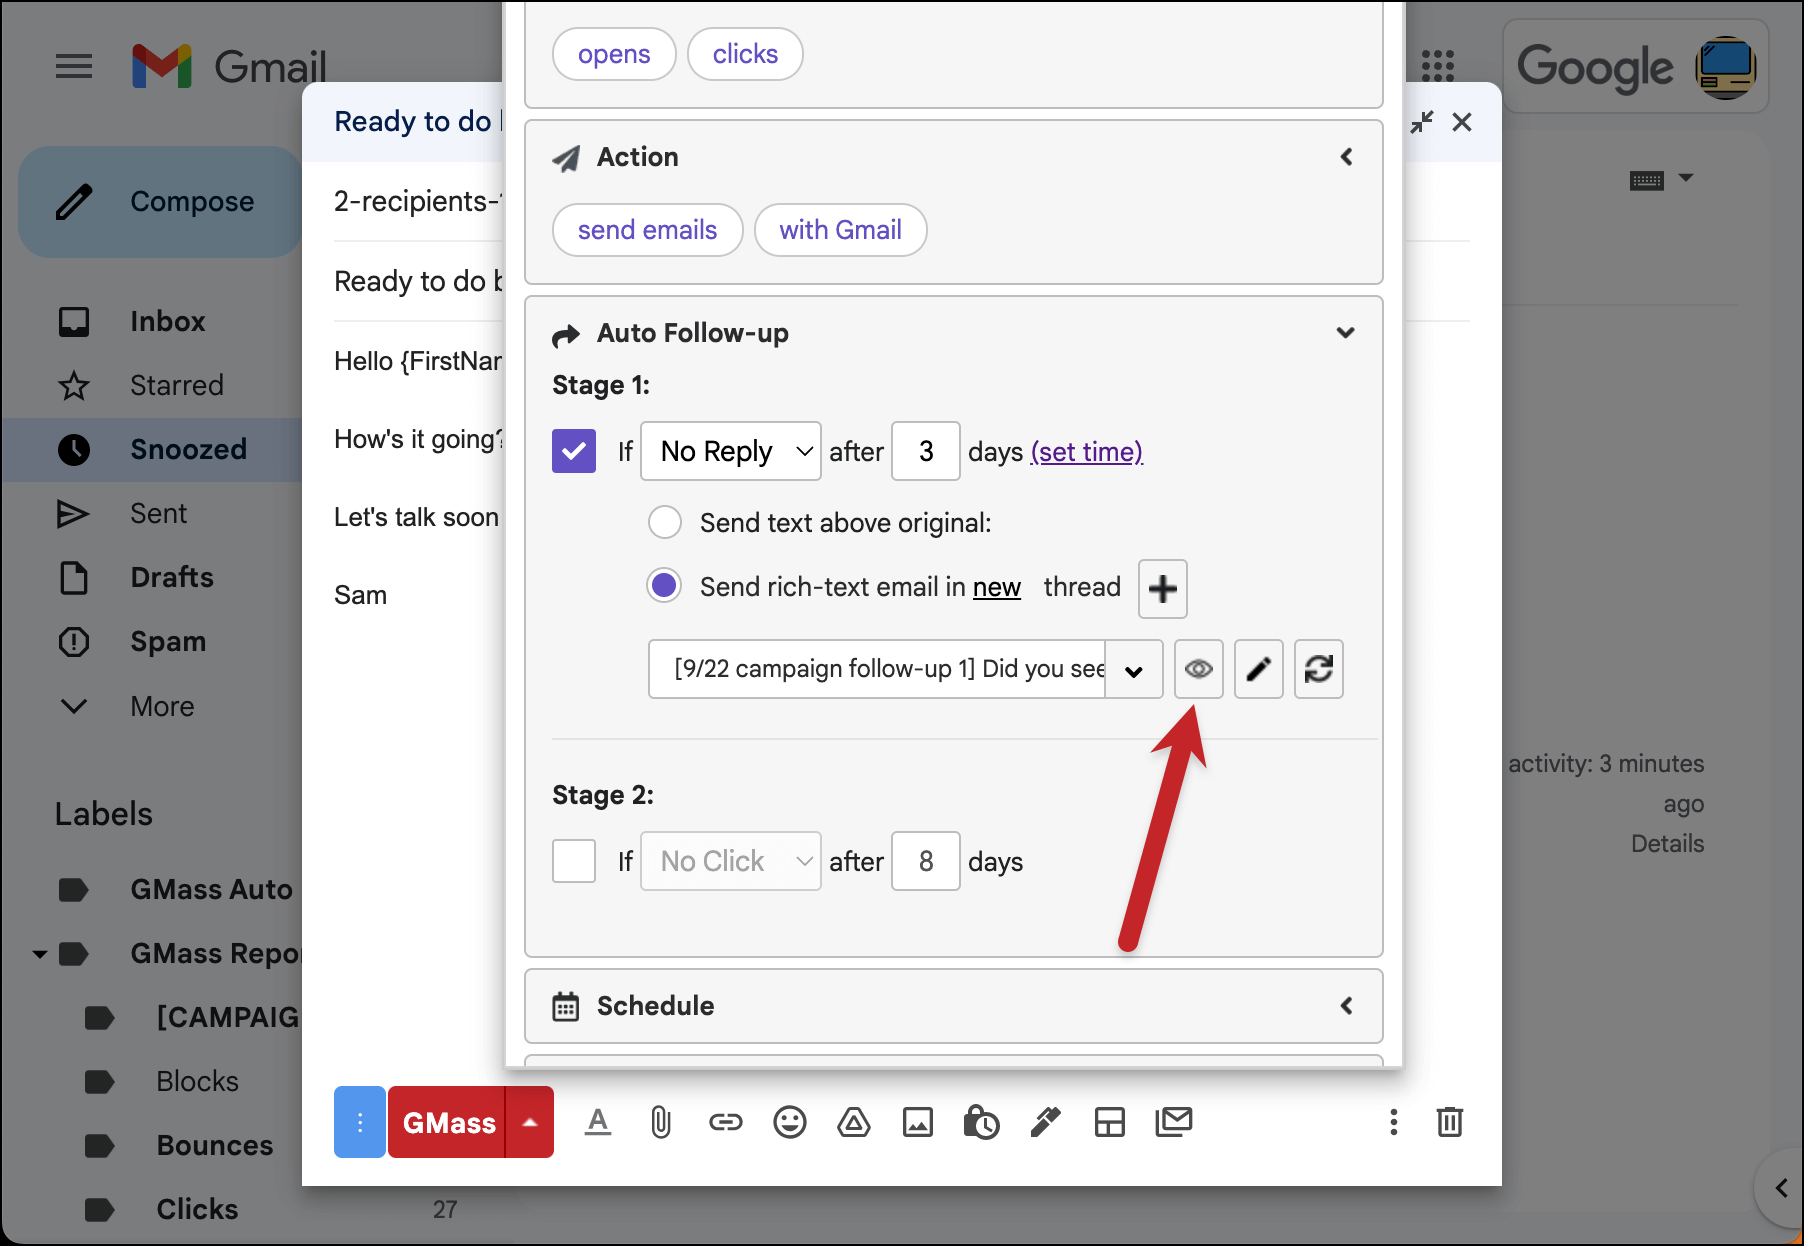
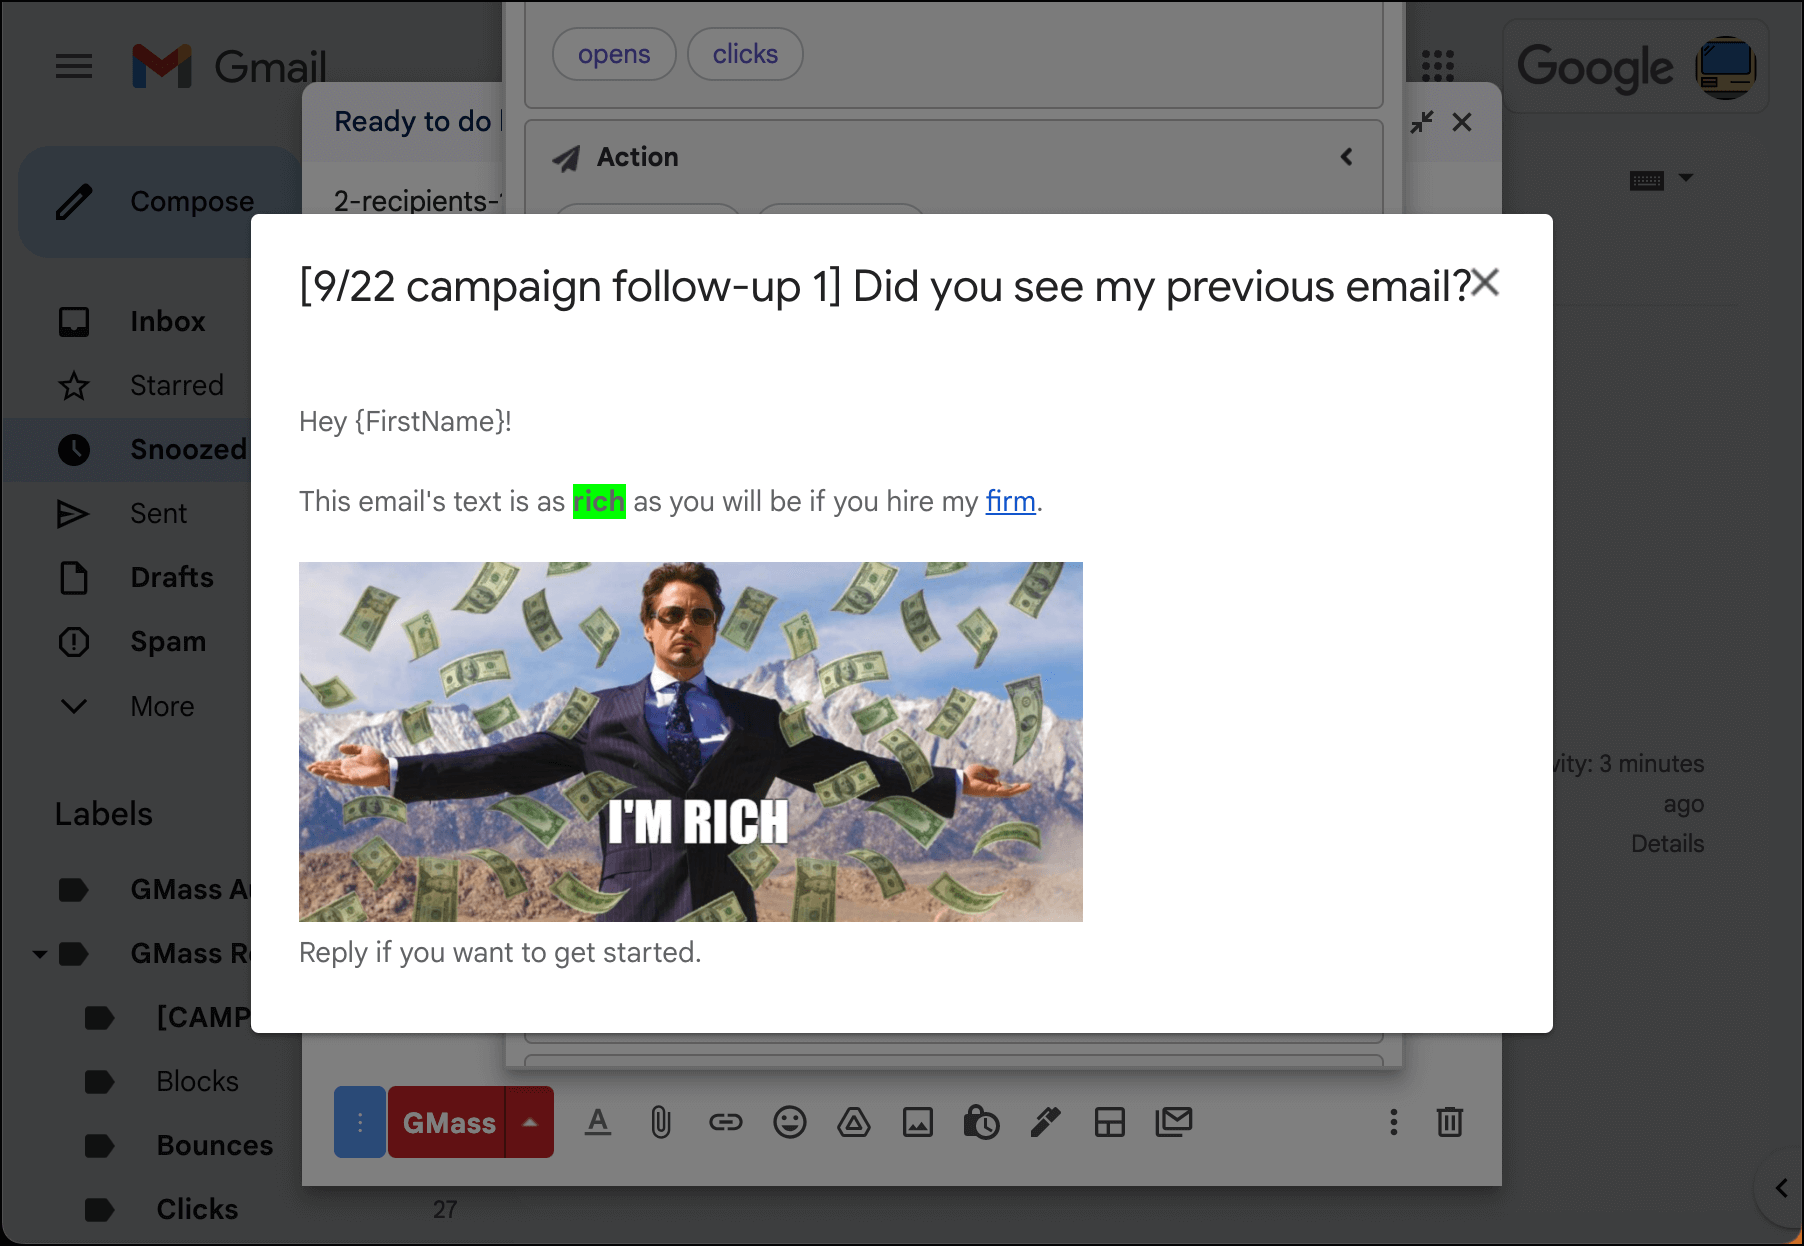
You can view your template by clicking the eye icon.
How to Edit a Rich Text Follow-Up Template
Let’s say you want to edit a rich text follow-up template you’ve previously used. Rather than having to go through the entire creation process described earlier in this article you edit the template on the spot.
After you’ve chosen the template you want to edit from the follow-up dropdown, click the pencil icon.
GMass will bring up the Compose window with your follow-up template.
Once again, don’t touch the address in the To field — that address is how GMass gets your edited template into the system.
You can edit the subject line and email body here.
You can also edit the preview text and friendly name for the template.
Warning: If your follow-up message had attachments, you’ll need to re-add those manually when you edit the template. GMass will give you a warning if you’re facing that scenario.
And when you’re ready to save your edited template, click the GMass button to save it.
Now when you refresh the template box you’ll see your edited template there.
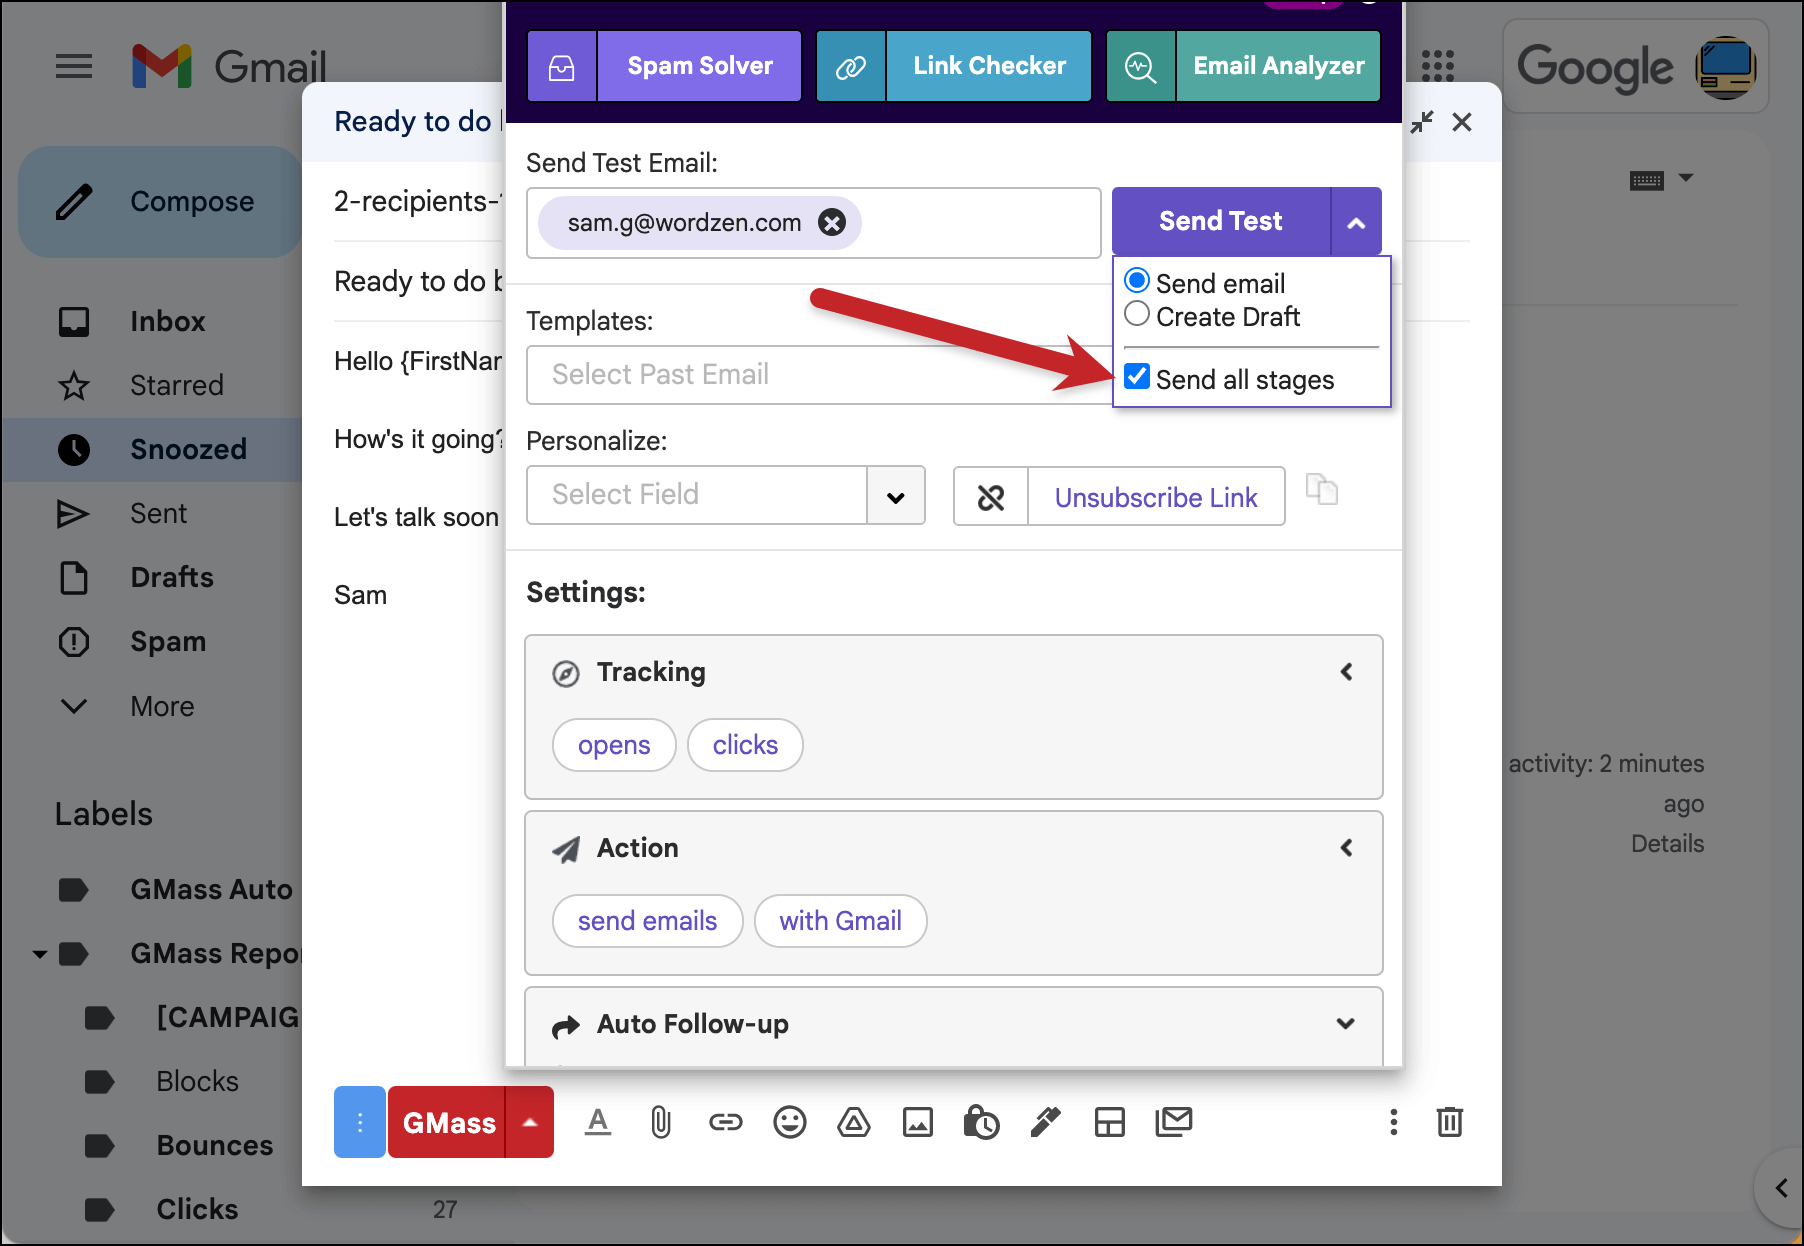
To see how your sequence will look and test your templates, you can use GMass to send a test of all the stages of your email.
And we’re all set! You should now be all set creating and editing rich-text auto follow-up templates for your campaigns.
Send incredible emails & automations and avoid the spam folder — all in one powerful but easy-to-learn tool
TRY GMASS FOR FREE
Download Chrome extension - 30 second install!
No credit card required

Ajay is the founder of GMass and has been developing email sending software for 20 years.